Costumes from anime, comics and video games often feature fabrics with geometric patterns or skillful ornaments. There are a number of ways to decorate your fabric: paint, embroidery, heat-transfer vinyl – but my favorite technique is fabric appliqué.
The art of applying fabric to fabric is a simple technique that does not require expensive tools like an embroidery machine or a plotter – a regular sewing machine will do. And it’s extremely versatile! I’ve used fabric appliqué in various costumes over the years to produce anything from delicate flowers to graphic lines and gigantic swirls covering half of the costume.

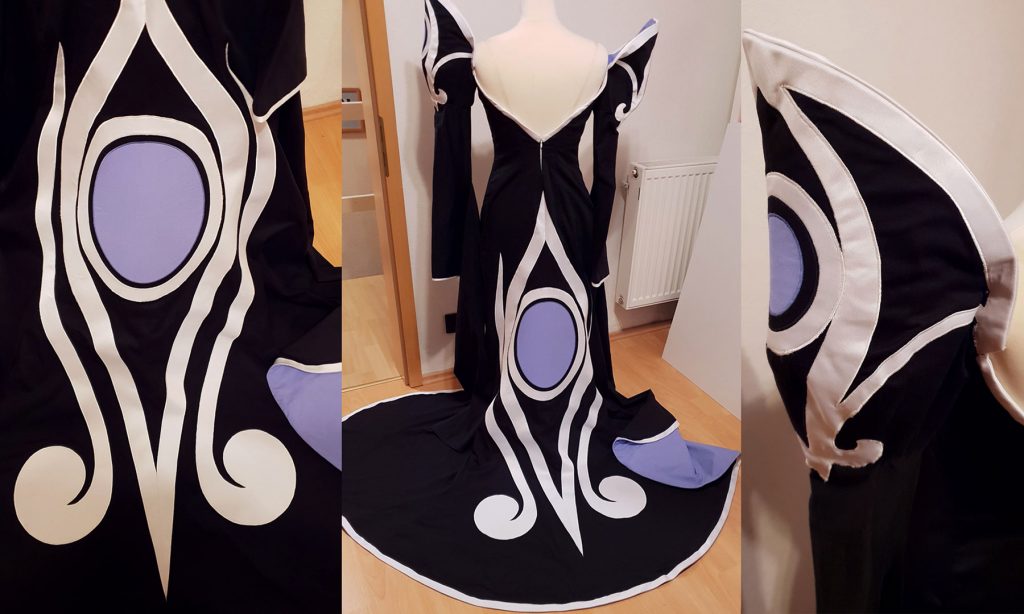
The back view of my Yuuko dress shows off the massive appliqué
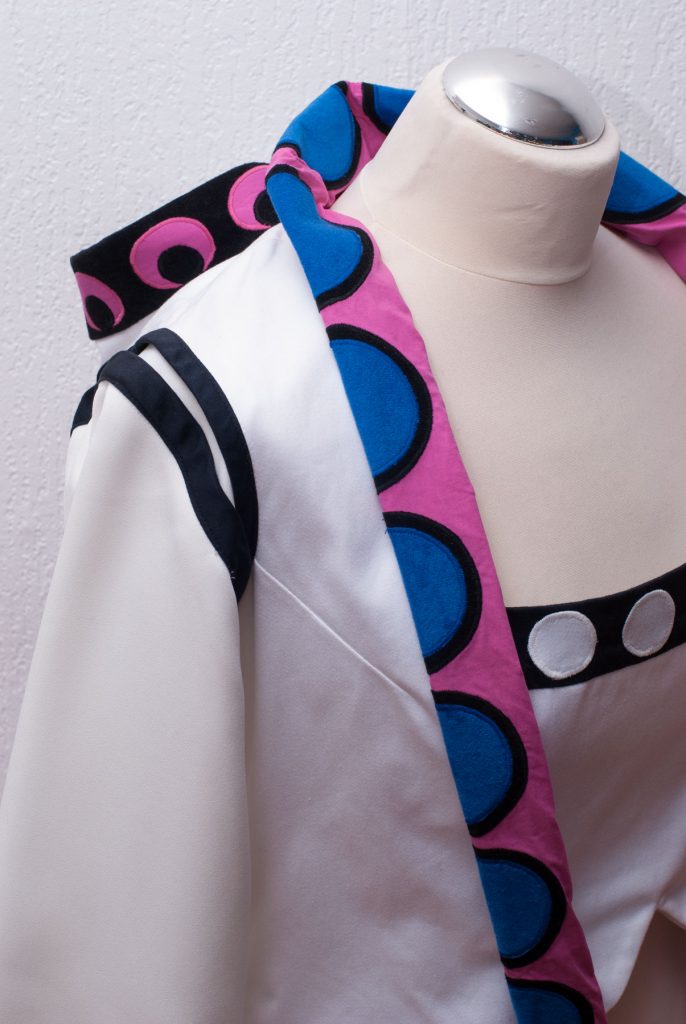
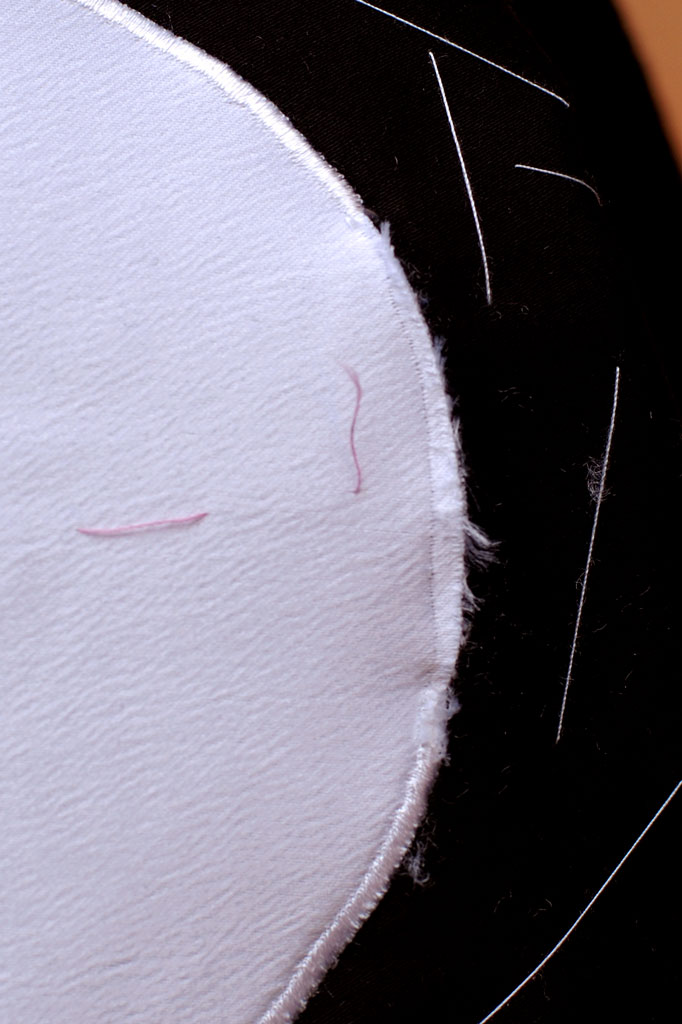
Appliquéd circles on my White Mage Paine robe
Material
You will need whatever fashion fabric you’re making your costume out of, and a second fabric for the ornaments that you want to apply to the fashion fabric. For best results, use densely woven, robust fabrics in plain weave or satin weave – like cotton/poly broadcloth or cotton sateen. It is possible to use delicate and stretchy fabrics but it takes a little more practice (see the tips in my add-on tutorial).
Cotton sateen and heavy poly satin (bridal satin) for Yuuko

Do you need help choosing the right fabric for your costume? I’ve written more about that topic here!
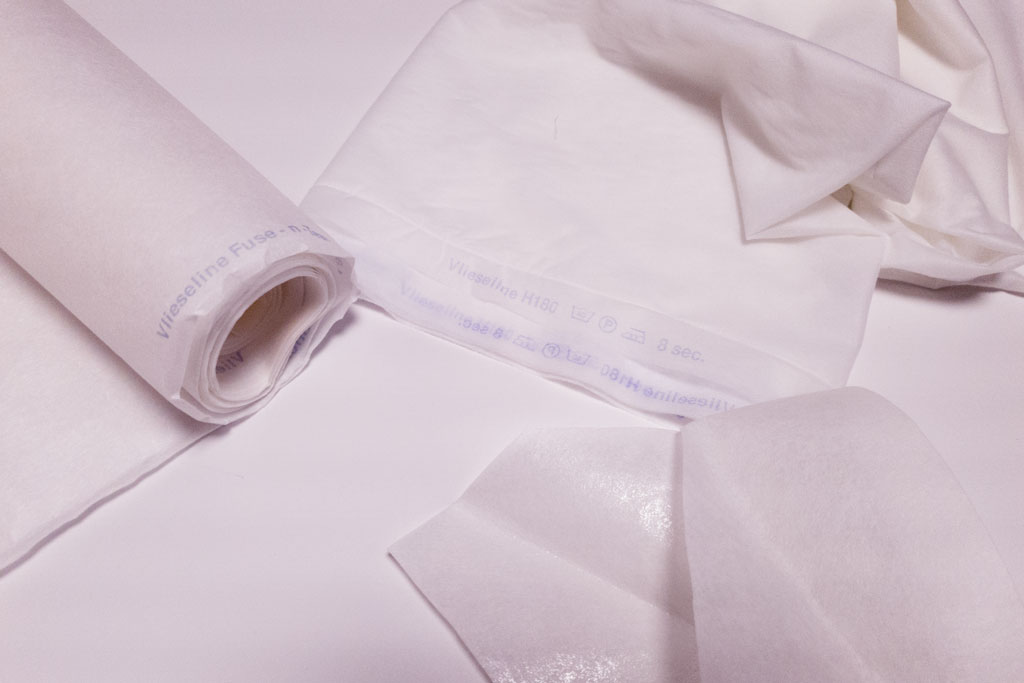
To reinforce the fabric, you will need fusible interfacing and/or tear-away stabilizer or freezer paper. Fusible interfacing to permanently reinforce delicate fabrics (cut all pieces the same size as the fashion fabric), tear-away stabilizer or freezer paper to temporarily stiffen the fabric while you stitch on the appliqué (buy enough to back every piece of appliqué and include a generous allowance).
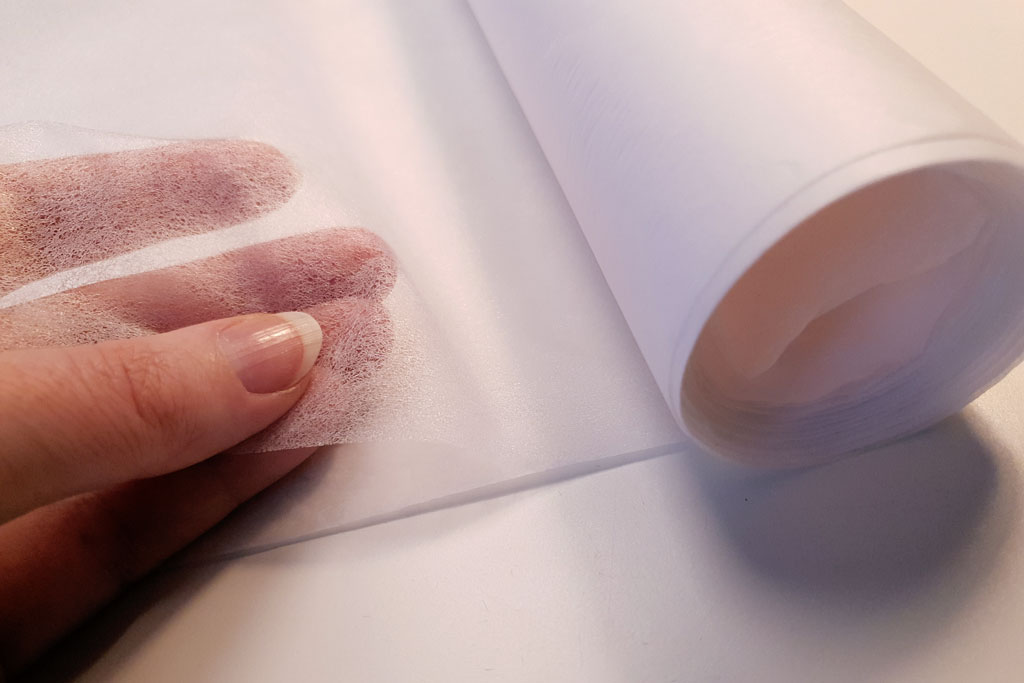
Tear-away stabilizer (left) and fusible interfacing (right and bottom)
To join the appliqué to the fashion fabric, we’ll be using double-sided fusible web (e.g. Vliesofix). This is a thin layer of heat-activated adhesive that comes with a paper backing so you can easily cut it out and transfer it to the fabric.
Tip: If you buy fusible web or fusible interfacing by the yard, always store it rolled up, not folded. You cannot iron out creases without activating the adhesive.
Double-sided fusible web (Vliesofix)
Your sewing machine needs only a zigzag stitch and maybe a quilting / appliqué foot (optional) which has a bit more grip and a larger opening for you to see through. I’ve been using a normal presser foot for years, the quilting foot just makes it easier to see your appliqué as you stitch over it.
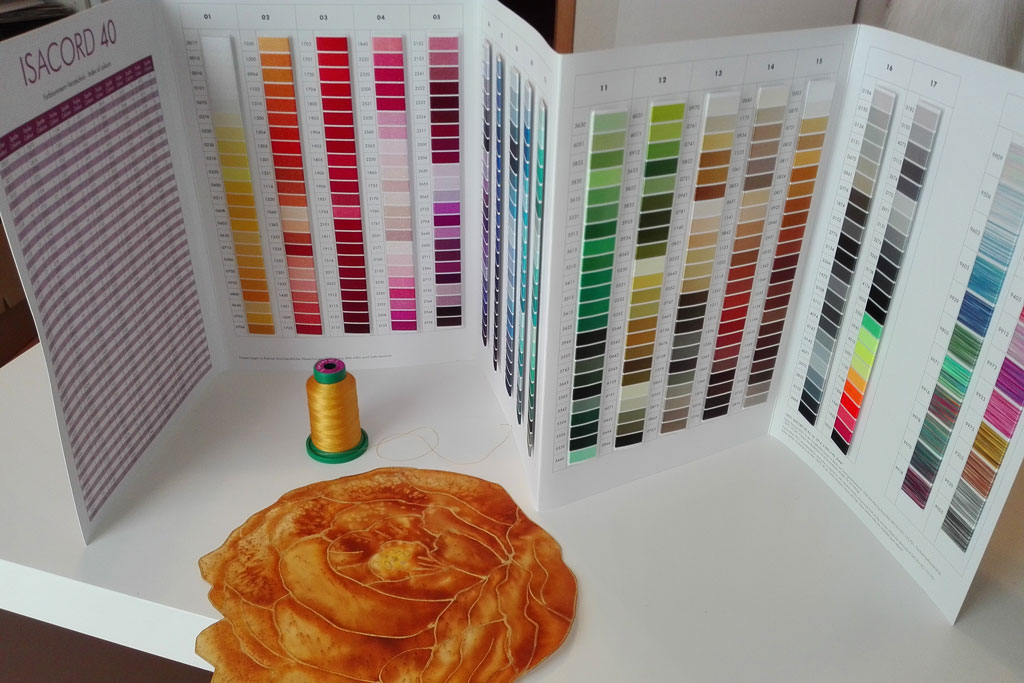
You can use regular sewing thread (always use new or like-new, high quality sewing thread that won’t rip easily!) or machine embroidery thread, which is thinner and comes in shiny and metallic colors. You’ll be needing lots of yarn! I buy mine on 500m or 1000m cones.
Color chart: Isacord by Amann
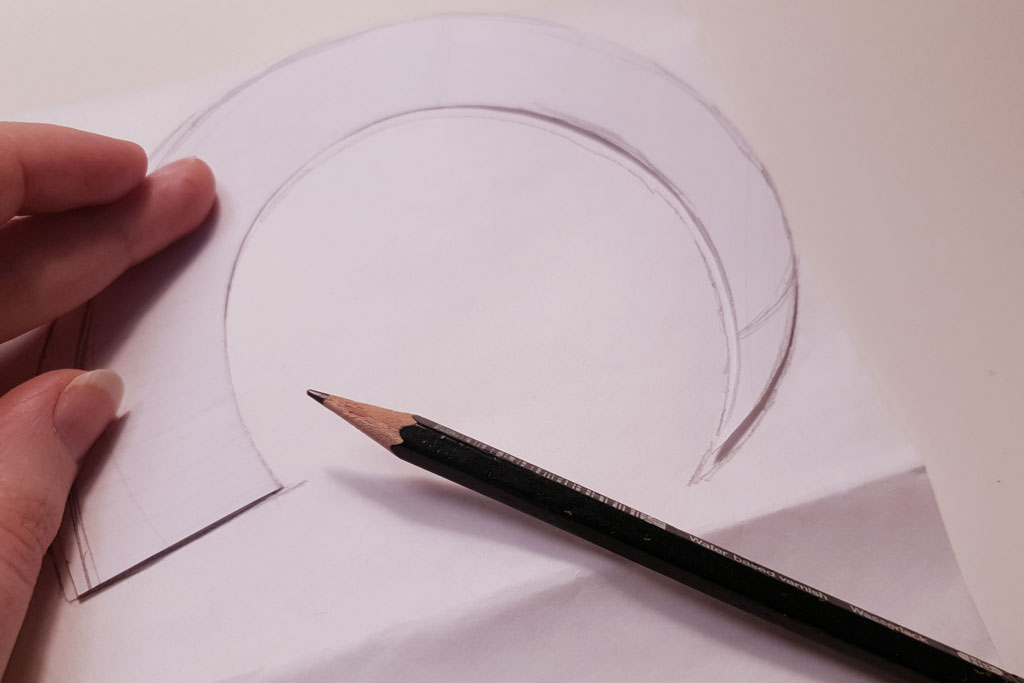
Create your pattern
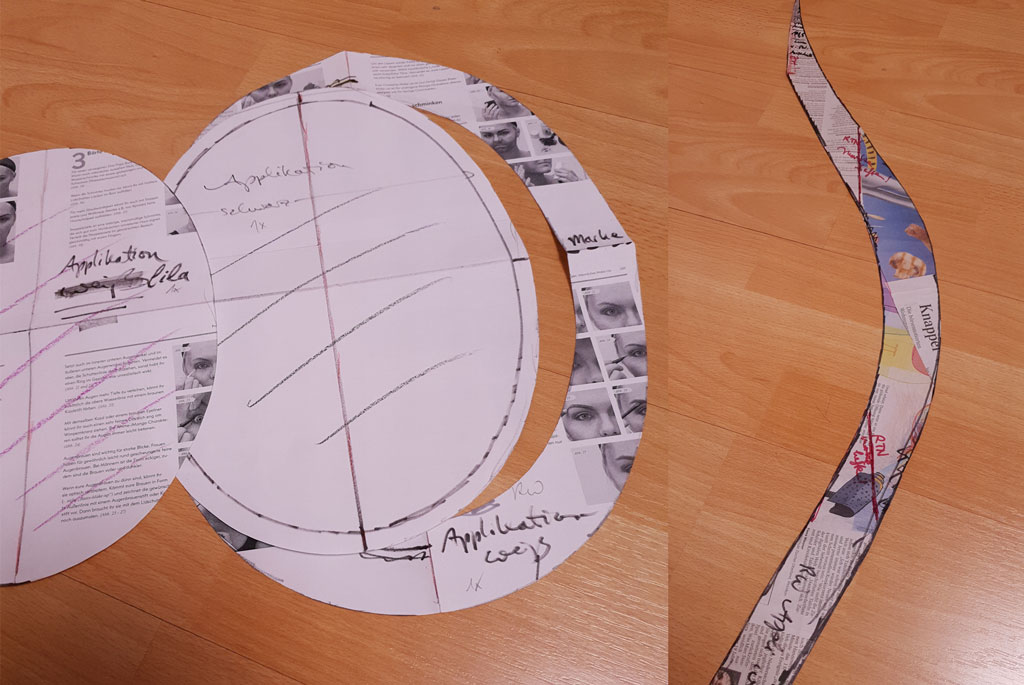
Print the ornament or draw it free-hand to match your reference. Scale it up or down if necessary. Measure the size of the ornament relative to your body and make sure it fits on the pattern of your garment.
For large ornaments that cover a significant portion of the costume, I highly recommend sewing a mock-up of the garment first to determine the exact placement of the appliqué. This is especially true if the ornament extends over one or more seams, since it will be near impossible to remove the appliqué later if you realize the costume doesn’t fit and needs to be altered.
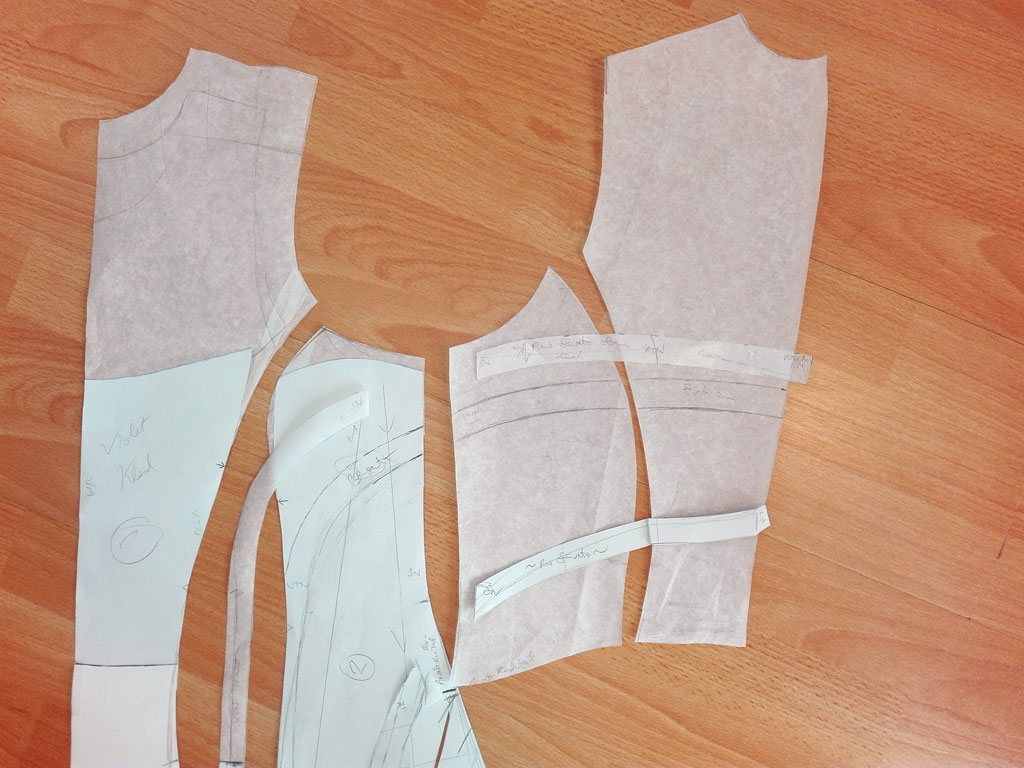
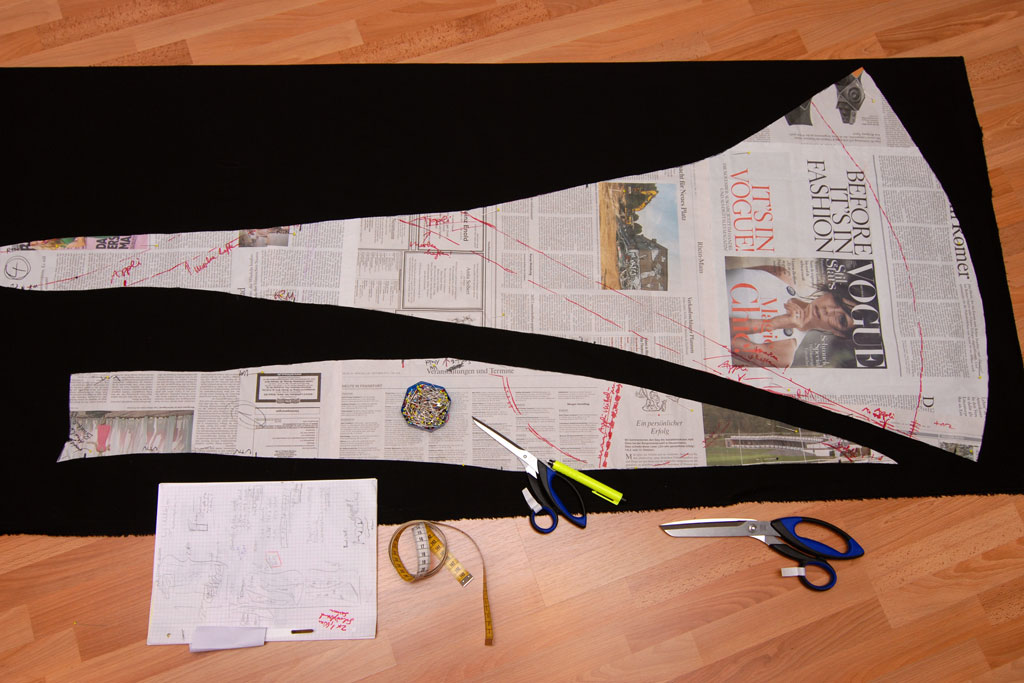
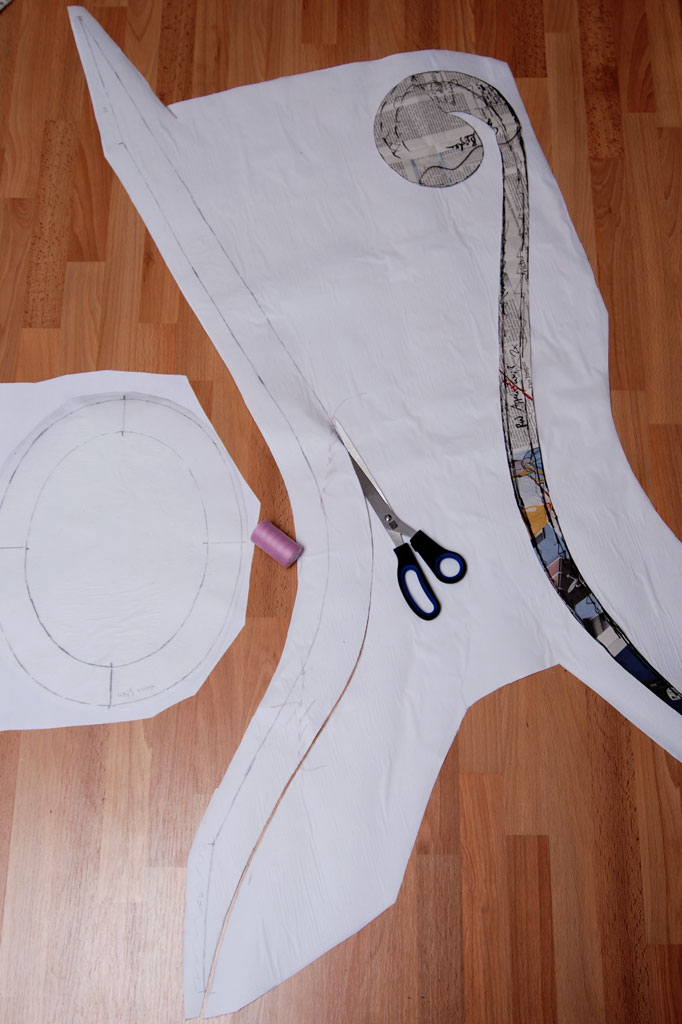
Pattern for Violet’s dress with matching appliqué stripes
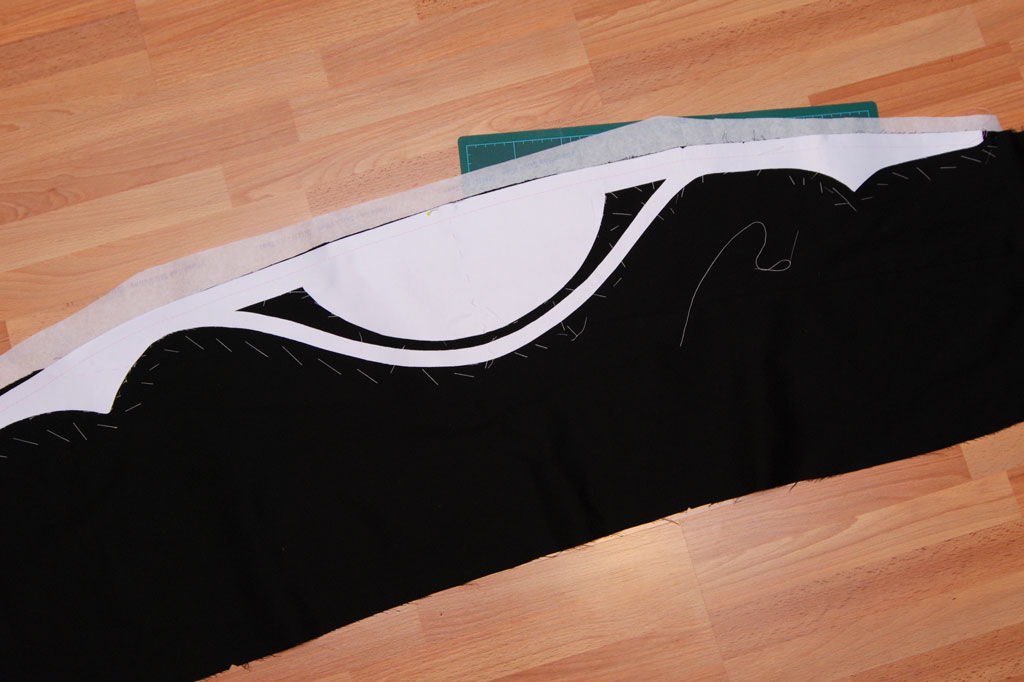
When you’ve drafted the pattern, indicate the grainline (the „direction“ of the fabric) and any markings that will help you place the appliqué on the fashion fabric later. In my example, I indicated the seams with red marker, and the elliptical shape has a cross drawn through the center that will help me place it upright and centered on the back of the costume.
Yuuko appliqué patterns with markings for placement: fabric grainline and seamlines (red)
Vice versa, indicate the placement of the appliqué on the costume pattern as well, and transfer those markings to the fashion fabric. That way you’ll be able to align the ornaments symmetrically. You’ll thank me later!
Transfer the pattern
Now that you’ve got your pattern, you need to cut out the fabric for the ornaments. There are two ways to do this.
Small ornaments
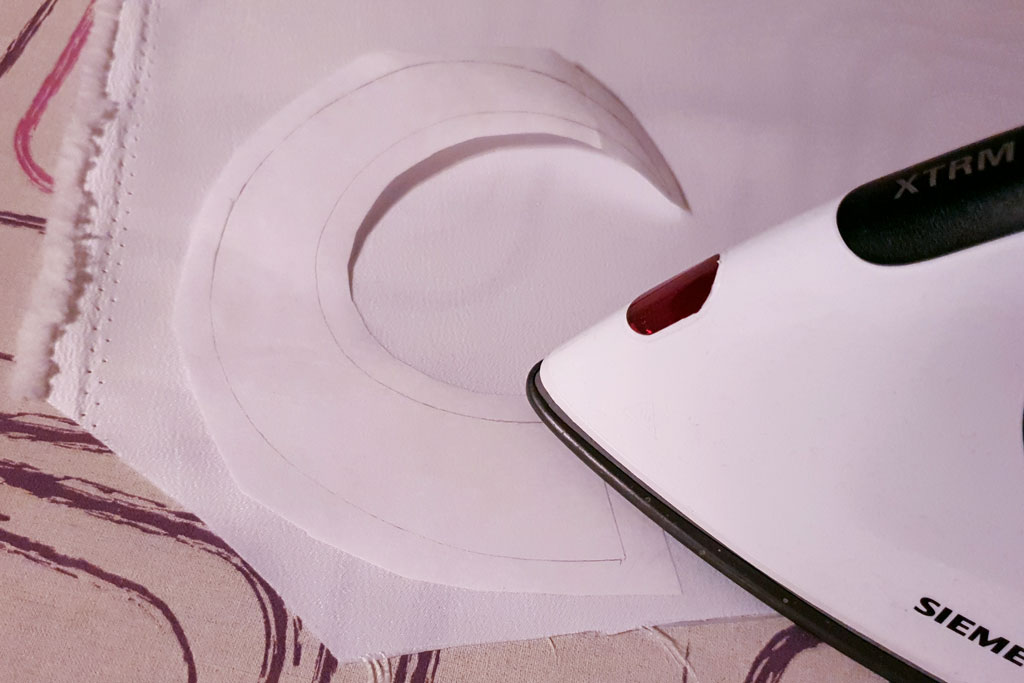
Transfer the outline of the ornament to the paper side of the double-sided fusible web (Vliesofix). Cut out the shape roughly with paper scissors.
Place the fusible web on the wrong side of the ornament fabric, shiny side facing the fabric. Pay attention to the grainline and carefully iron it on.
Cut out the shape with paper scissors or all-round crafting scissors – not with your precious fabric scissors! The paper will dull the blades.
Big ornaments
A faster method: take a large piece of double-sided fusible web (Vliesofix) and iron it to the wrong side of the ornament fabric. Then transfer your pattern(s) to the paper side. Pay attention to the grainline, as indicated by your markings on the pattern.
If you need to cut lots of pieces from the same fabric, this is the fastest method, but it means more waste.
Transfer the markings for placement and cut out the appliqué
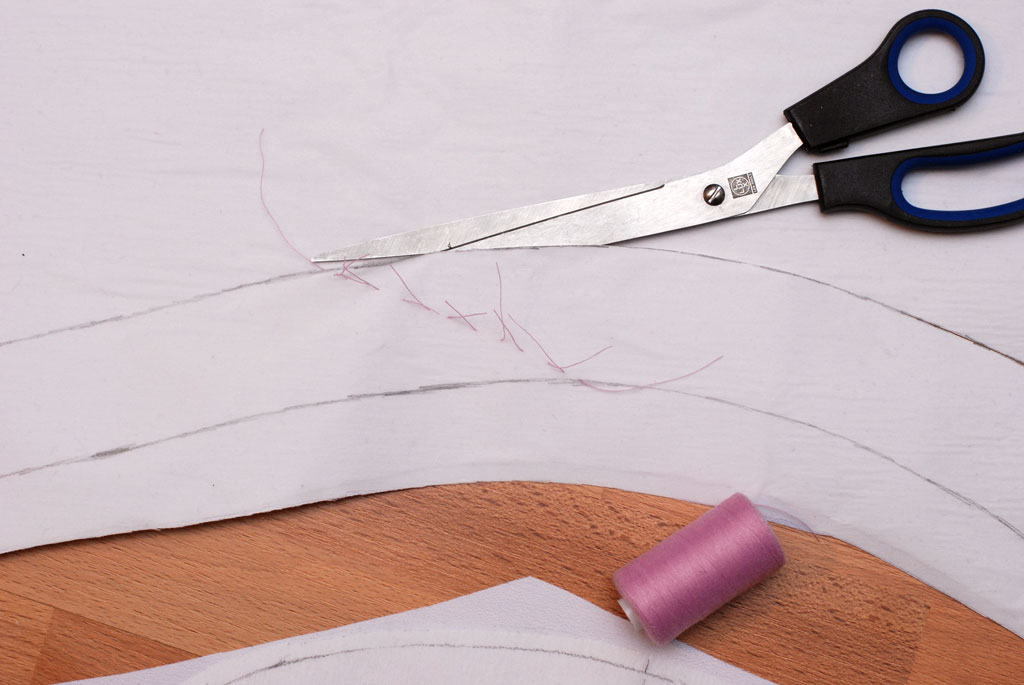
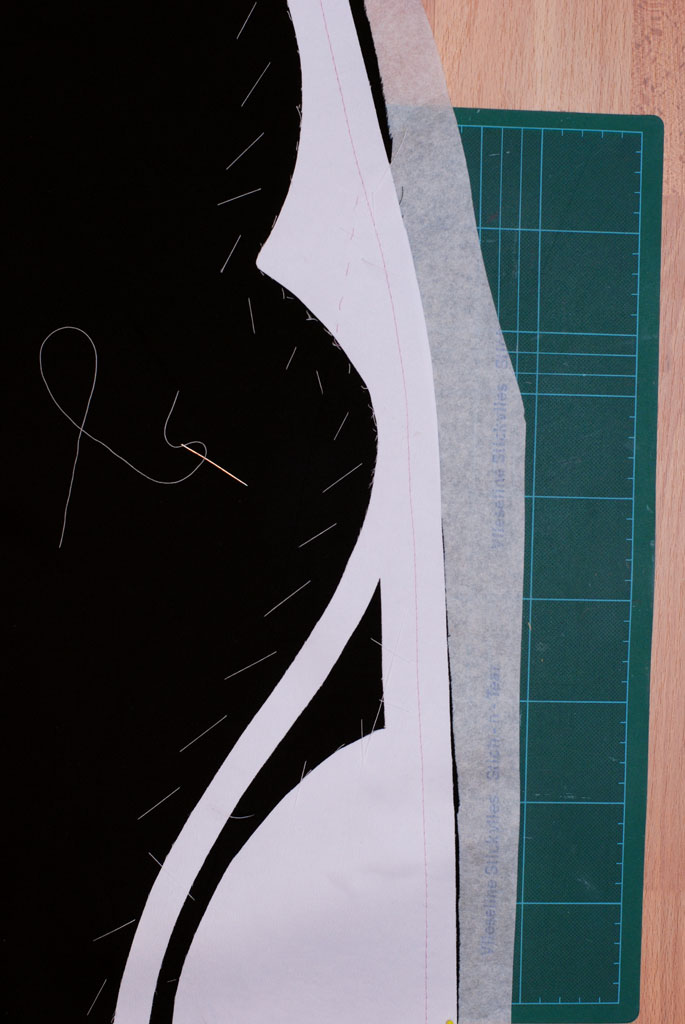
Cut out the appliqué using crafting or paper scissors. Basting thread marks the seams on the dress and helps with placement later
There is no need to include a seam allowance (except where the pattern extends over the fabric edge, e.g. at the hem). The raw edges will be finished with a satin stitch later.
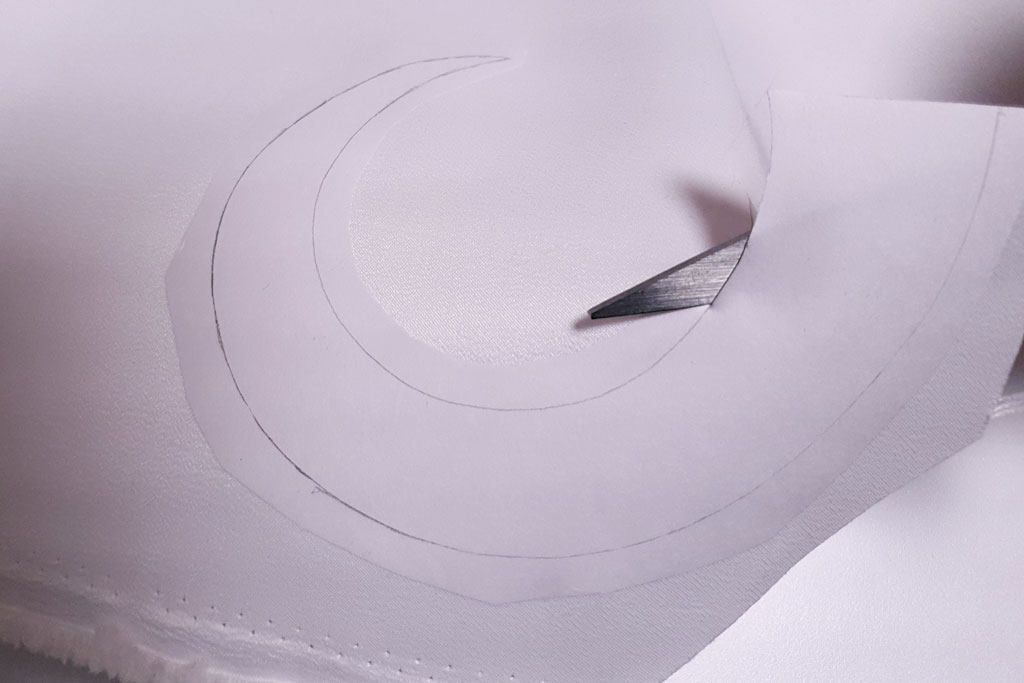
Use a scalpel to cut out delicate shapes and inner corners.

Be sure to transfer not just the outline but also the other markings, like the grainline and seamlines that help you to place the appliqué on the garment later. Transfer them either with a pencil or with basting stitches.
Note: When you transfer your pattern, keep in mind that it will be mirrored later!!! The side you’re drawing on will be the back of the appliqué, so you have to flip your pattern before transferring it to the paper.
Flip the pattern…
…so that your appliqué is not mirror-inverted
Ironing Tips
When you iron the double-sided fusible web (Vliesofix) to your ornament fabric, follow the instructions for the material. I use medium heat, but never more than the fabric will allow.
Do not steam (it’s paper!) and do not iron over pins – they will leave a visible dent in the fabric. Briefly press the iron onto the fusible to fix it in one corner, then remove the pins as you go. Use pressure to make sure the adhesive bonds well with the fabric. Careful not to iron in creases.
I recommend placing a pressing cloth, a cotton towel, or a sheet of baking paper between fabric and iron. As the adhesive melts, it may creep out from under the appliqué and spill over onto the iron and the fashion fabric, where it can leave ugly stains.
For the same reason, always clean both the iron and the ironing board after working with fusible interfacing.
Allow the material to cool down for a few minutes – instructions recommend up to 30 minutes for the adhesive to set completely. Make sure the fabric lays flat during cool-down so that it doesn’t warp.
Join appliqué and fashion fabric
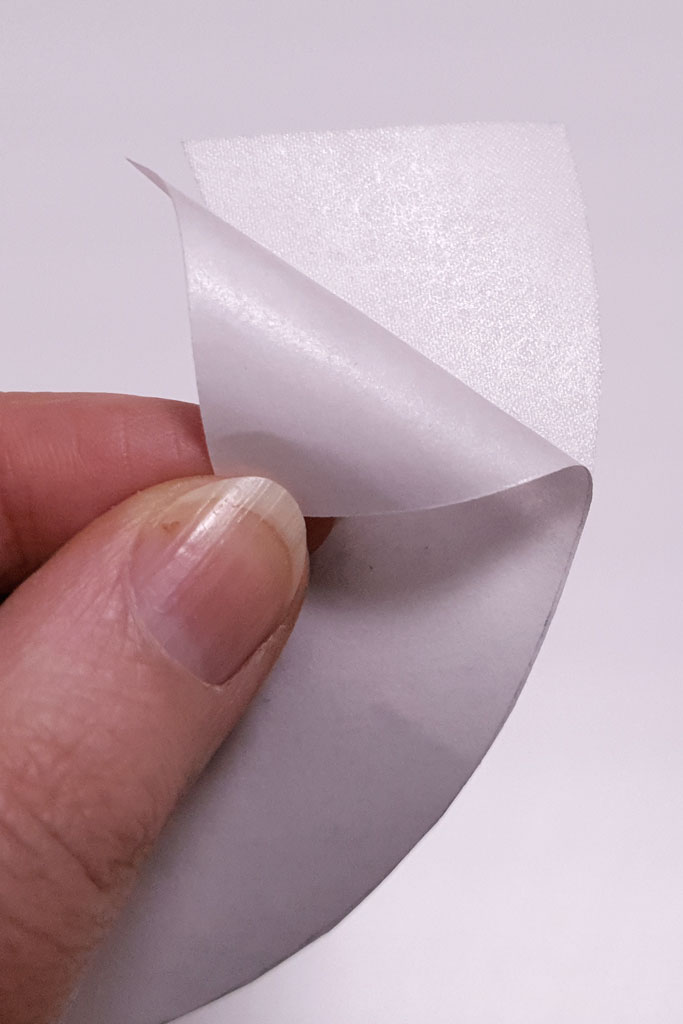
Peel off the paper backing to reveal the adhesive.
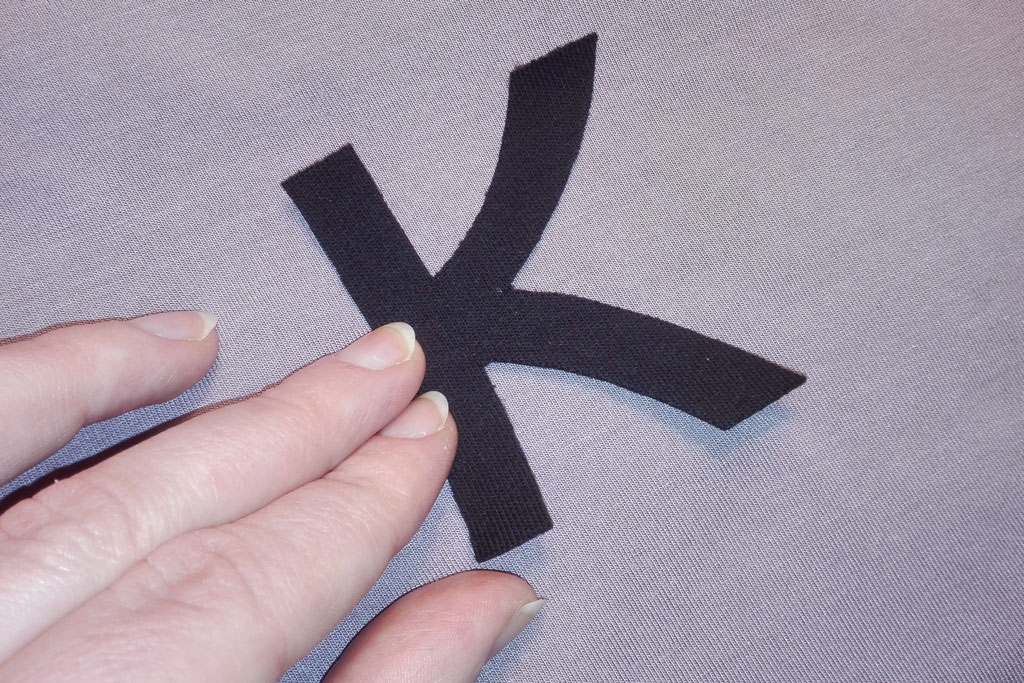
Place the ornament with the shiny (sticky) side on the fashion fabric.
Align all markings and pin in place if necessary. (Note: If you didn’t baste the markings previously, you’ll need to transfer them to the outside with pins before you remove the paper.)
Iron it on with medium heat (or less, as much as the fabric will allow). You can steam now that the paper is gone. Apply pressure and take your time to fix the appliqué properly. Let it cool down to allow the glue to set completely.
Use a pressing cloth when you iron on the appliqué

Use basted markings on the dress for perfect symmetry!

Your ornament is now fixed to the fashion fabric! It’s looking good – but if you wore the costume now, the raw edges of the appliqué would eventually fray. Plus, the adhesive can peel off when exposed to heat and movement (when you put your costume in the washer, for example). So it needs a permanent fix.
Set up your machine
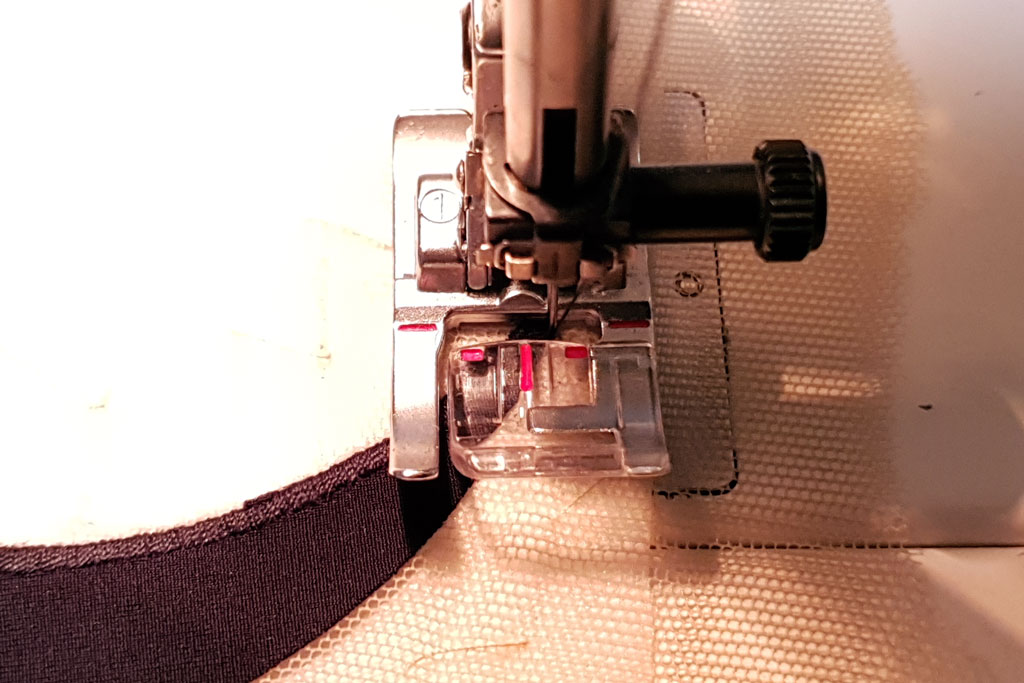
To sew the appliqué to the fashion fabric, we’ll use a satin stitch. That’s a very dense zigzag stitch that serves a double purpose: to join the two fabrics permanently, and to seal the raw edges of the appliqué in a decorative fashion.
For the satin stitch to look pretty, you’ll need to tamper with the settings of your sewing machine.
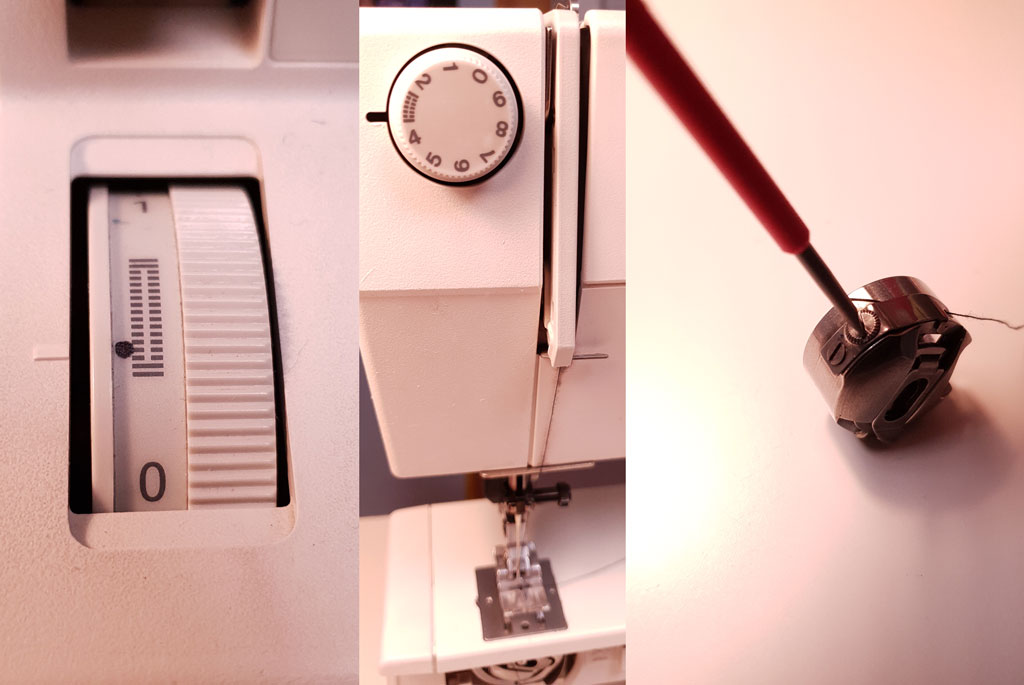
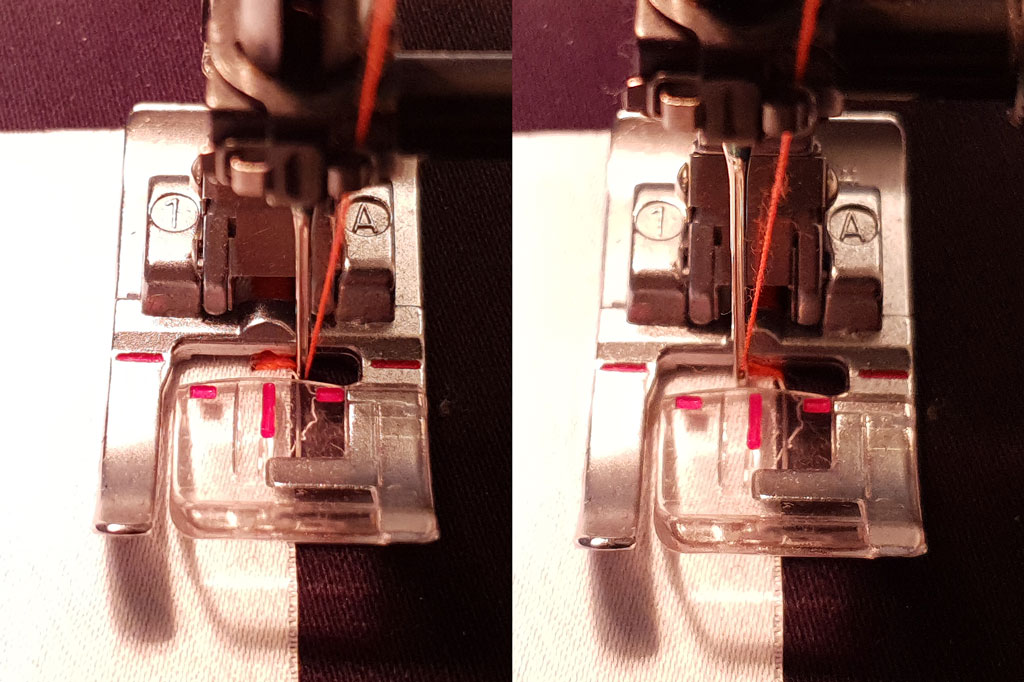
First, set your machine to a zigzag stitch (narrow to medium width) with extremely short stitches. I use the button-hole setting (close to 0mm).
Next, dial down the thread tension. The upper thread tension should be very low, button-hole setting or lower. The tighter the thread, the more the fabric will warp, and we want to avoid that.
Now dial up the bobbin tension. Start by turning the screw a quarter turn clockwise.
Use the button-hole setting for your zigzag stitch and adjust the thread tension
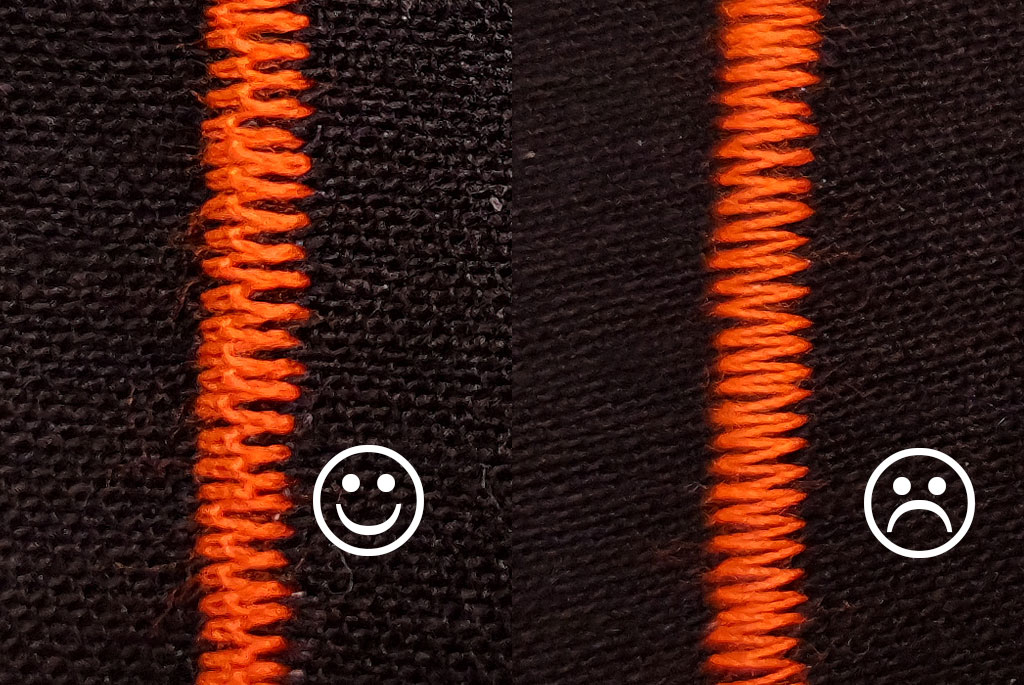
Our goal is to offset the thread tension so that all the thread is pulled to the underside of the fabric. We want the upper thread and bobbin thread to loop on the underside, rather than between the fabric layers or inside the fabric.
Test the stitch on a piece of the same fabrics, layered like the real thing. If you can still see thread loops on the upper side, dial up the bobbin tension to pull them to the underside.

Note: The bobbin tension should usually be kept at factory setting and there’s rarely a reason to change it. Before you tamper with it, mark the original setting on the bobbin case (e.g. with a sharpie) and make sure you know how to determine the perfect thread tension if it’s ever screwed up.
Stabilizer
The extremely dense stitches and the uneven thread tension will cause the fabric to warp when you sew it. Thin, flimsy and stretchy fabrics like poly satin or jersey will warp more than firm cotton broadcloth or cotton sateen. But no matter which fabric you use, the garment should always be reinforced before you satin-stitch it.
Fusible interfacing is the quick and easy way to reinforce fabric, but it stiffens the fabric permanently. If you don’t want that, use tear-away stabilizer or freezer paper as a temporary reinforcement.
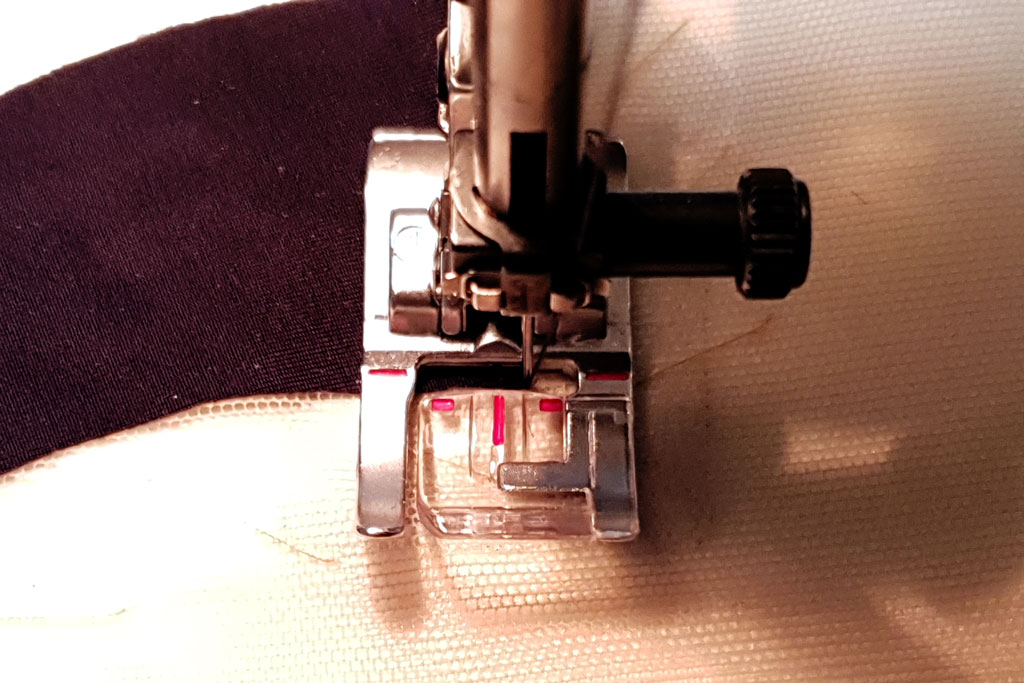
Cut out a piece of stabilizer 1-2 inches larger than the appliqué. Place it under the fashion fabric and pin it in place.
When using non-fusible stabilizer like me: join the layers with basting stitches by hand to prevent the fabric from shifting as you sew. It’s a tedious process for large appliqués, but utterly worth it. No more shifting, no more warping or bunching up!
Fix the stabilizer with basting stitches to keep the layers from shifting
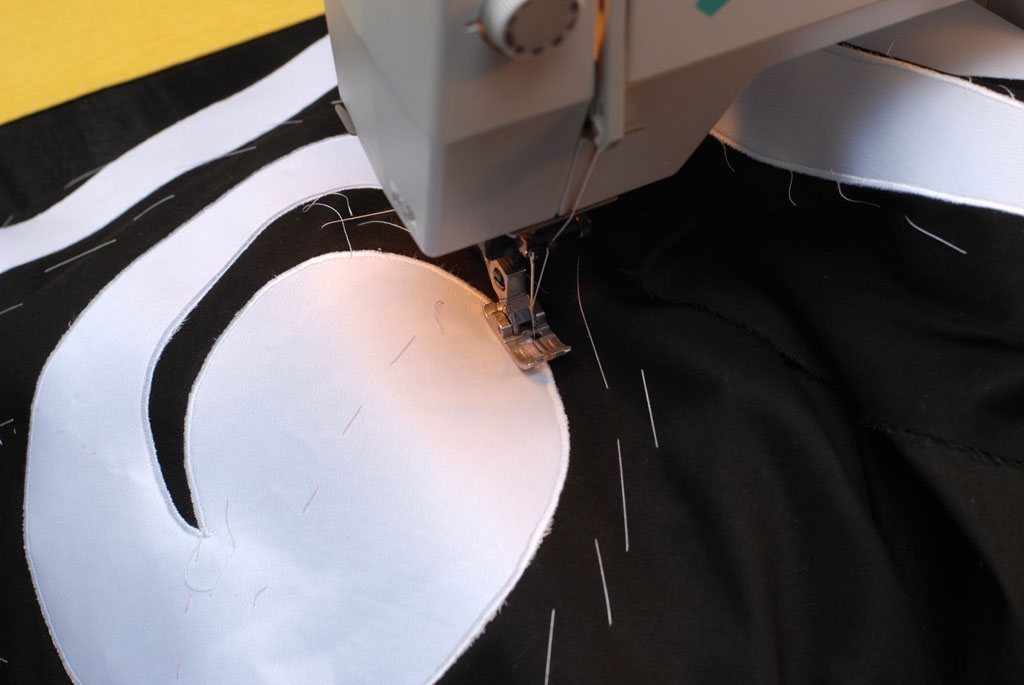
Satin stitching
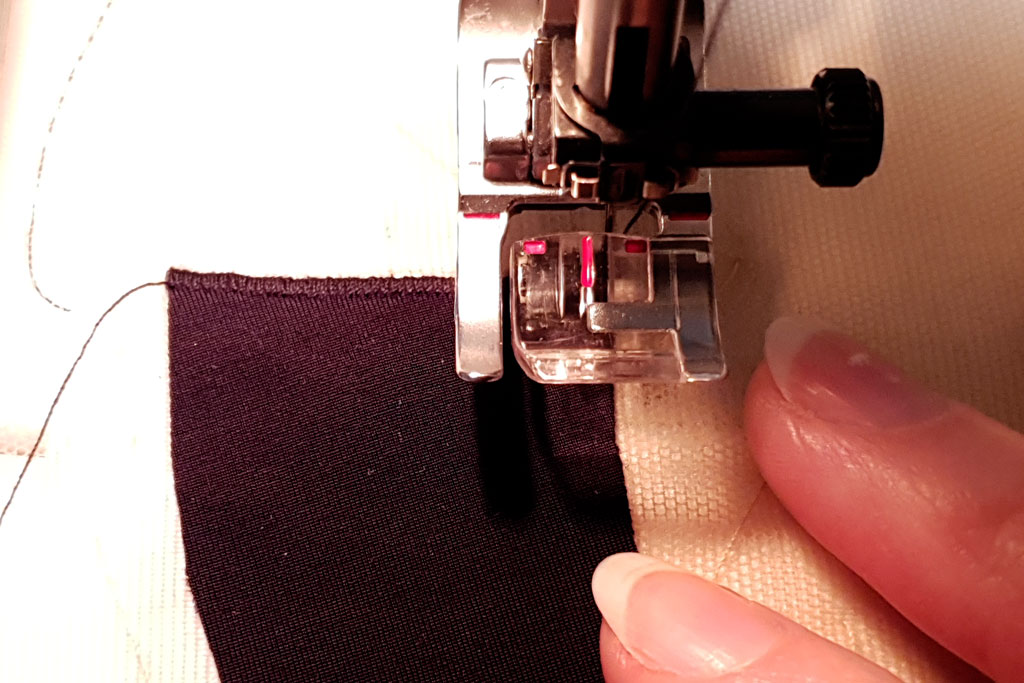
Place the fabric with the appliqué in your sewing machine, with a regular presser foot or quilting foot. Use a new needle. Pull on the thread ends so that you have at least 4-6″ (10-15cm) excess thread when you start stitching.
Place the edge of the appliqué under the presser foot and use the hand wheel to position the needle. In the far right position of the zigzag stitch, the needle should catch the fashion fabric just outside the appliqué. In the far left position, the needle should catch enough of the appliqué fabric to sew it on securely and prevent it from fraying. Fray-happy fabrics may need a slightly wider stitch.
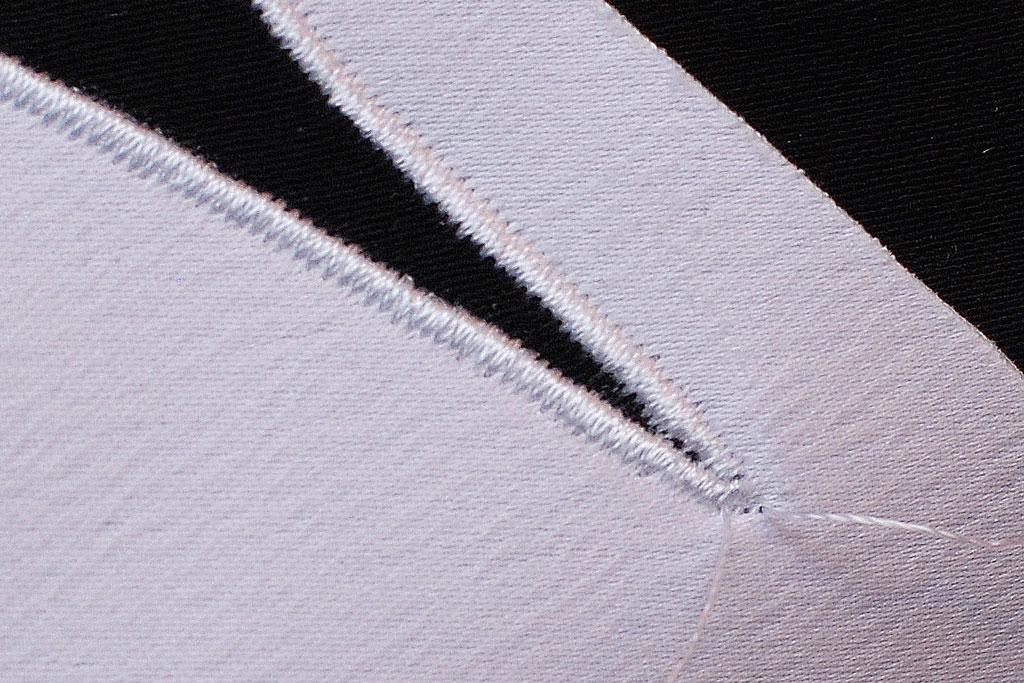
Zigzag-stitch along the edge of the appliqué.
Do not lock the seams by tracing back and forth, as you normally would. Leave about 4-6″ (10-15cm) of thread hanging loosely on each end of the seam. These threads will be sealed by hand later.
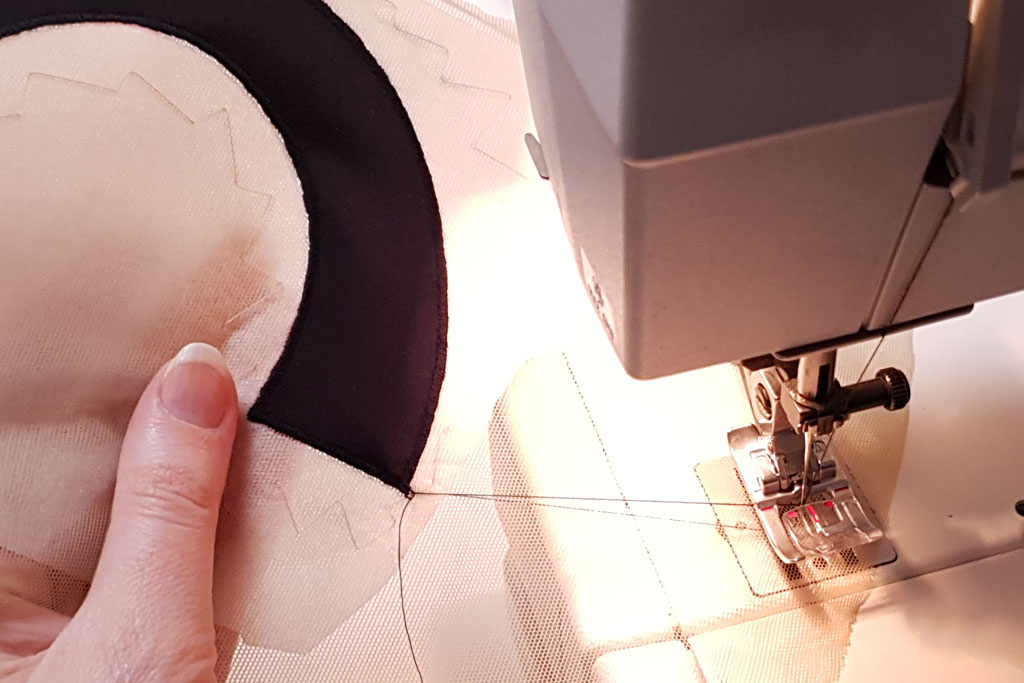
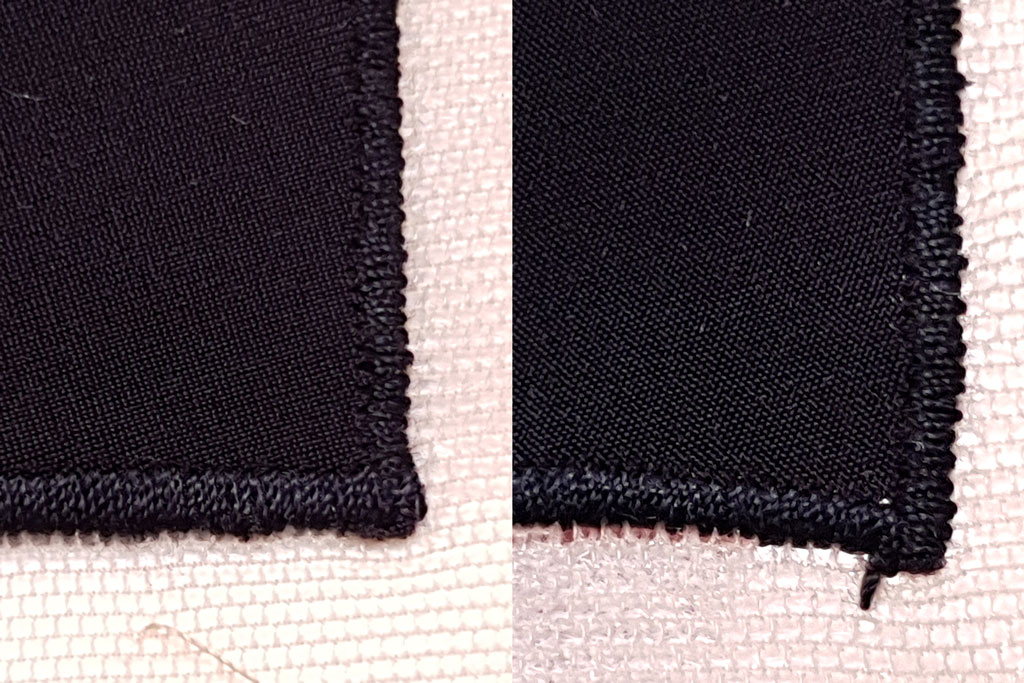
At corners, stop sewing with the needle still stuck in the fabric. Lift the presser foot and rotate the fabric. Lower the presser foot and continue sewing. Make sure that the zigzag stitches overlap at the corner but without any stray stitches extending into the fashion fabric.
Stop with the needle stuck in the fabric… …lift the presser foot and rotate the fabric
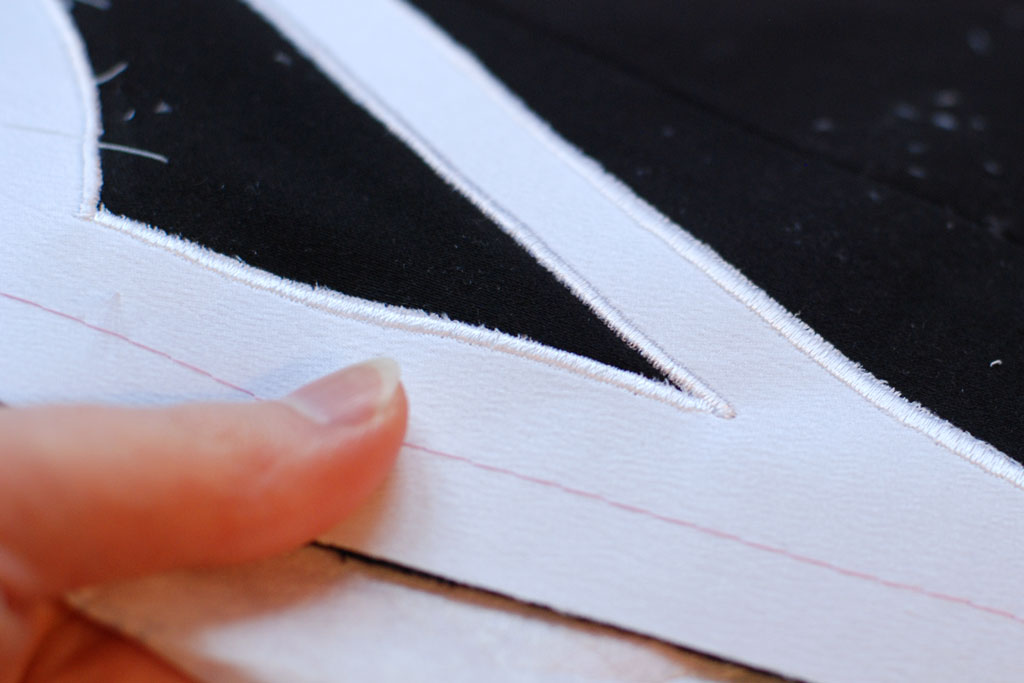
Make sure your corners are clean
Acute angles and tapered corners look best if you gradually reduce the stitch width as you near the corner, and dial it up again after the corner.
Experiment with varying stitch widths for larger vs. smaller pieces, wide vs. tight curves, thick vs. delicate fabrics. Just make sure that the stitches are always wide enough to catch the appliquéd fabric and prevent it from fraying.
Round edges are difficult to stitch in a smooth, not jagged line. Try to guide the fabric through the machine in one continuous motion. It’s better to go real slow than to race ahead. Gently guide the fabric through the machine, do not pull on it or the stitches will become too long and uneven.
Practice on a fabric scrap until you have perfected the hand motion for curves.
Curves and rounded corners require a steady hand
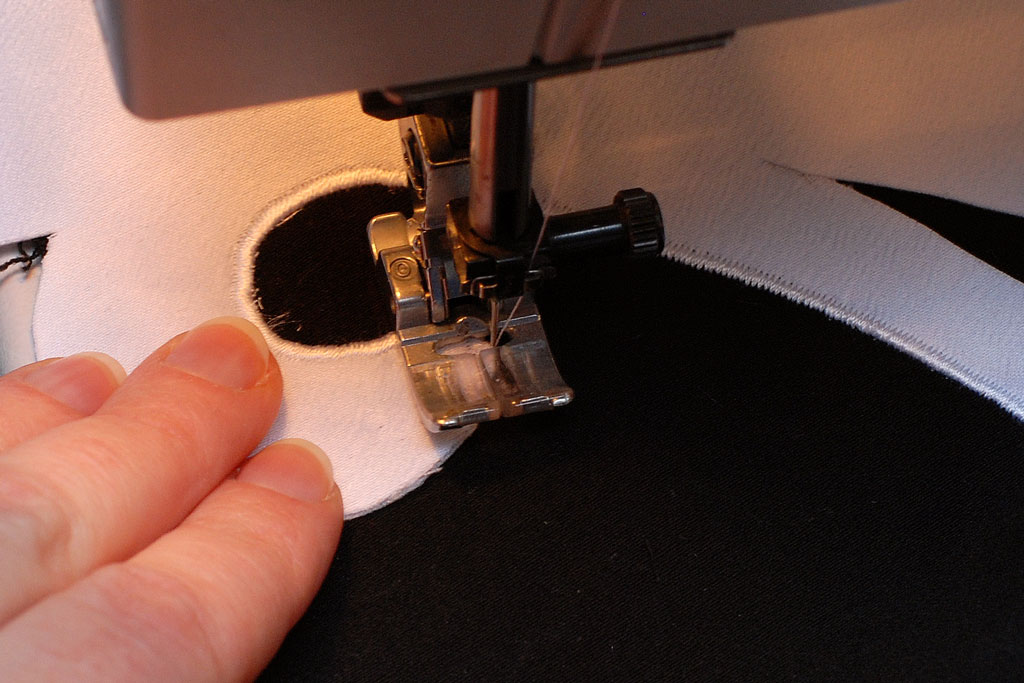
For very tight curves, stitch one stitch at a time. Stop with the needle still stuck in the fabric. Lift the presser foot and rotate the fabric minimally. Lower the presser foot and stitch the next stitch using the hand wheel. Lift, rotate, lower, next stitch, and so on.
Tight curves are quite tricky. Sew them slowly, stitch by stitch
Large fabric pieces that don’t easily fit under the arm of your sewing machine are a lot easier to handle if you roll them up and fix the excess fabric with sewing pins.
Roll up the fabric and fix it with sewing pins so that it won’t get in your way

Make sure that you can rotate the fabric freely inside the machine, because if it gets stuck and blocks your continuous motion while sewing, this will result in a crooked seam. Even small mistakes will show, especially when you’re working with contrasting fabric colors or shiny yarn.
Go slowly and practice sewing curves to avoid crooked seams
If you need to correct a mistake, use a seam ripper to carefully cut open the thread in and around the area. Remove all fluff and stitch over the area again, new stitches overlapping the old ones by just a few mm. Leave the loose threads hanging to seal them by hand later.
Rip the crooked seam… …so you can start over Ripped seam, underside of fabric

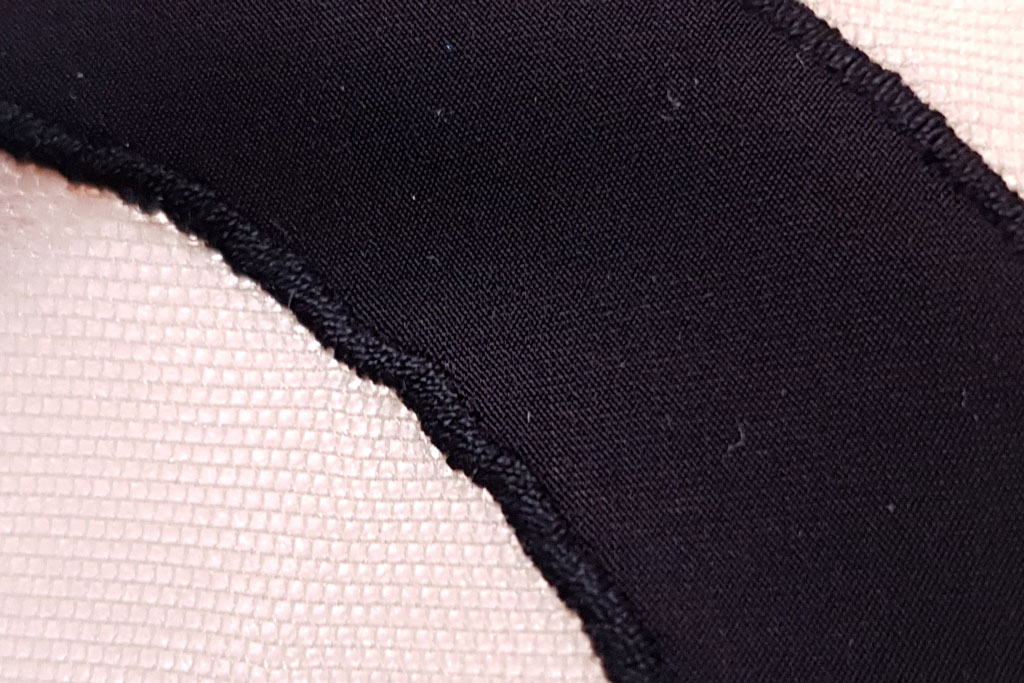
Finishing touches
You should clean up your appliqué before you assemble the garment.
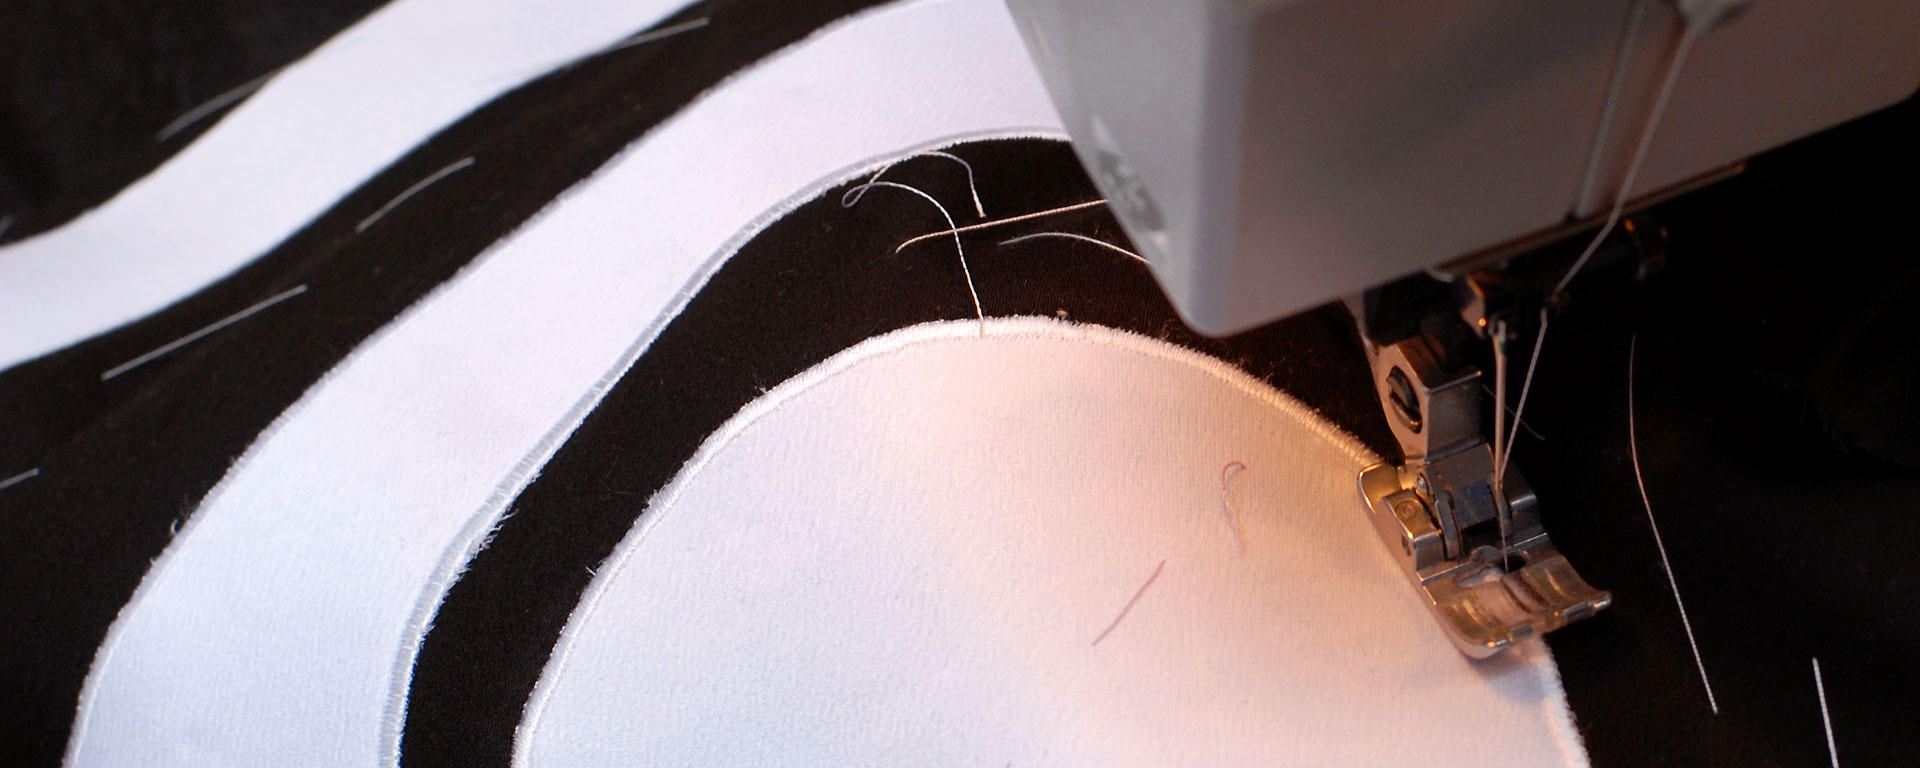
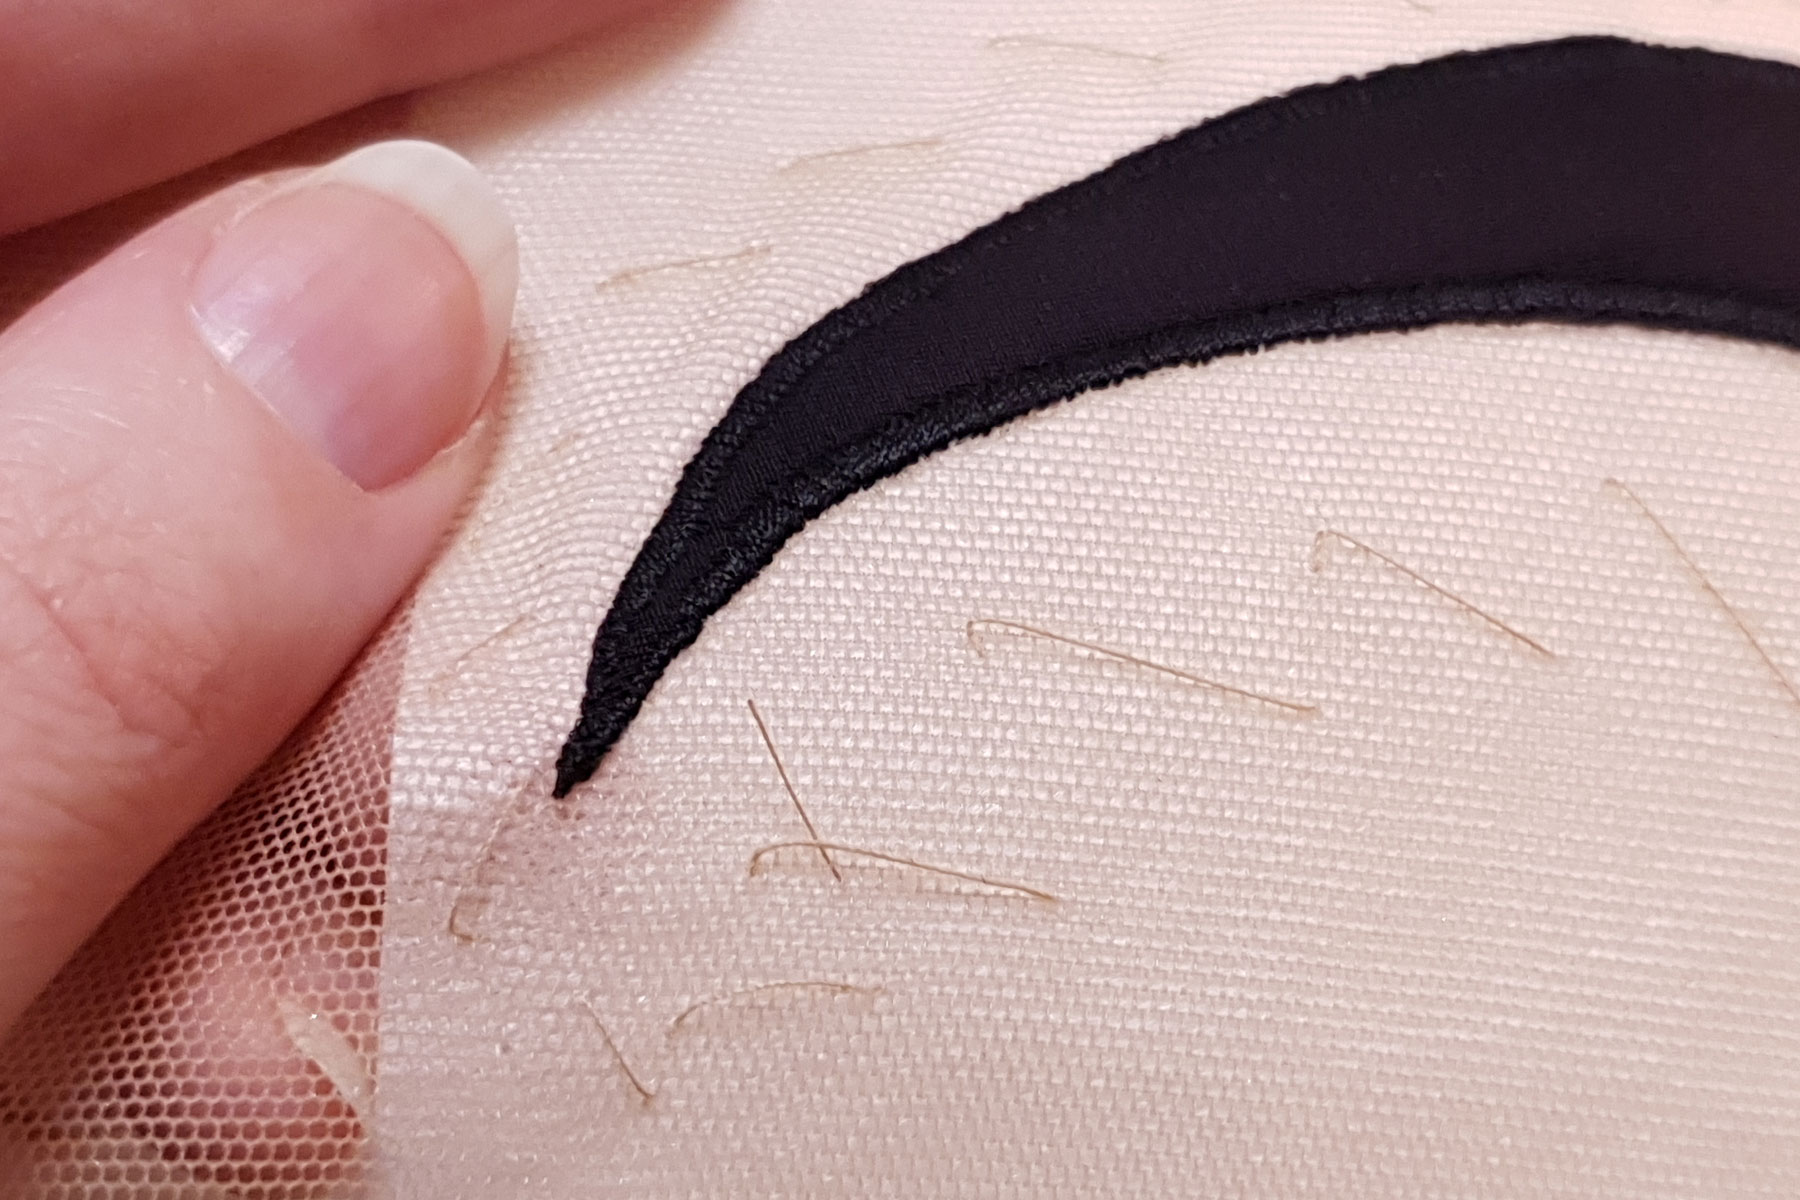
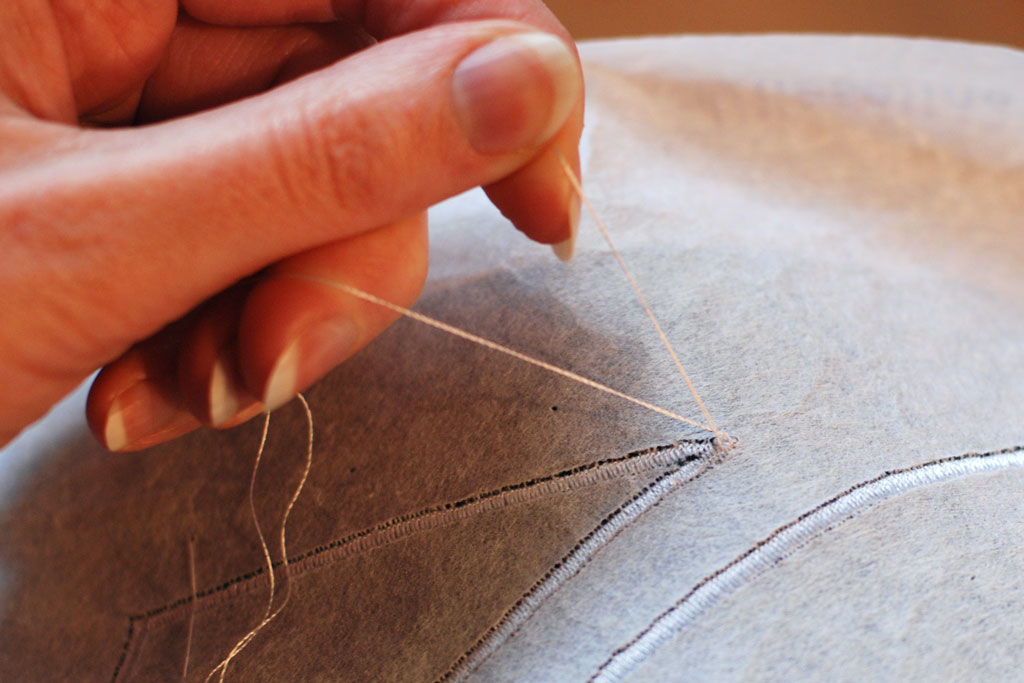
First of all, seal the loose threads that you left hanging at the end of each seam. Use a long sewing or darning needle to pull the upper threads through to the underside of the fabric. Stick the needle into the fabric very close to where the thread end originates, so that it disappears completely between the machine stitches.
On the underside of the fabric, tie all adjacent threads (upper and bobbin thread) into a double knot to prevent them from unraveling. Trim the ends about 1/2″ (1cm) from the knot.
Use a needle to pull the upper thread to the underside of a fabric Tie the thread ends in a knot to seal the seam Finished seam from the outside

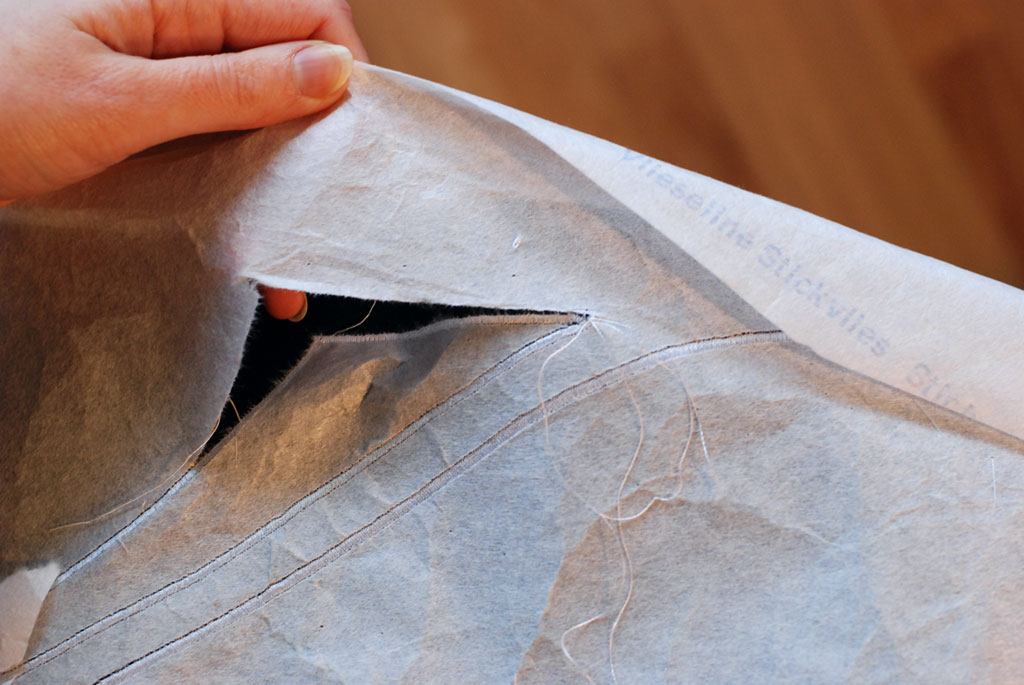
Once you have sealed all the seams, it’s time to remove the basting threads and the stabilizer (if you used the tear-away kind). The fabric will regain most of its original drape and stretch.
Use pincers to pick off threads and small patches of stabilizer that are difficult to tear away by hand.
When your appliqué is finished, tear away the stabilizer
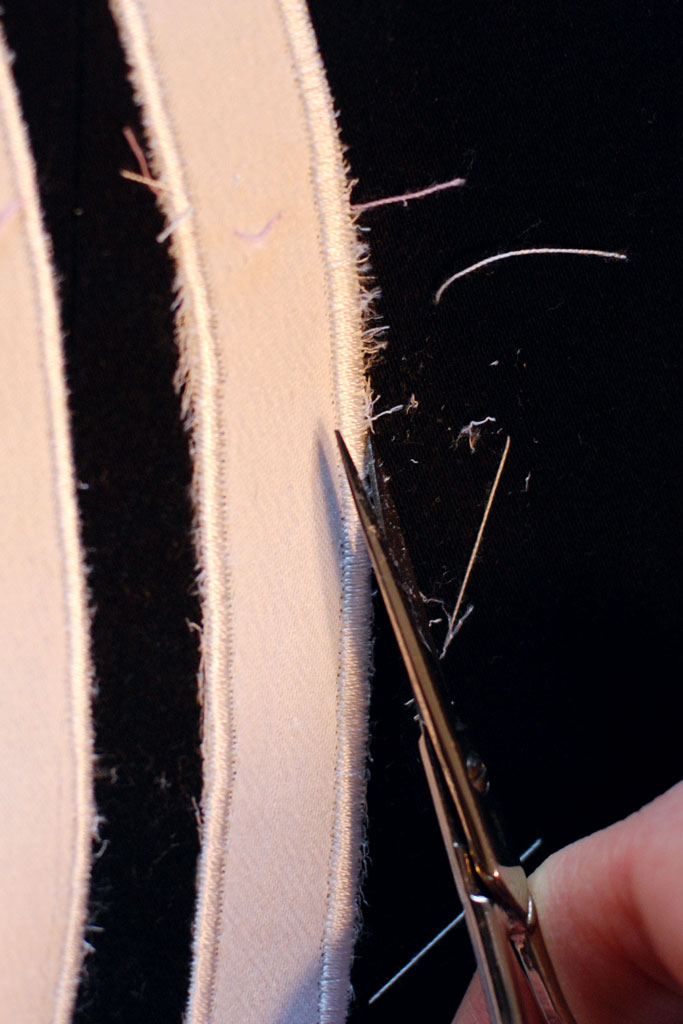
Use small, sharp scissors to trim any loose fiber that pokes through the satin stitches.
Press the appliqué flat using a steam iron. Thin and stretchy fabrics will usually warp quite a bit when you satin-stitch or embroider them, but the stabilizer and the right thread tension should have reduced the effect.
Your appliqué is done!
Clean fabric appliqué takes a while to produce, but it can really upgrade the look of your costume. My Yuuko dress scored high with contest judges, and our craftsmanship and patience earned us the Best Costume award at the WCS preliminary in 2016.
The time witch Yuuko from CLAMP’s wondrous world

Continue reading my blog to learn more tips & tricks for appliqué: how to create complex, multicolor patterns, how to work with stretch fabric, and much more.
2 Gedanken zu “How to Make Fabric Appliqué”