No luck finding shoes in the perfect color? Can’t afford those gorgeous overknee boots that would be perfect for your cosplay?
In this tutorial, I’ll show you how to sew a fabric cover to make your own boots. It doesn’t matter if your base shoe is a worn-out slipper or an ankle boot! Learn how to turn any shoe into a boot, or how to make detachable boot covers so you can re-use the base shoes.
I’ll show you how install a zipper and how to make sure your boots stay up and don’t ride down!

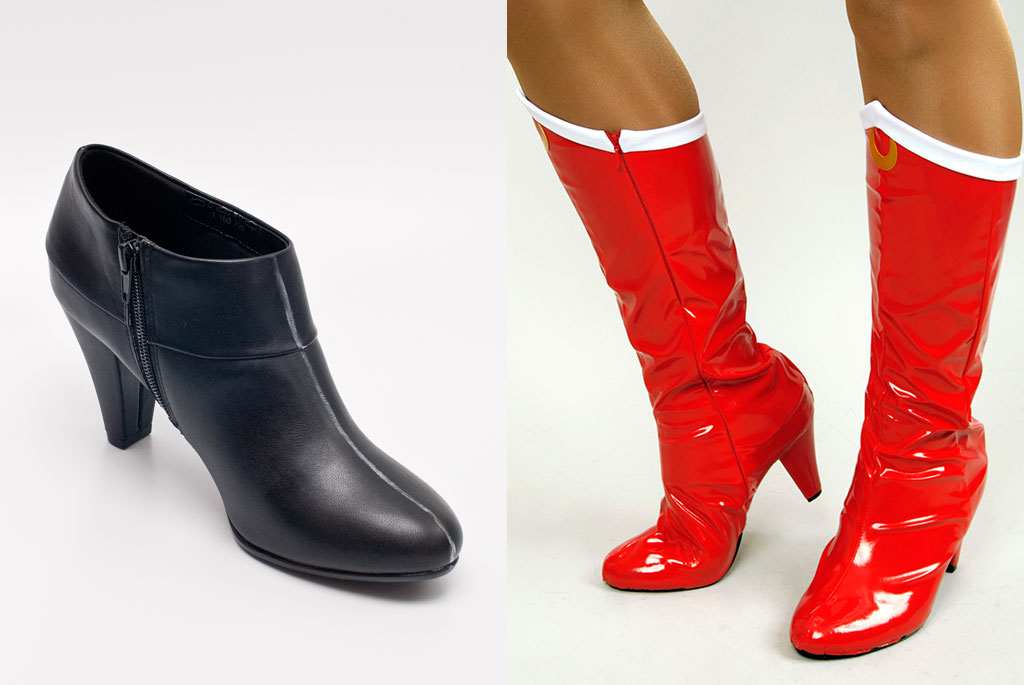
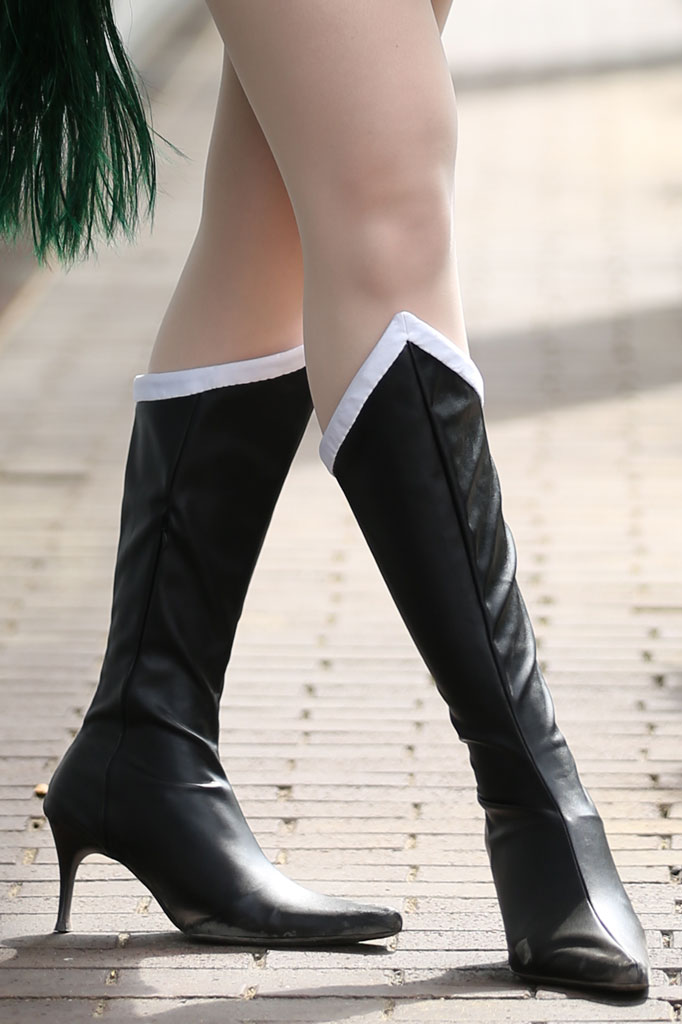
Before & after: base shoe and finished Sailor Moon boots
What you need
- base shoe or boot
- (stretch) fabric
- matching yarn
- pattern paper or silk paper
- OR tape and plastic wrap
- fabric and paper scissors
- pencil or marker, fabric chalk
- glue (leather glue, foam glue or contact cement)
- optional: invisible zipper, silicone-backed elastic band, acrylic paint
Pick your base shoe: the shape of the heel and toe box should match your reference. The color doesn’t matter, and neither does the length of the shaft! You can create stunning thigh-high boots from low-cut pumps or ankle boots.
A smooth surface is always a plus. If your base shoe has decorative elements like buckles or studs, you will need to remove them with scissors or a seam ripper before you continue.
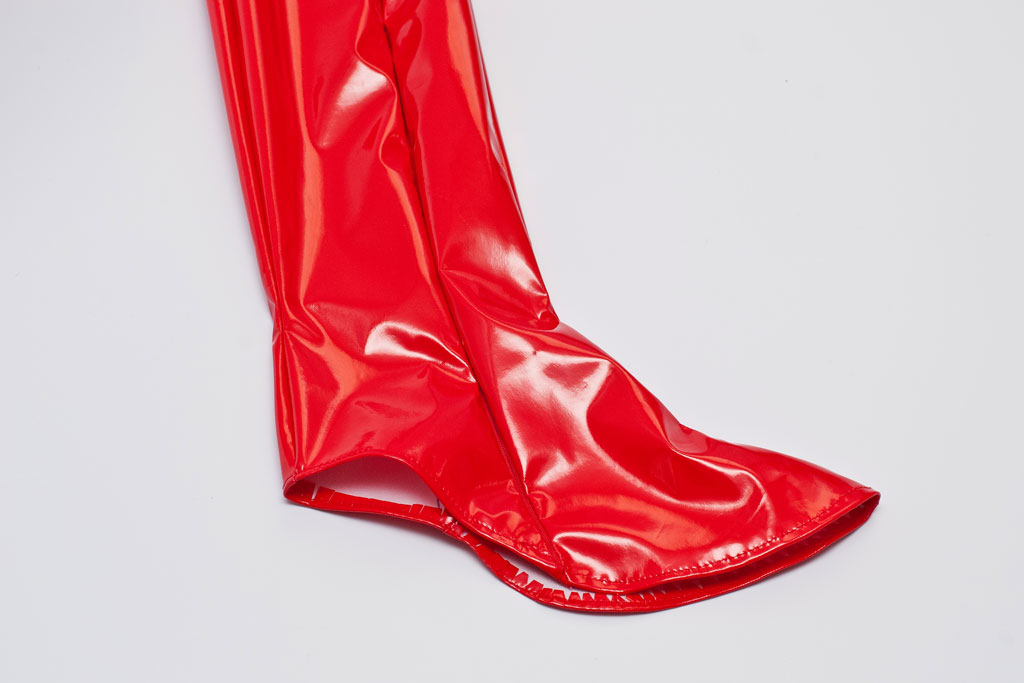
You can use any fabric to make a shoe cover. However, stretch fabrics are more forgiving and easier to fit around your base shoe and your leg. In this tutorial, I am using stretch vinyl. It looks sleek, does not fray and is stain-resistant.
Cotton or poly stretch fabric, pleather and heavyweight spandex also make good boot covers. I’ll show you some more examples from my wardrobe at the end!
To estimate how much fabric you need, measure the desired height of your boot from the top edge to the sole (at the toe box for high heels!), and add a few cm / inches of seam allowance. This is your minimum yardage of fabric that you need to buy. If your fabric is narrower than 140cm or 55″, double the yardage. And don’t forget about potential straps, bucket or embellishments! If in doubt, I draft the pattern first to find out how much fabric I need.
There are two different ways to create a pattern that will fit over your base shoe, as well as your leg.
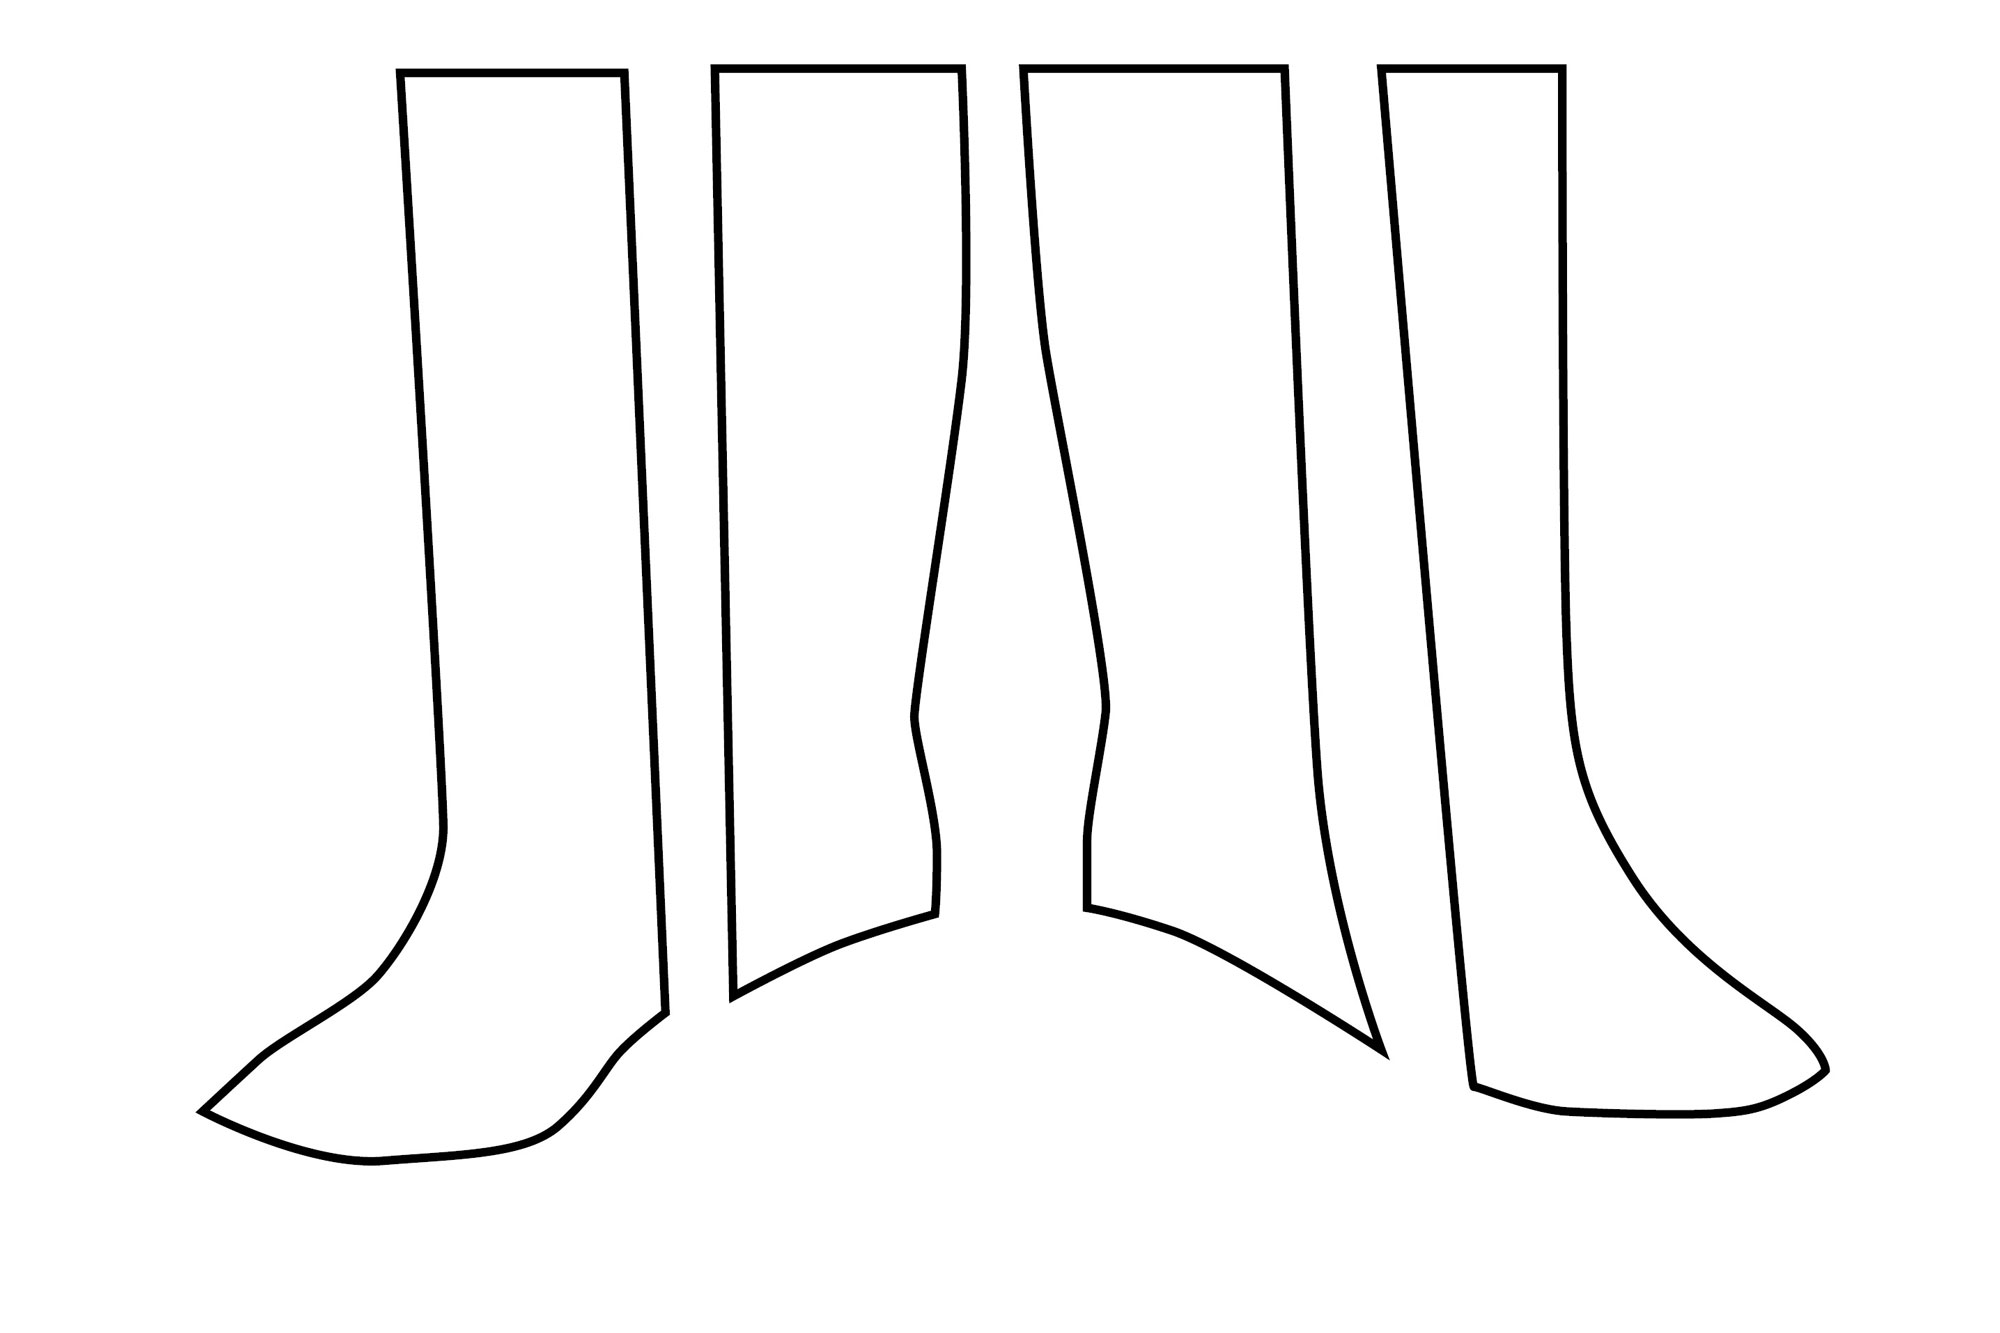
Base boot with drawn-in front seamline

Draft the pattern
Tracing Method
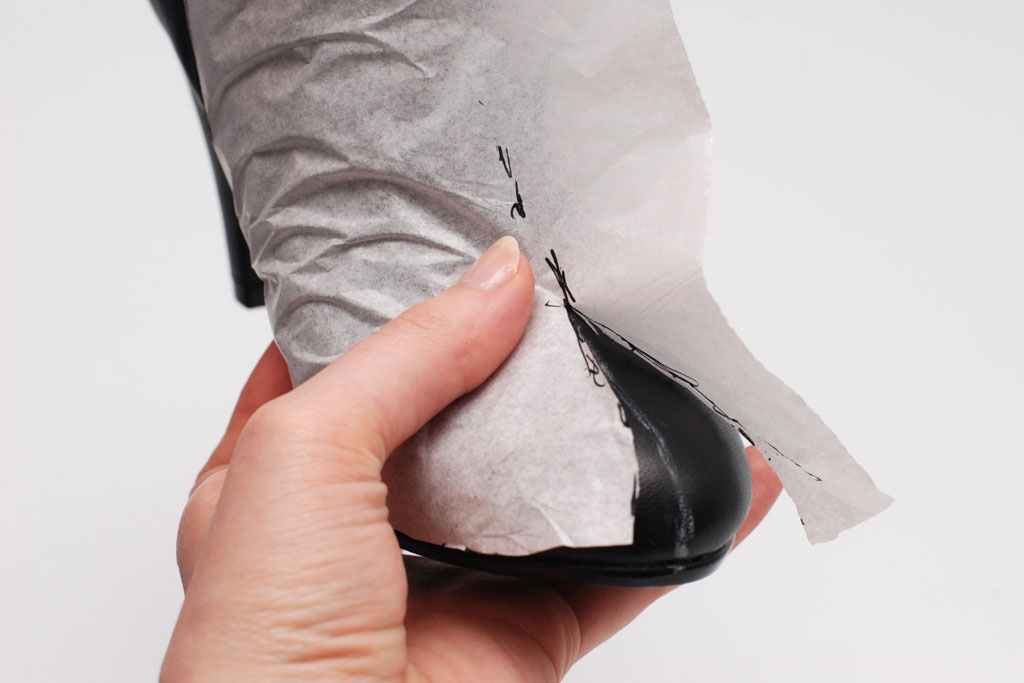
Take either one of your base shoes, a pen and a scrap of pattern paper or silk paper. The paper must be thin and somewhat transparent so you can see and feel the seams and edges through the paper. Press the paper against the shoe and trace the outline of the shoe, as well as the seams. You can pin the paper to the shoe to hold it in place while you draw.
Boots usually have at least a center front seam and a center back seam to fit the curve of the foot and leg. If your boot has a toe box that’s cut and molded in one piece, I recommend drawing in a center front seamline anyway. Use a chalk pen or pencil to draw it on the base boot before you trace the pattern.
Using the seamlines as a guide… …trace the pattern on paper

Side seams may be necessary to add a zipper, to add decorative seams or embellishments like stripes, or to fit the shaft to your leg (especially when you want it to flare out at the top). You’ll figure this out in the next step.
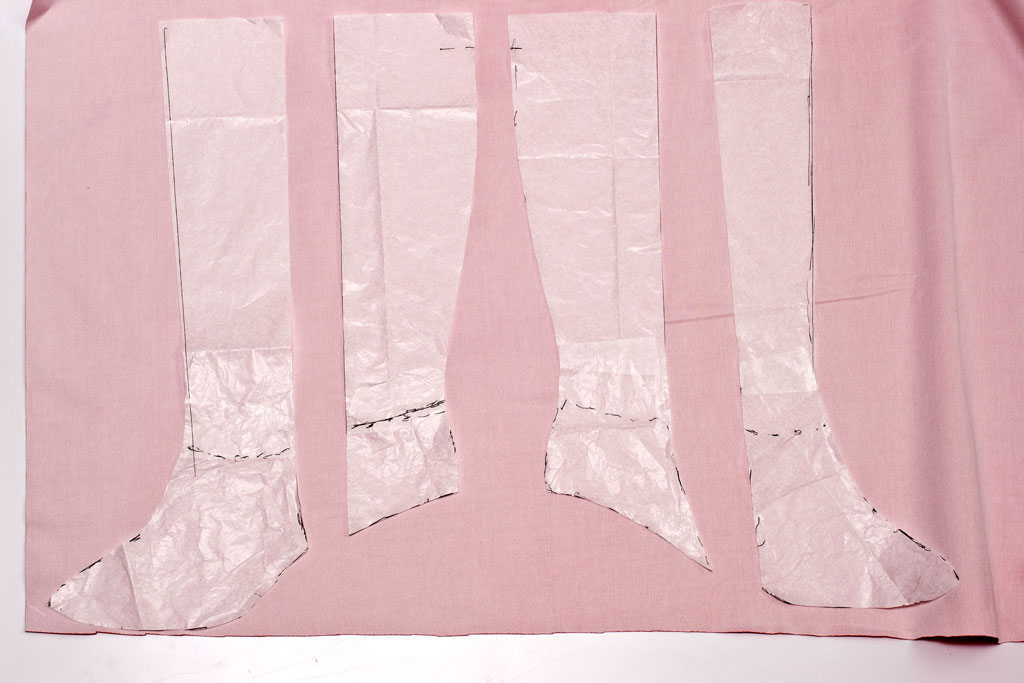
Next, add the boot shaft. Measure the width of your calf and thigh (for thigh-high boots) and the desired length of the shaft, and sketch the basic shape of the shaft on pattern paper. If you have a pattern for leggings or a bodysuit, use that as a base. Just add more seam allowance if your boot cover fabric isn’t stretchy. Tape or glue the shaft piece to the shoe pattern piece, and you’ve got your basic pattern!
Here’s what a typical boot cover pattern looks like. (Thanks to Artflower Cosplay for tracing this for me!) The line on my paper pattern is where the base shoe ends and the boot shaft begins. As you can see, I added center front and back seams, as well as side seams. The zipper will be added to the inner leg seam where it’s least visible. The outer leg seam is optional: the seamline is straight, so you could just tape the pattern pieces together if there’s no seam in your reference.
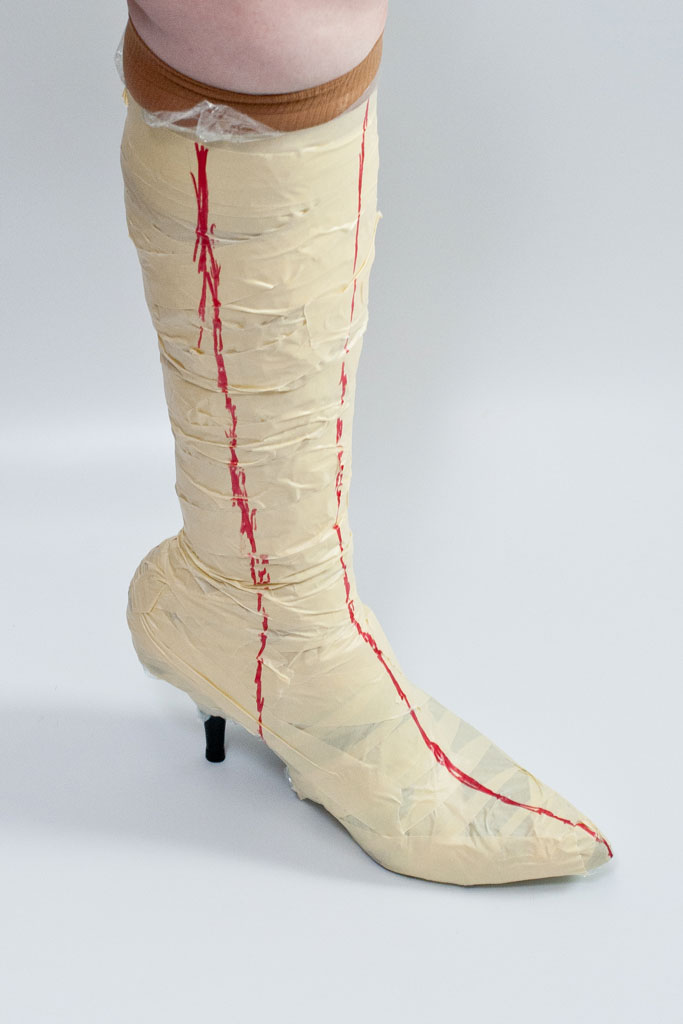
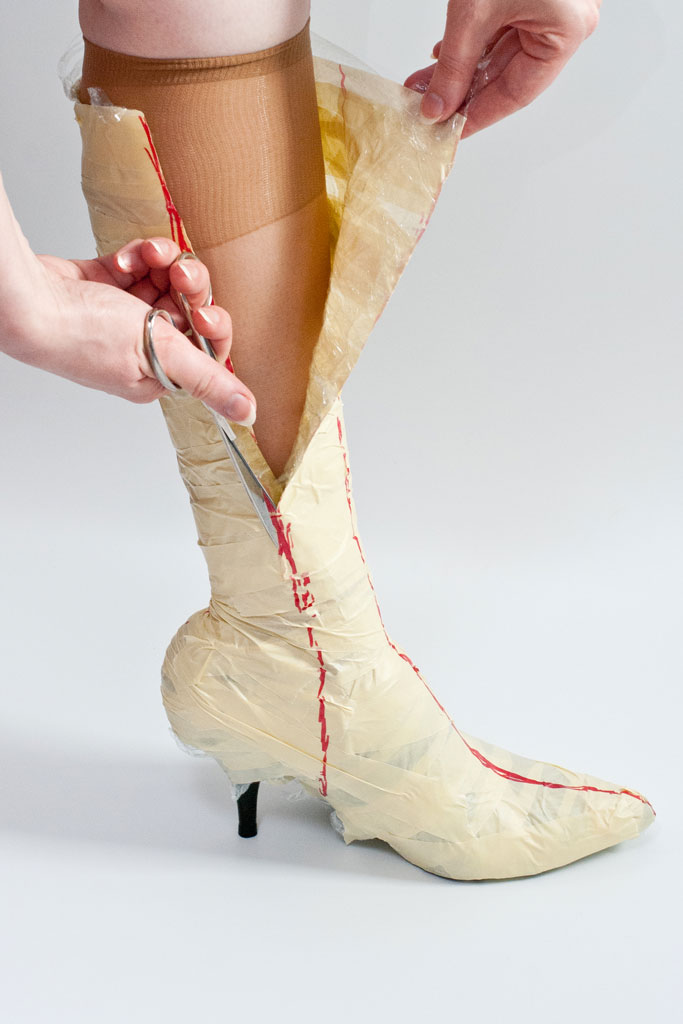
Tape Method
If you have trouble drafting the pattern free-hand, use the duct-tape method that’s popular with armor makers. Put on the base shoe, wrap your leg with plastic wrap (cling wrap), then cover it with duct tape or masking tape. Be careful not to wrap it too tight, so you don’t cut off your blood or make the shaft too small to fit comfortably.
Draw in the seamlines (center front, center back and at least one side seam) with a marker, then carefully cut open the tape dummy. It’s best to have someone help you with this method.
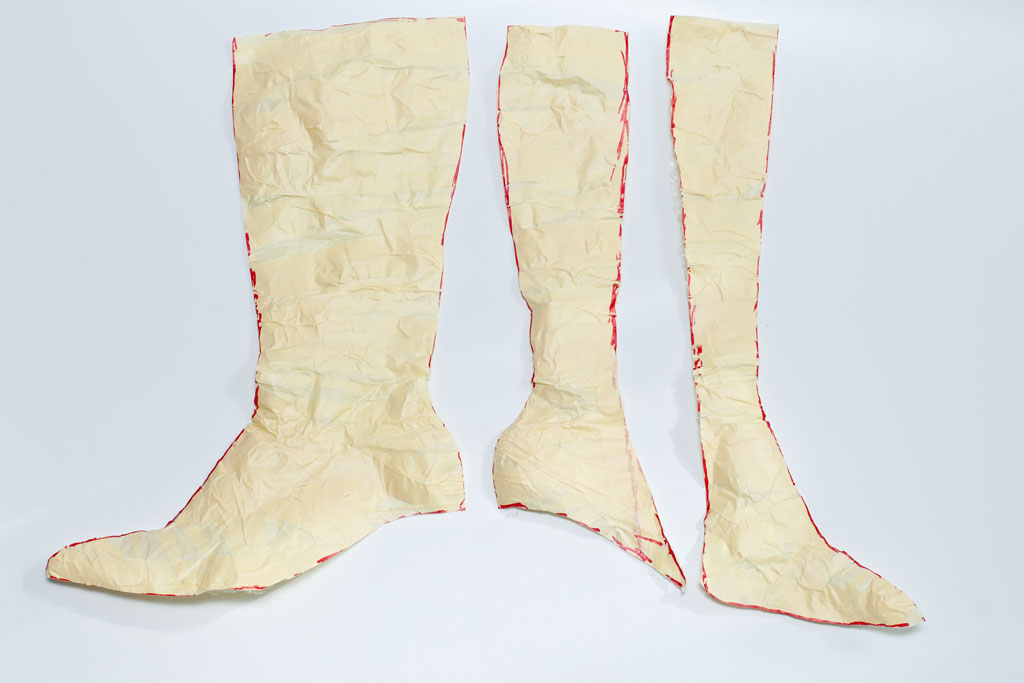
Cut the tape dummy apart at the seams and flatten the pieces with your hands. Trace them on paper to get a reusable pattern.
Pattern-making: the tape method Cut open the tape at the seamline Flatten the pieces and you have your pattern
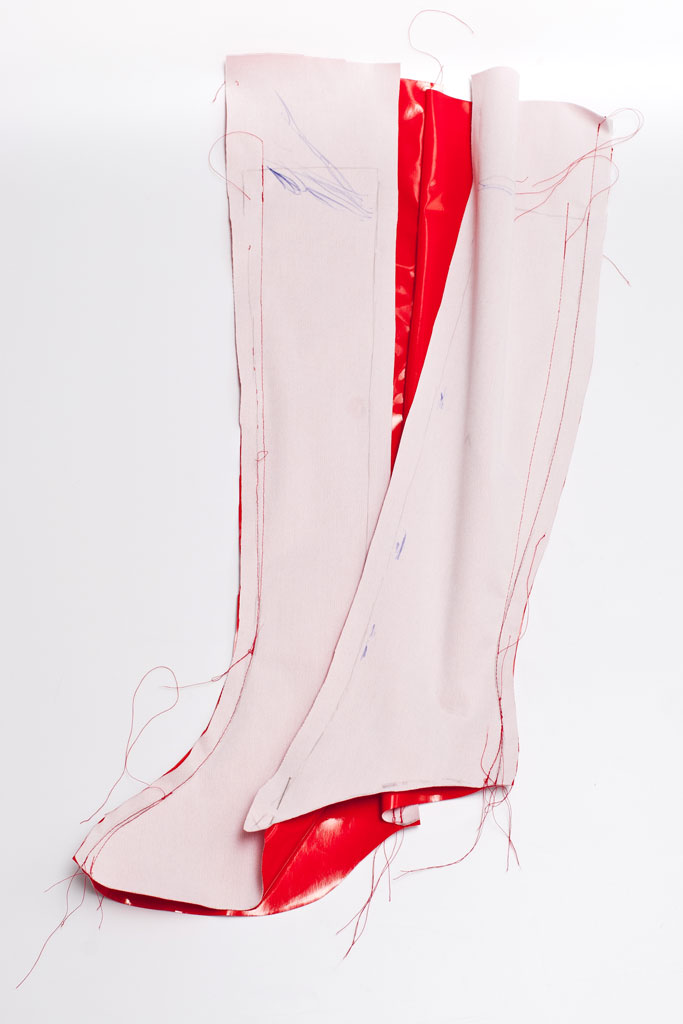
Cut the fabric
Cut each piece x2 – mirrored, of course, for the left and right boot.
Add at least 1–1.5cm (3/8″– 5/8″) seam allowance on all seams. I usually add more for thigh-high boots so that I have enough material to adjust the fit, especially if my fabric doesn’t stretch.
How much allowance you add at the top depends on how you want to finish it. You can fold over the fabric edge and stitch a wide hem, for example. I’ll show you a few alternatives at the end.
I do not add an allowance on the bottom where the fabric will be flush with the sole. The raw edge will be glued onto the base shoe.
If you would prefer to make a detachable boot cover instead, do add a small seam allowance (1cm / 3/8″) at the bottom.
Sew the cover
Close the seams with a straight stitch. (If you want to install a zipper: see below.) If your fabric is very stretchy (like spandex), baste the seam first, with long straight stitches. Then once you’re sure the boot cover fits, use an overlock or stretch stitch to get a sturdy seam.
When using vinyl or pleather, be very careful not to put pins or stitches anywhere except the seam allowance. Needles punch holes in the material that will be visible later. If I’m not yet sure how my boot cover fits, I use more seam allowance and sew the cover a little wider, then take it in later.
Wrong sides out, pull the cover over your leg and over the base shoe. It should be stretched taut and not bulge out. If it’s too loose, take in the seams as needed, or add an extra dart (e.g. on the toe box) to make the fabric hug the curves of the shoe.
Try on the boot cover Take in the seams until it fits
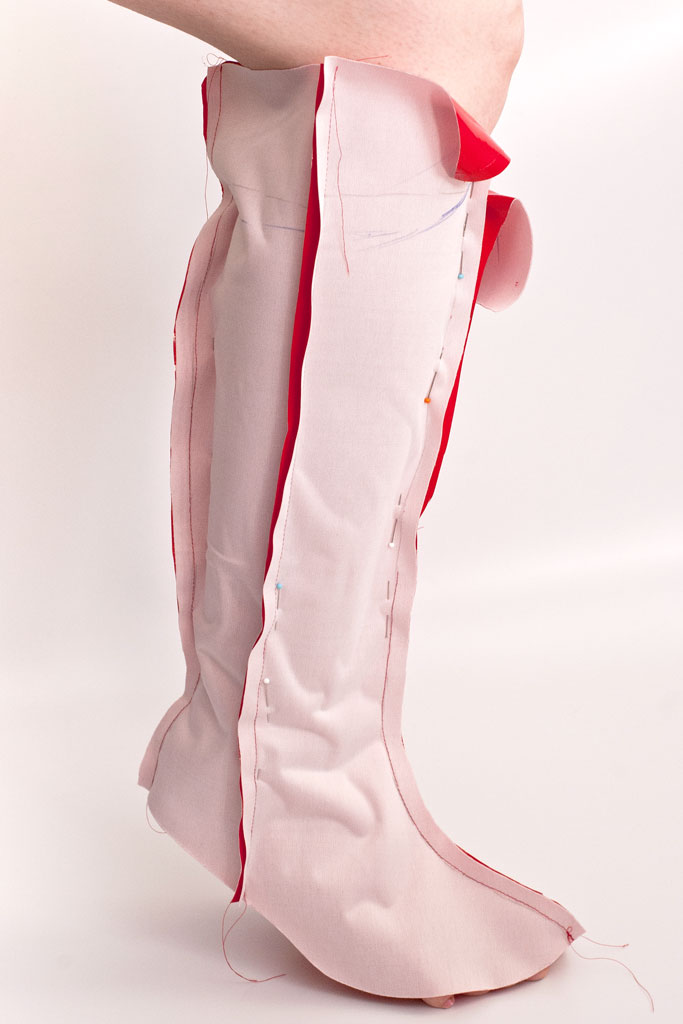
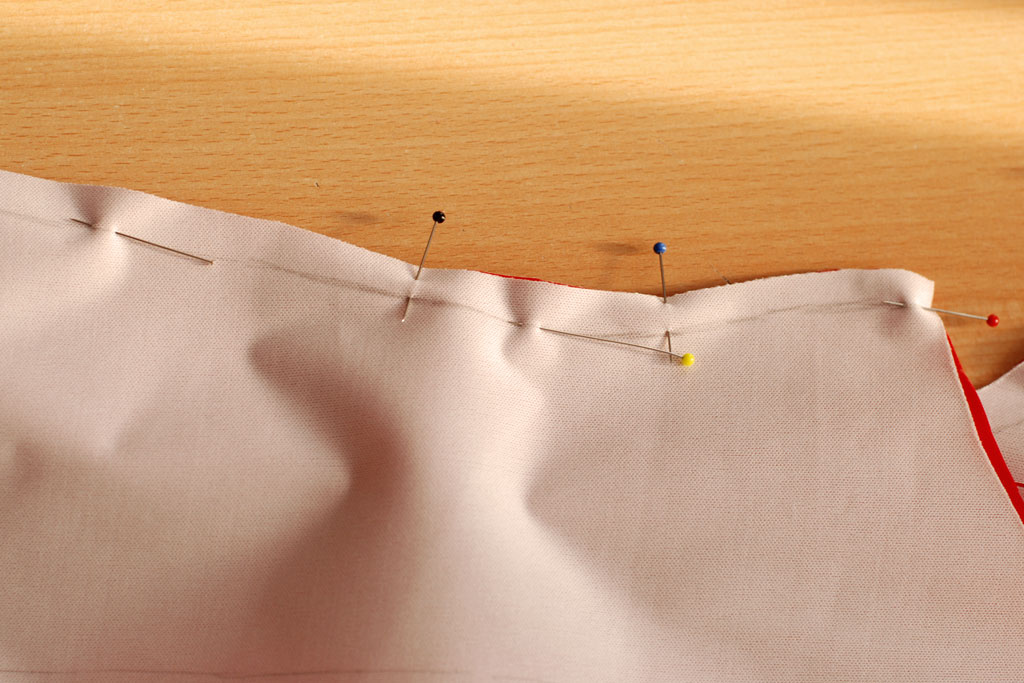
Fitting boot covers can be tricky if you’re using stiff fabric that does not stretch very much. If you see the fabric pulling and making creases, unpick the seams and pin the pieces back together on your leg until the cover fits and the seamlines run straight.
Clip and notch the seam allowances to make the fabric lay flat inside the curves. Press the seams and turn the cover right side out. (Careful with vinyl or pleather: use low heat and a pressing cloth! Never place the iron directly on the fabric or it will melt.)
Test the fit one last time. I usually put on the boot cover first, then put on the shoe, and pin the boot cover to the shoe so that it does not ride up. I then stand in front of a mirror to check the fit, stretching and bending my leg to make sure it fits snugly, but does not inhibit my movement.
Attach the cover
To attach the cover to your base shoe, you can either glue it on, or create a detachable cover that allows you to re-use the base shoe.
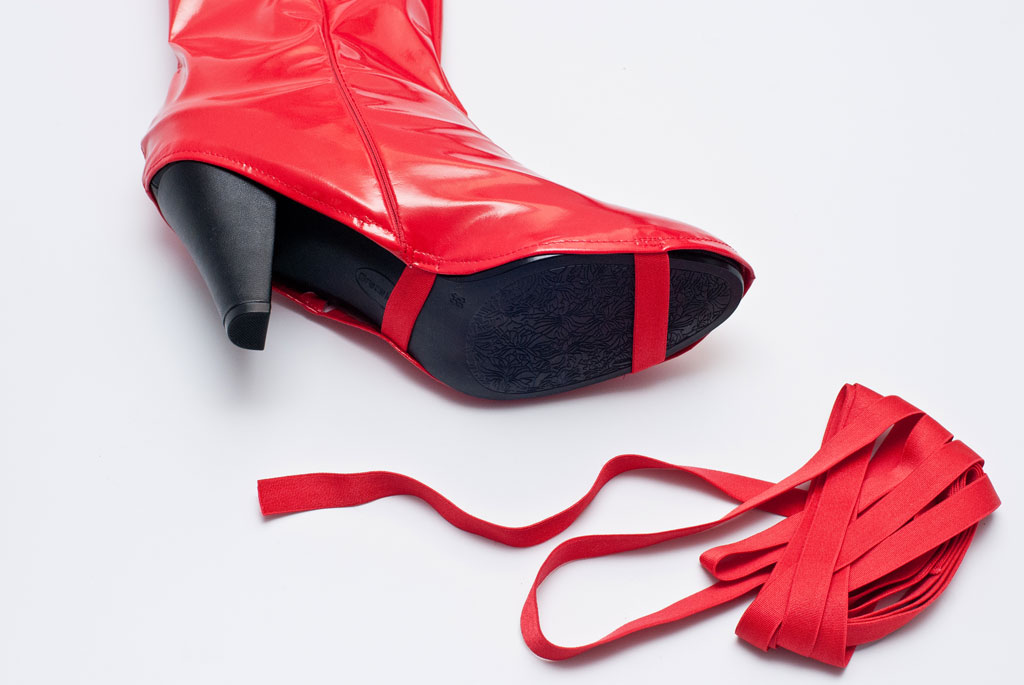
For detachable boot covers, clip and hem the bottom edge with a straight or elastic stitch. Try it on over the base shoe, and cut two strips of elastic band wide enough to fit under the sole. Pin and sew it to the covers. I place one piece of elastic band under the ball and another under the arch. They must be stretched so that the cover is pulled taut over the base shoe.
For a detachable boot cover, finish the bottom edge with a narrow hem Elastic bands help keep the fabric in place
Detachable boot covers are a quick and cheap solution if you don’t want to sacrifice your shoes for a single costume, but they will never look perfect because they can still shift and slip when you wear them.
My preferred method is to attach the cover permanently with glue, as seen in my basic shoe cover tutorial.
Use a wooden spatula or a piece of cardboard to spread out the glue Use your fingernails to press down the fabric edge


Shoe and leather glue, foam glue, and contact cement work well with most materials. Always test your glue on a fabric scrap, especially when you are using man-made fibers like vinyl. The glue should be somewhat transparent and elastic when dry.
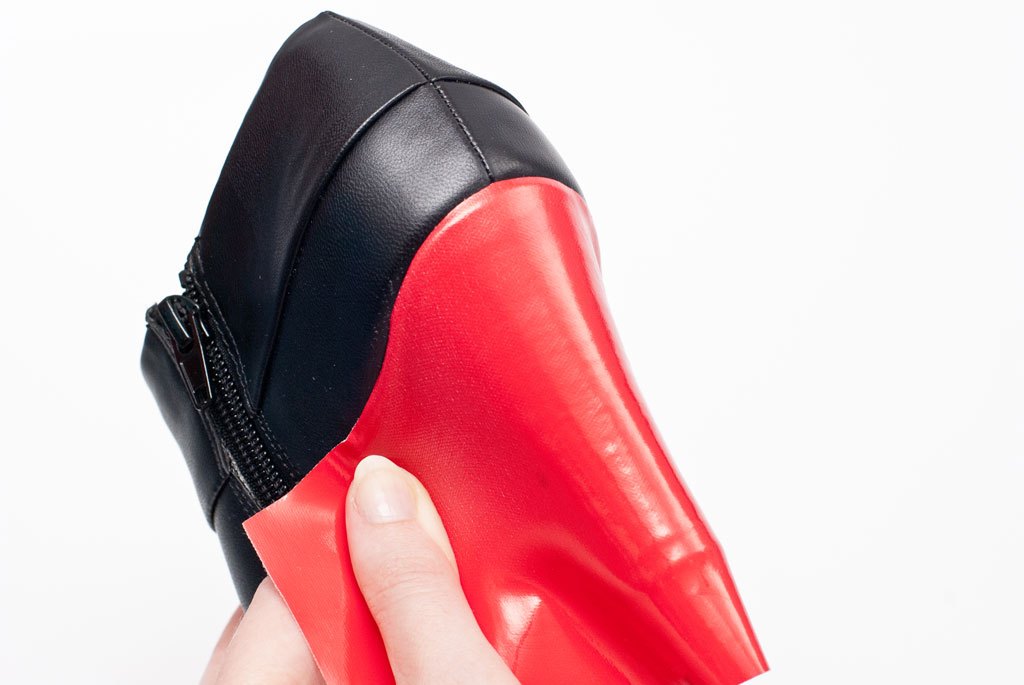
Start attaching the fabric cover on the front and sides. Use the seamlines as a guide when placing the fabric on the shoe. Use a wooden spatula or a strip of cardboard to spread out the glue evenly to a small portion of the shoe. Let it dry until it is barely sticky. You do not want to press your fabric into wet glue and risk it seeping through the fabric, or squishing out at the bottom!
Pull the fabric over the glued portion and gently press it down. The bottom edge of the fabric should end exactly where the sole starts. Use your fingernails or a pointy tool to press down the fabric edge. Fix the edges with sewing pins until the glue has dried. Work on the second boot while the glue dries, and continue attaching the fabric bit by bit.
Glue on the fabric cover and fix the edges with pins until the glue has dried
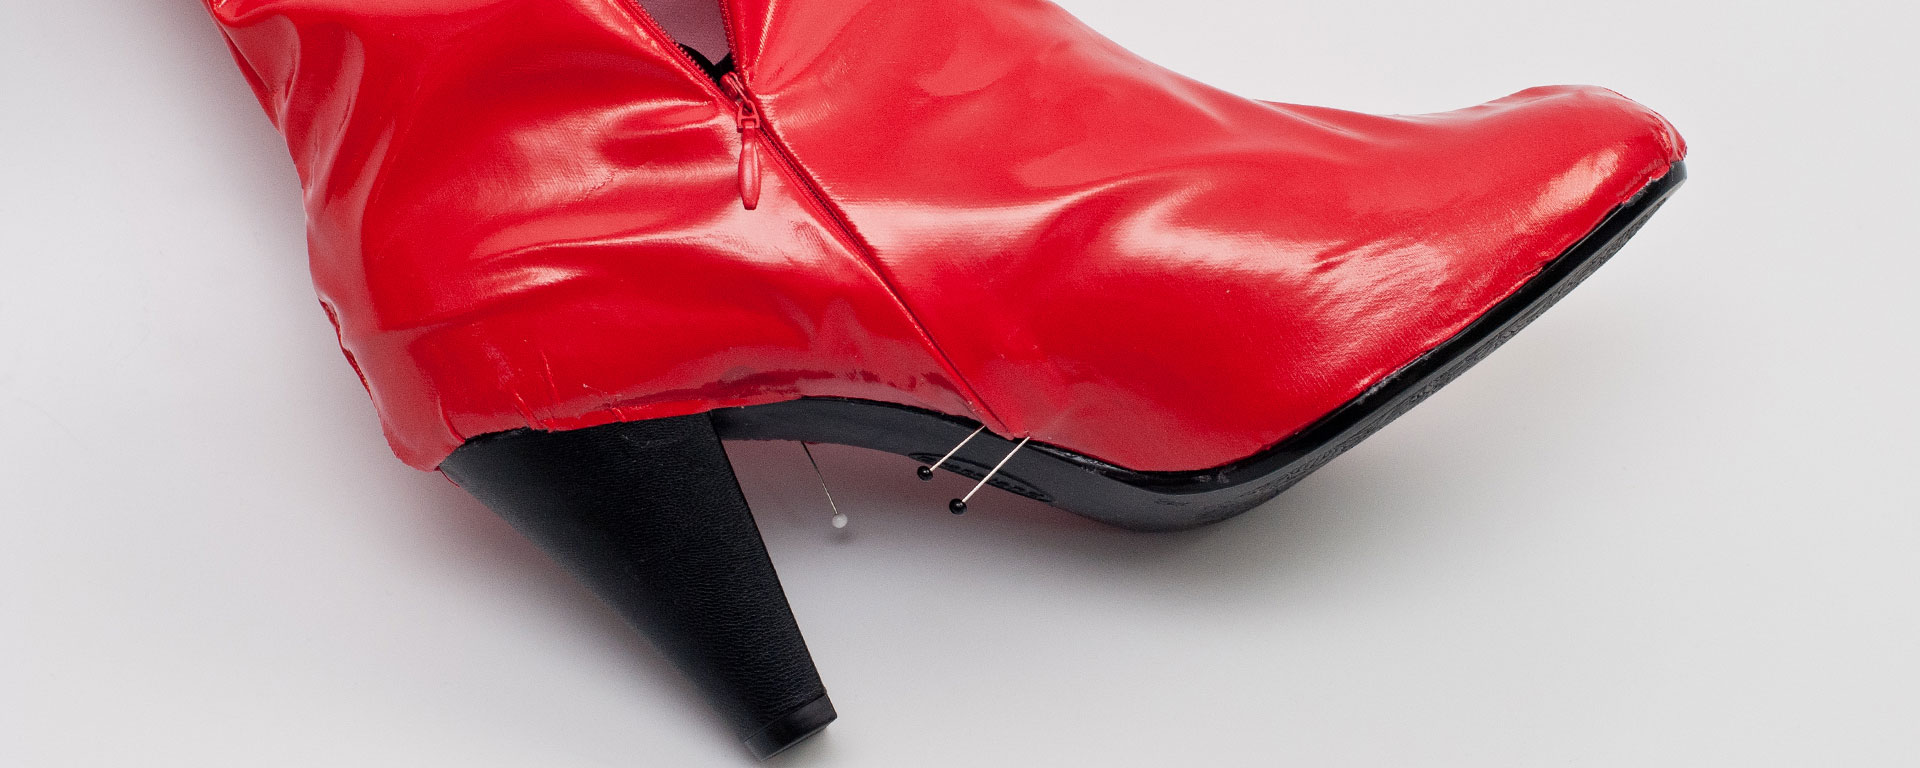
Install a zipper
Unless they’re made out of very stretchy fabric (like spandex or jersey), boot covers need a zipper so you can slip in and out. Even on a stretchy boot, a zipper makes it easier to fit your foot through the „bottleneck“ at the ankle.
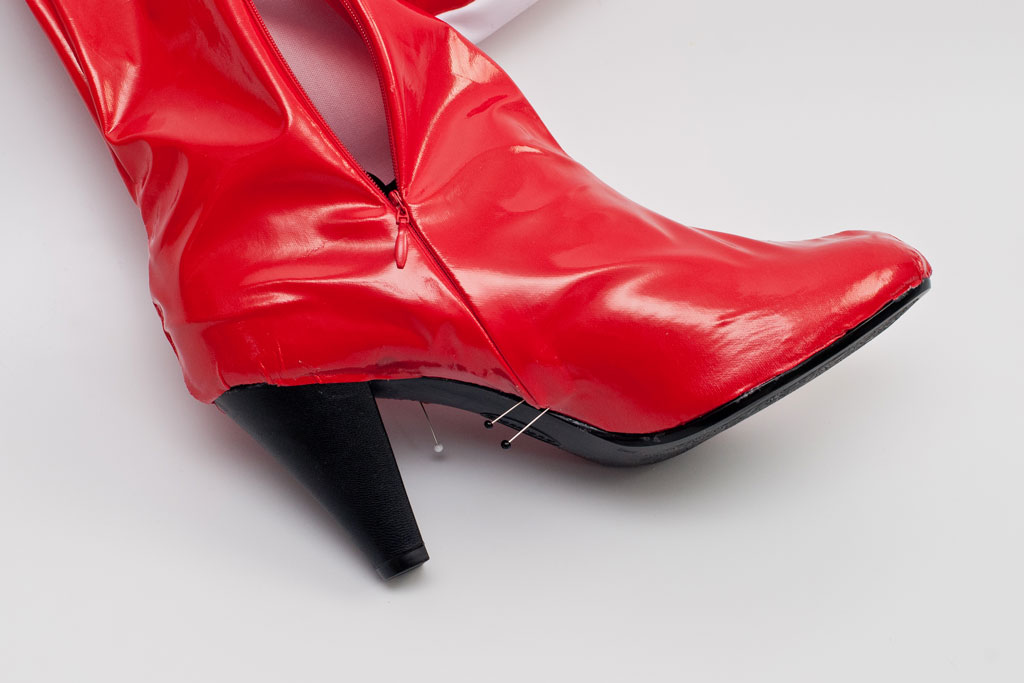
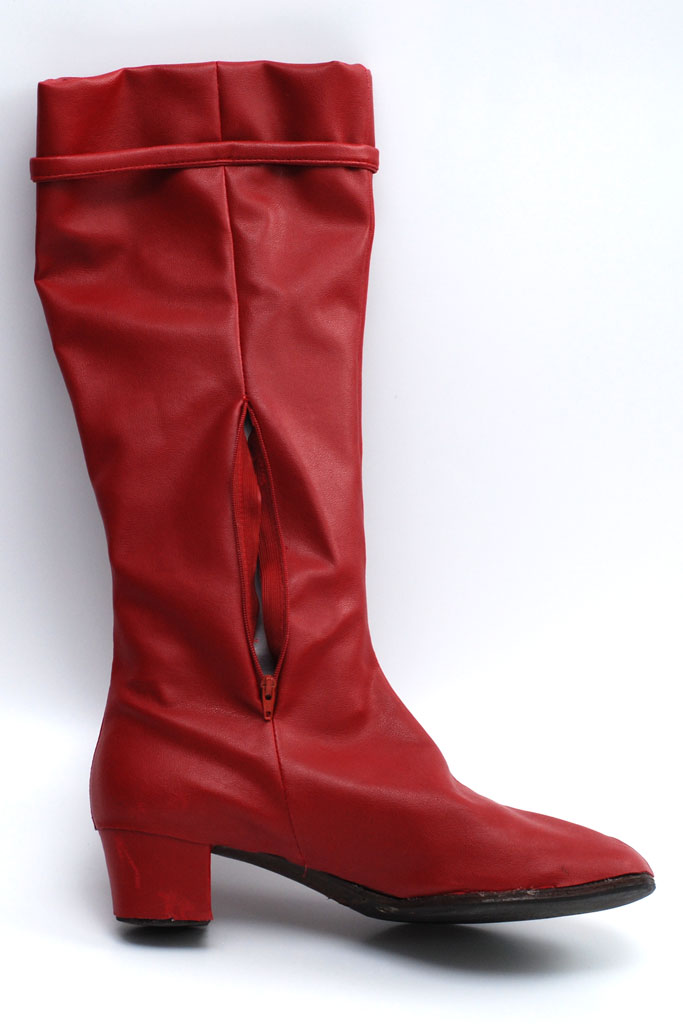
If you’re using a base boot that already has a zipper installed, and the zipper is long enough for your cosplay boot, you can simply leave it in. Leave the corresponding seam on your boot cover open, then fold over the seam allowances and glue them to the base boot all along the edge of the zipper (while you attach your boot cover to the base shoe, see previous step).
This boot already had a long zipper, so I just left an opening in the fabric cover
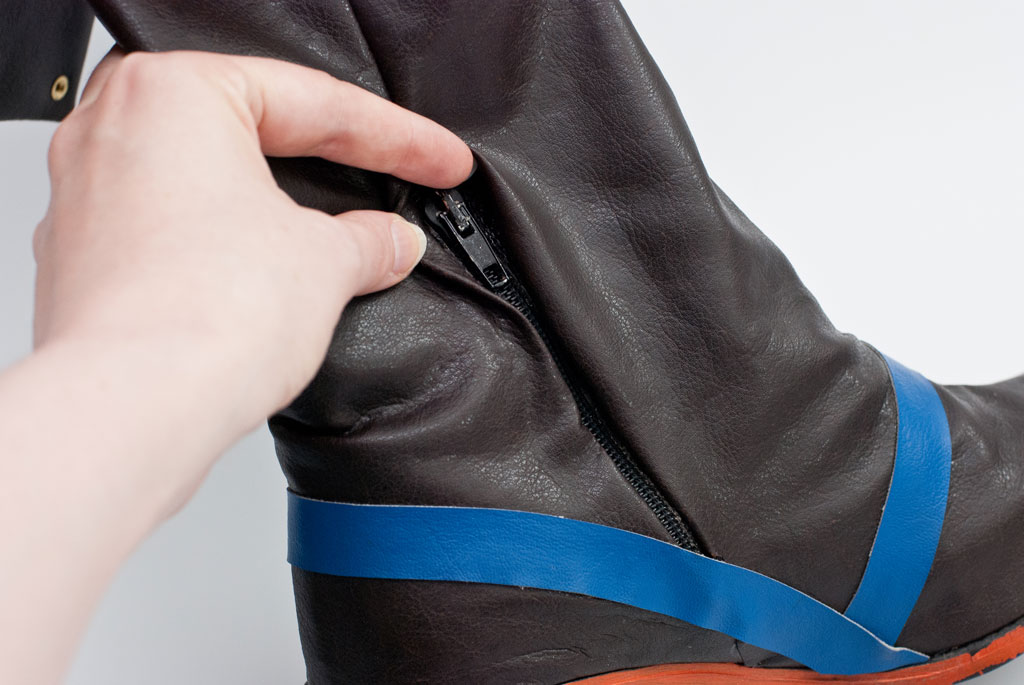
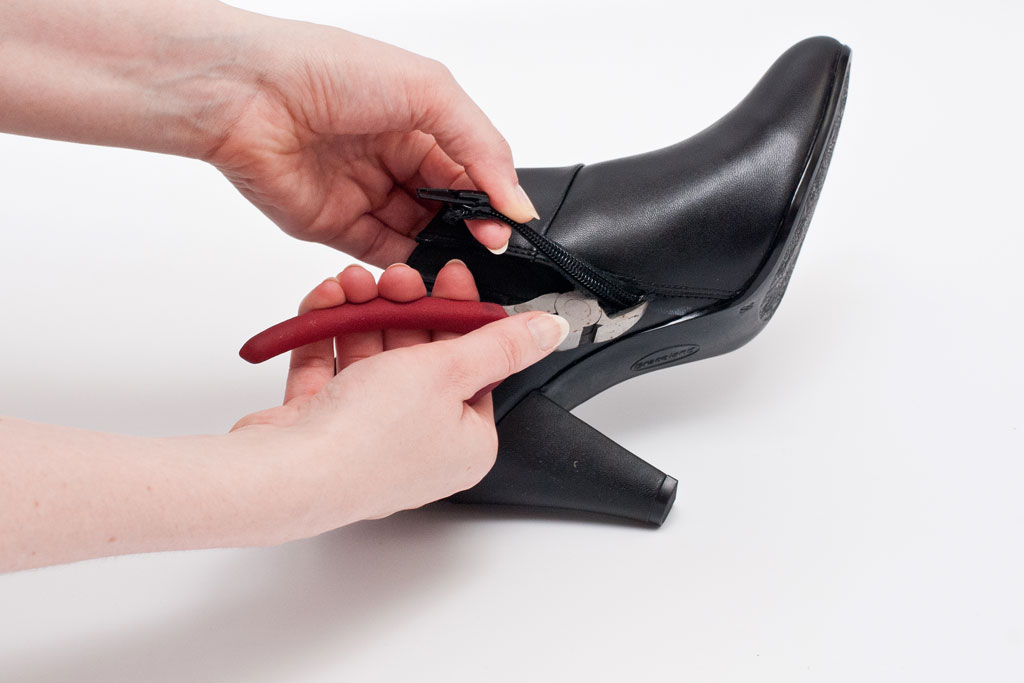
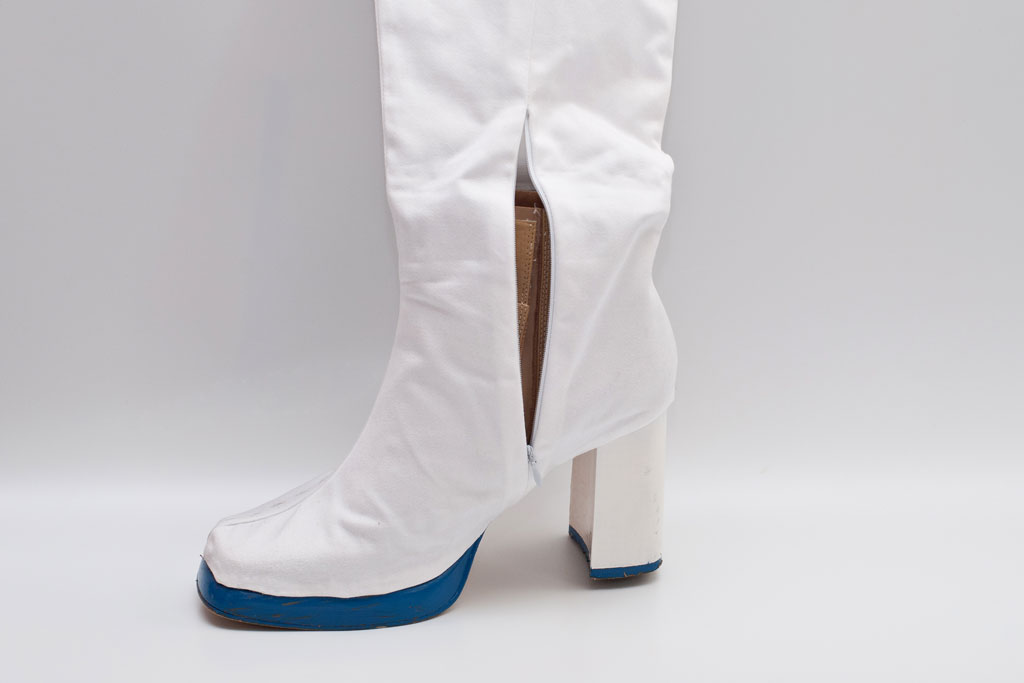
More commonly, my boot cover will be longer or tighter than the original shoe, so I remove the zipper with a seam ripper, scissors or wire cutter. The slit in the base shoe can be left open. I then install a new, longer zipper in my boot cover while I sew it.
Remove the old zipper and install a new one Invisible zipper in the side seam
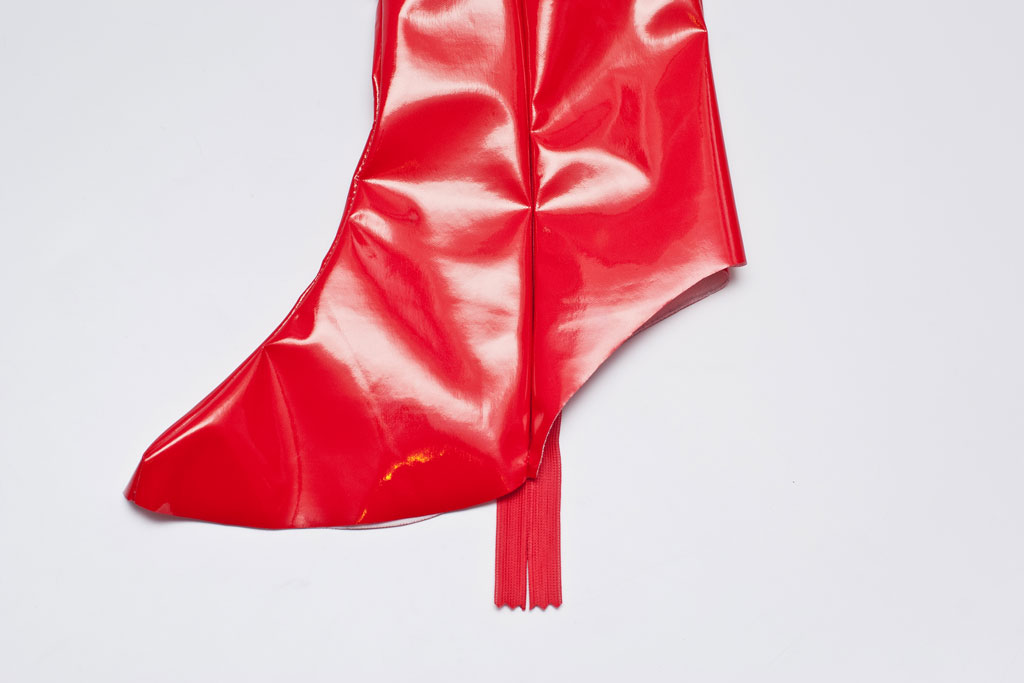
I prefer invisible zippers because they are, well, almost invisible! They require a special zipper foot, and I suggest that you install them at the very beginning, before you close any of the other seams. I place them on the inner leg seam.
The zipper should go from near the sole, across the ankle, to the calf. For boots with high shafts, you do not need to install a zipper over the full length of your boot cover. You can close the seam above the zipper. That makes it easier to get a clean top edge.
Boot with a short zipper in the side seam Here you can still see the slit in the base boot from the old zipper
Tip: If you don’t want the zipper pull dangling out in the middle of your leg, remove the pull tab (with a wire cutter) and use a paper clip instead.
Finish the top edge
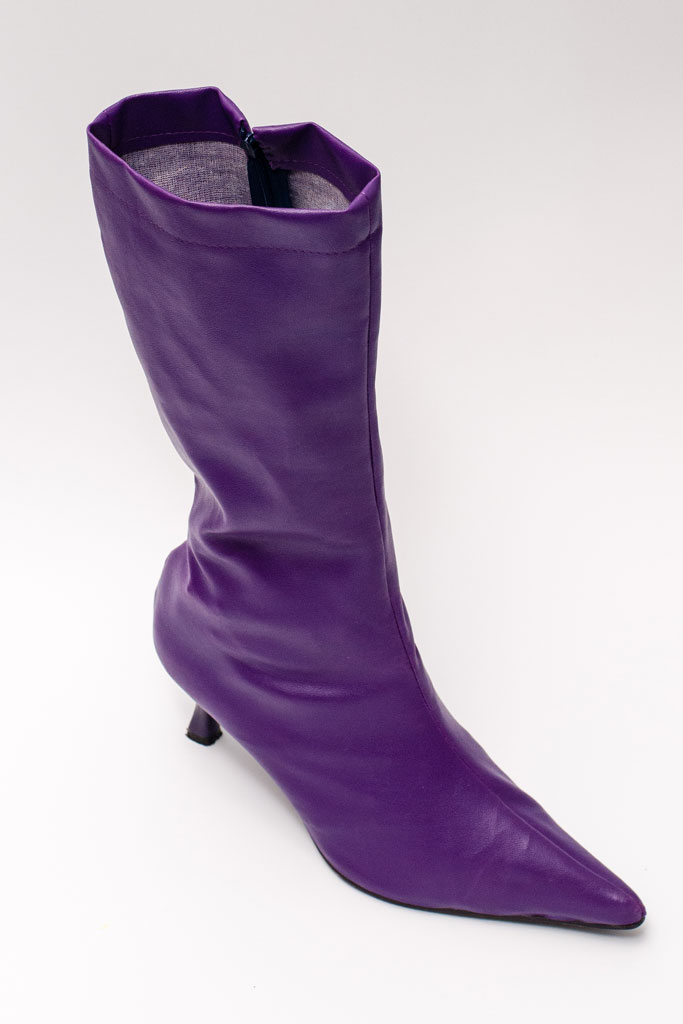
The easiest way to finish the top of your boot is to fold over the hem allowance once or twice and stitch a wide hem. This will work fine for lower boots made of sturdy material.
Purple pleather boot for Mai Valentine (YGO) with a wide hem at the top
More often than not, however, you’ll find that your boot covers ride down when you walk, so you have to constantly pull them up again. This is very annoying when it happens at a convention and it can ruin the clean look of your costume.
There is more than one solution to this problem: you can sew in a silicone-backed elastic band to make the boot stick to your leg, attach it to your tights, or reinforce the shaft. I’ve put together a bonus tutorial to show you how!
If the top edge isn’t straight, finish it with bias tape or facing (a piece of contrasting or matching fabric applied to the edge).
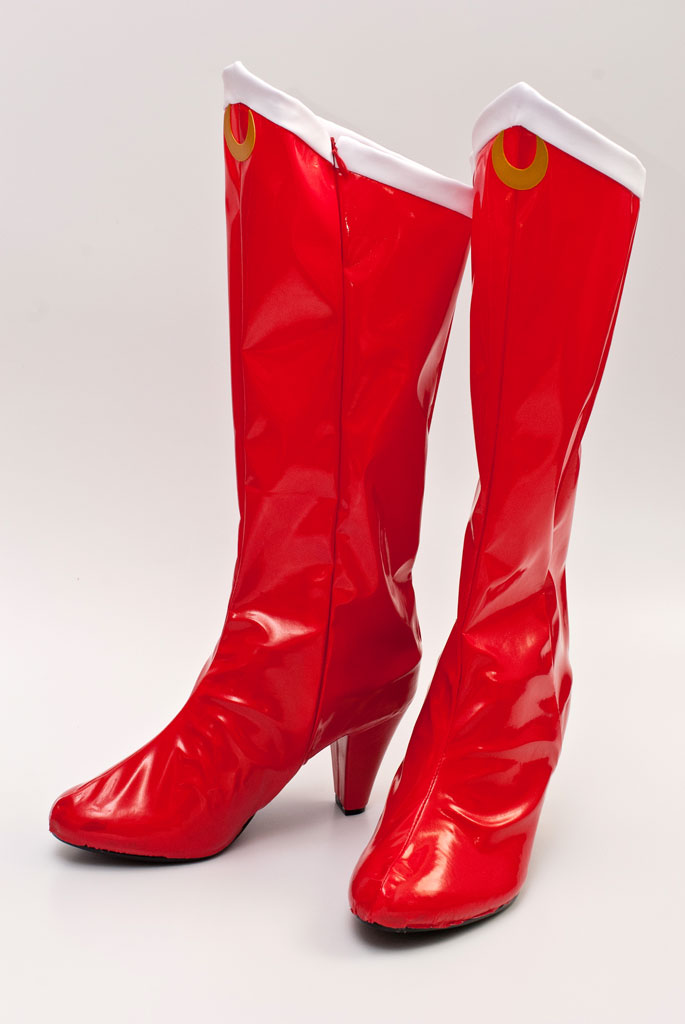
Sailor Pluto boots Sailor Moon boots
If you want to add embellishments like studs, appliqué, bias binding or decorative seams, do as much as you can before you glue the boot cover to your base shoe. That will make your life much easier than if you try to hand-sew things to the shoe directly.
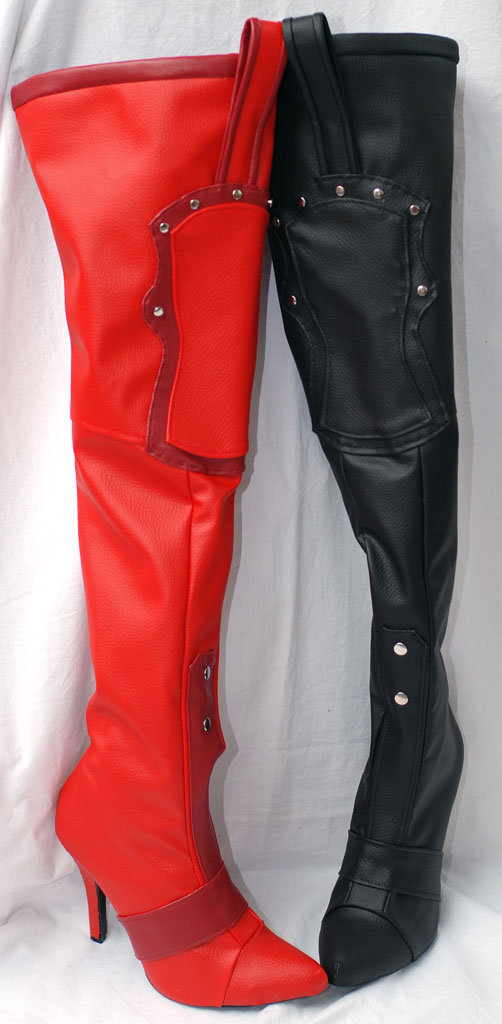
For this Harley Quinn boot commission, I finished all the sewing and embellishment work before I assembled the boots. The only thing I added at the end was the strap running across the toe box, which was machine-sewn as a separate piece, and then attached to the finished boot by hand.
Finish the heel
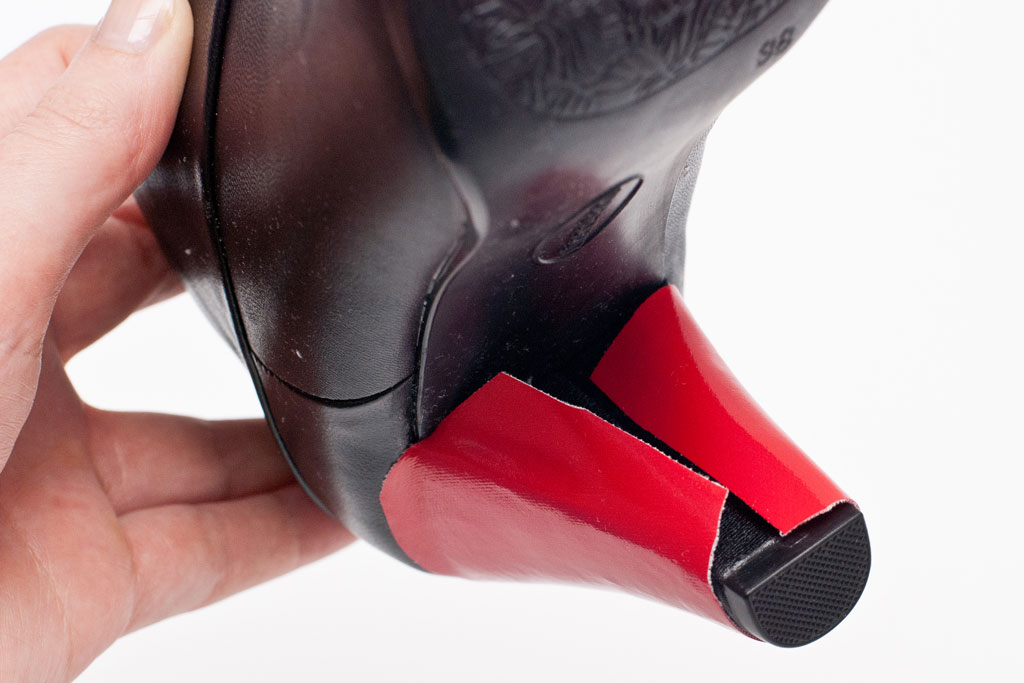
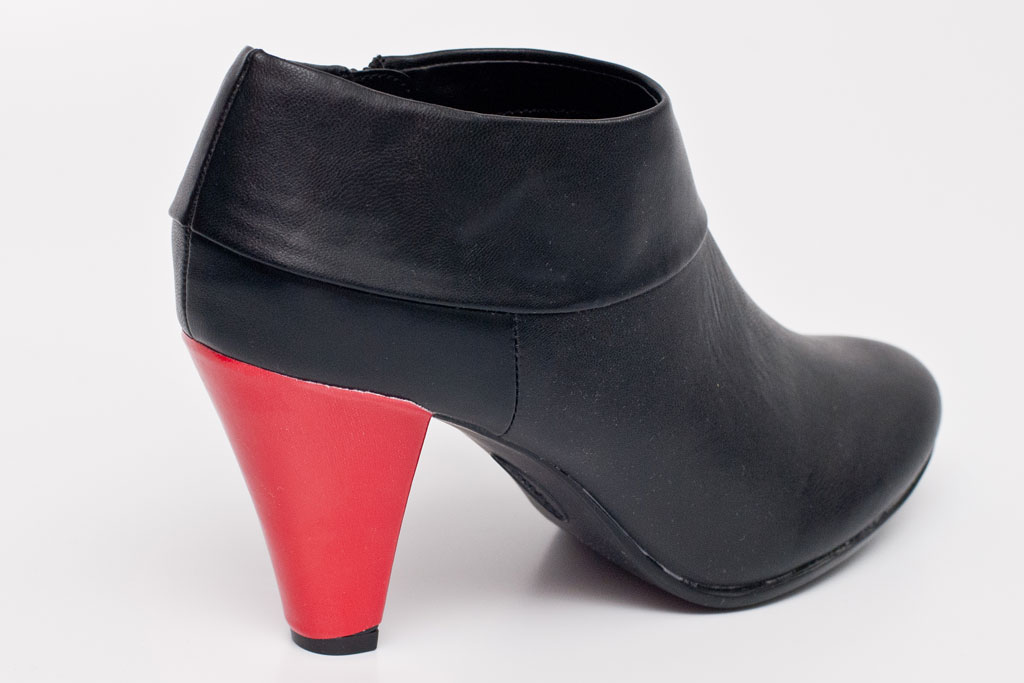
Heels can be covered in fabric to match the rest of the boot. You do not need a pattern for this, just take a piece of stretch fabric and wrap it around the heel. Trim the fabric so that the raw edges are flush with the sole.
Cover the heel with a piece of stretch fabric Wrap the fabric around the heel The seam is placed in the front where it is least visible

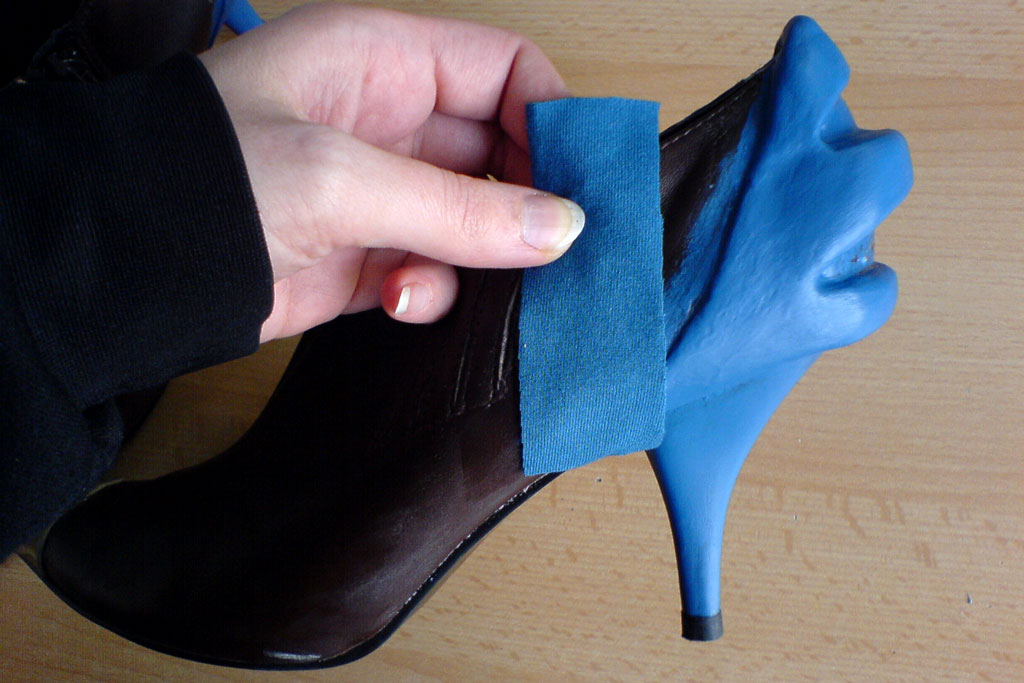
You can also paint the heels with acrylic paint to match your reference. Roughen up the material with sandpaper to make the paint stick better, and coat it with clear varnish. Keep some of the paint in a small container for touch-up jobs after the con.
For Satsuki, I modified and painted the base shoe before covering it with matching fabric
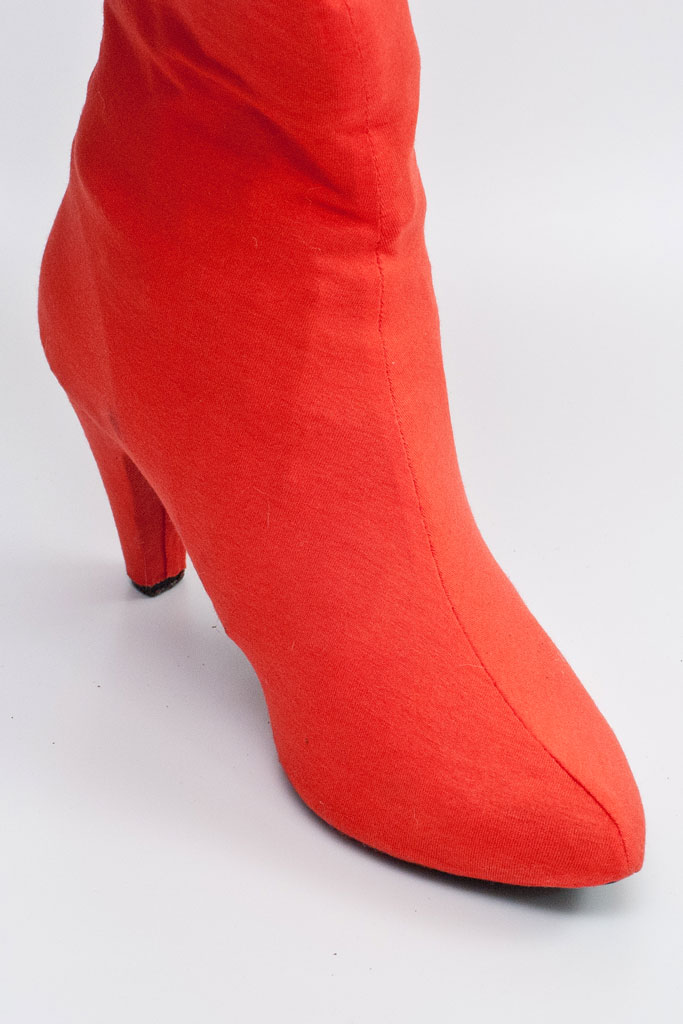
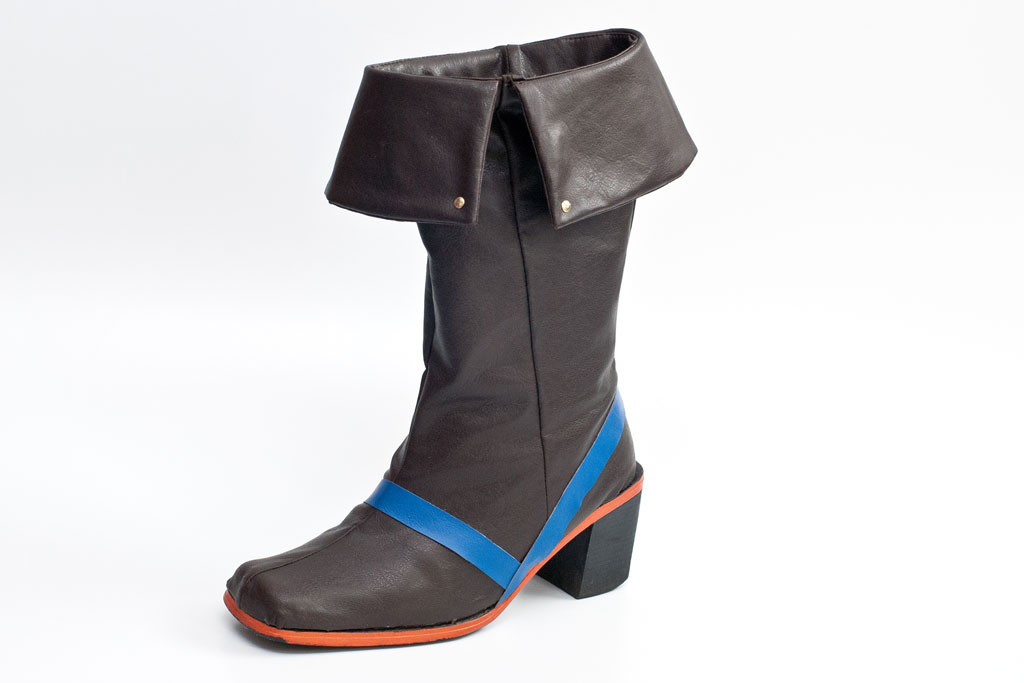
Hooray, your boot covers are finished! Cosplay boots can be made out of various materials. I prefer stretch fabrics that fit snugly around my base shoe and leg. Stretch pleather and vinyl look great, they are sturdy and dirt can just be wiped off with a damp cloth.
Jersey and spandex also make good boot covers, they are very stretchy so it is easy to achieve the perfect fit. Just make sure the fabric is not too flimsy and see-through.
Jersey is thin but very stretchy, so it is easy to adjust to your base shoe Sturdy boot made with stretch pleather
Are you having trouble getting your boot covers or stockings to stay up when you wear them? Check out my bonus tutorial!
Ein Gedanke zu “How to Make a Boot Cover”