Can’t find the perfect footwear to match your costume? Learn how to modify your shoes by covering them in a fabric of your choice!
In this tutorial, I’ll show you how to create and attach a simple shoe cover for slippers or pumps. For boots, there are a few extra steps that you’ll learn in this boot cover tutorial.
What you need
- base shoe
- (stretch) fabric
- matching yarn
- pattern paper or silk paper
- fabric and paper scissors
- pencil or marker
- glue (leather glue, foam glue or contact cement)
- acrylic paint (optional)
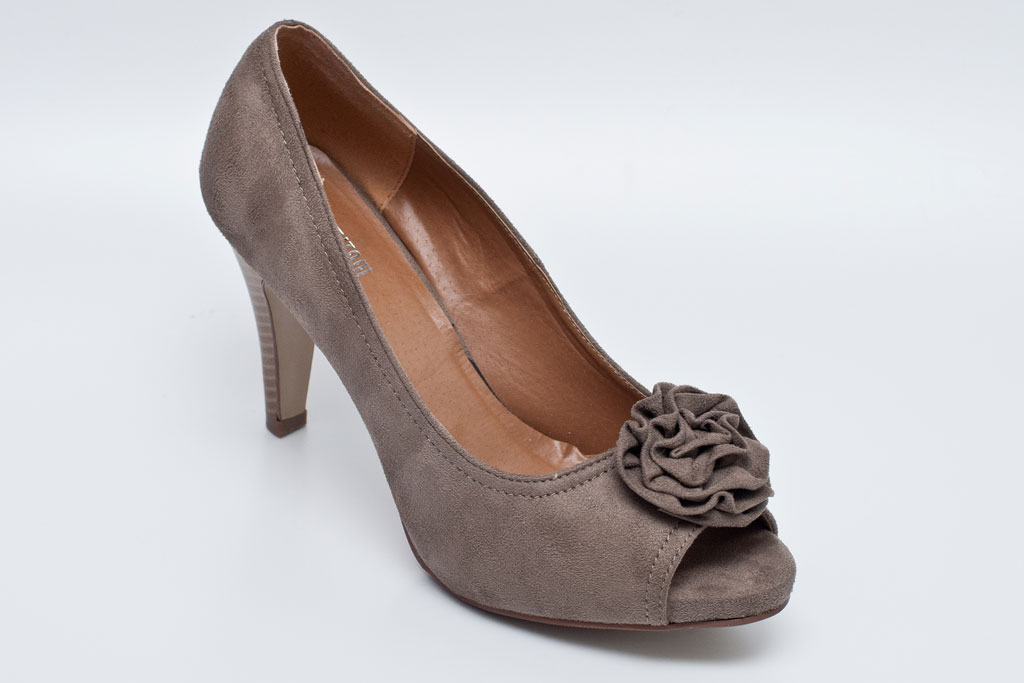
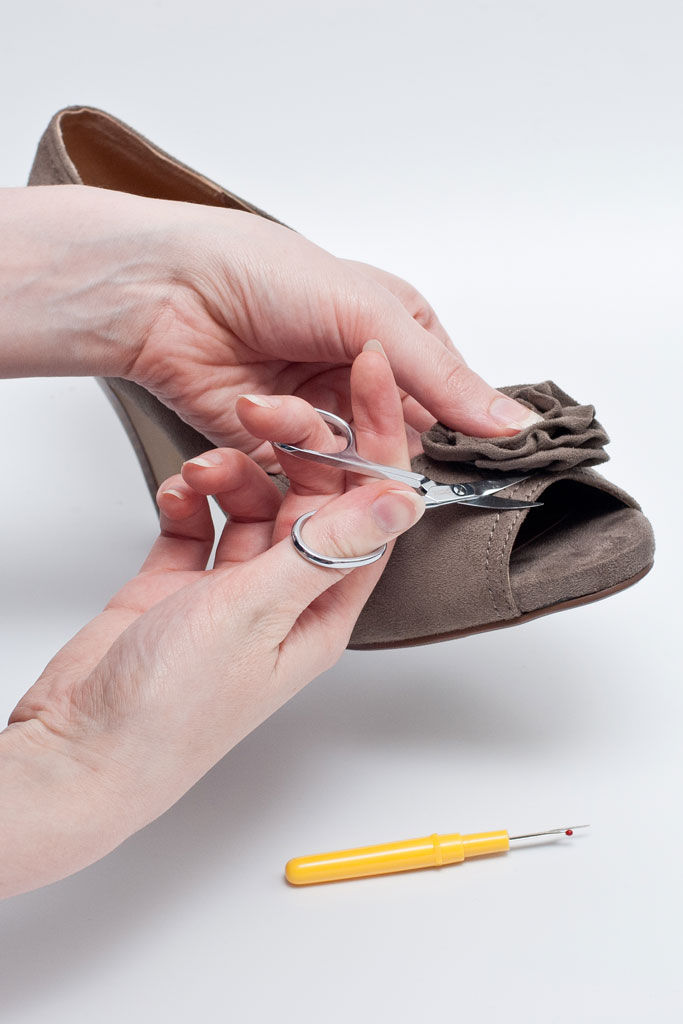
Pick your base shoe: the heel and overall shape should match your reference. The color doesn’t matter. If your base shoe has decorative elements like buckles, studs or a flower appliqué like mine, you will need to remove them with scissors or a seam ripper before you continue.

Remove and decorations… …that will not be needed
You can use any fabric to make a shoe cover. However, stretch fabrics are more forgiving and easier to fit around your base shoe. In this tutorial, I am using a lightweight cotton stretch twill, the same that I used for Makoto’s skirt. 2-way stretch faux leather or vinyl also makes great shoe covers because it does not fray and is stain-resistant.
To estimate how much fabric you need, measure the height of the shoe or boot from sole to top edge, and add a few cm / inches of seam allowance. This is your yardage of fabric that you need to buy. If your fabric is narrower than 115cm or 45″, double the yardage to be on the safe side.
Draft the pattern
Take either one of your base shoes, a pen and a scrap of pattern paper or silk paper. The paper must be thin and somewhat transparent so you can see and feel the seams and edges through the paper. Press the paper against the shoe and trace the outline of the shoe, as well as the seams. You can pin the paper to the shoe to hold it in place while you draw.
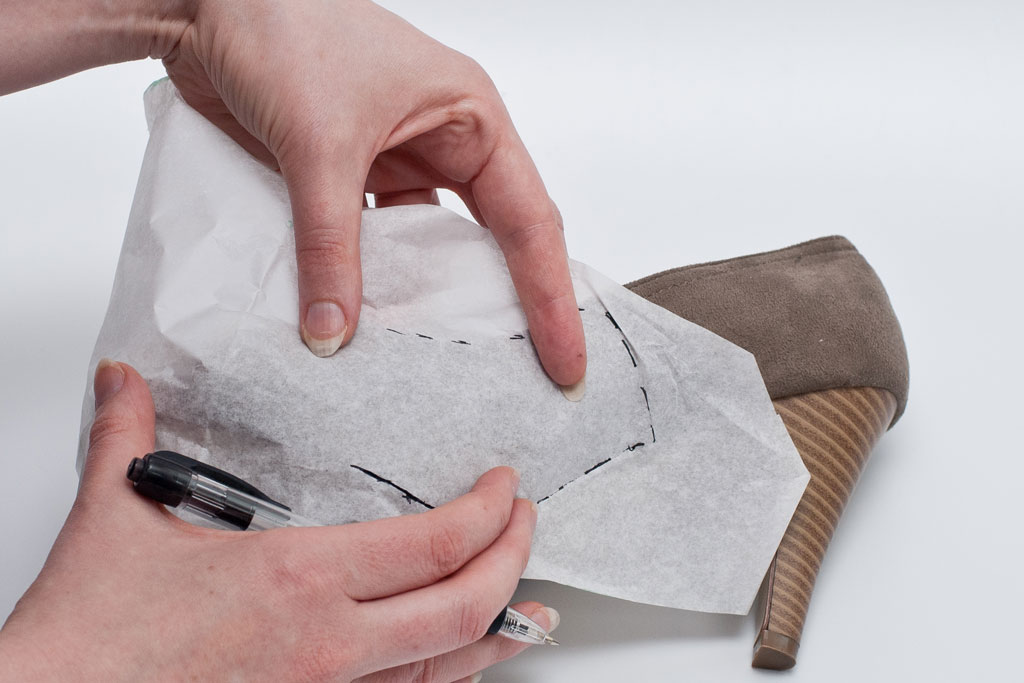
Split the pattern into multiple pieces if needed to adjust to the curve of the shoe. Shoes always have at least a center back seam to fit the curve of the heel.
Cut the fabric
Cut each piece x2 – mirrored, of course, for the left and right shoe.
Add 1–1.5cm (3/8″– 5/8″) seam allowance on all seams and at the top.
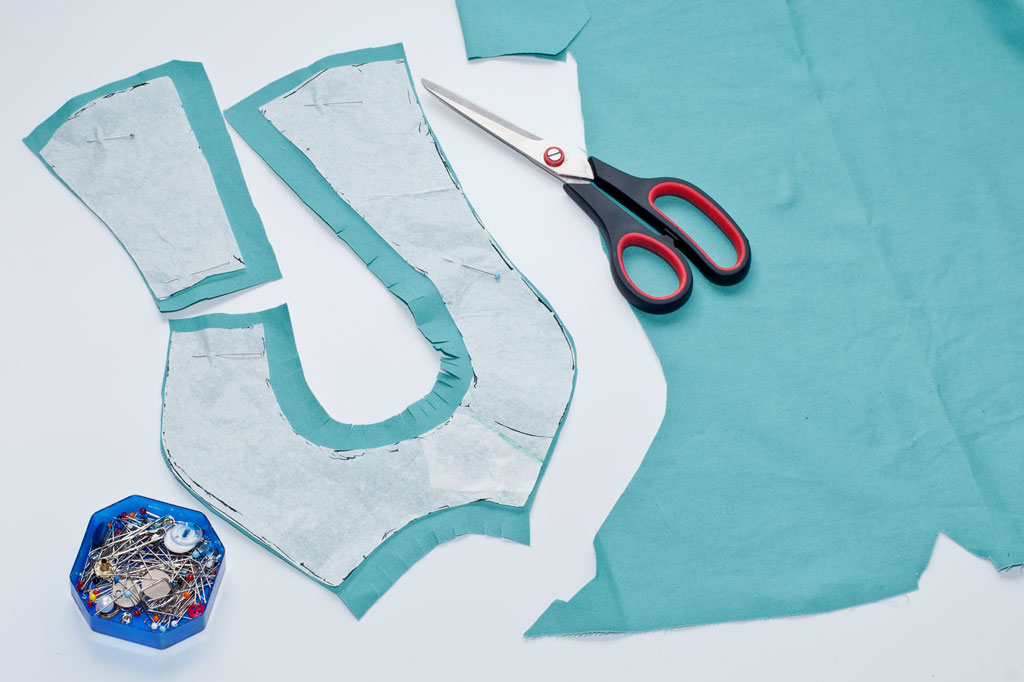
The fabric edge will be folded over the top edge of the shoe for a clean finish. I do not add an allowance on the bottom where the fabric will be flush with the sole. The raw edge will be sealed with glue later. So unless your fabric frays heavily, it is not necessary to add seam allowance on the bottom.
Sew the cover
Close the seams with a straight stitch. If your fabric is very stretchy (like spandex), baste the seam first, with long straight stitches. Then once you’re sure the shoe cover fits, use an overlock or stretch stitch to get a sturdy seam.
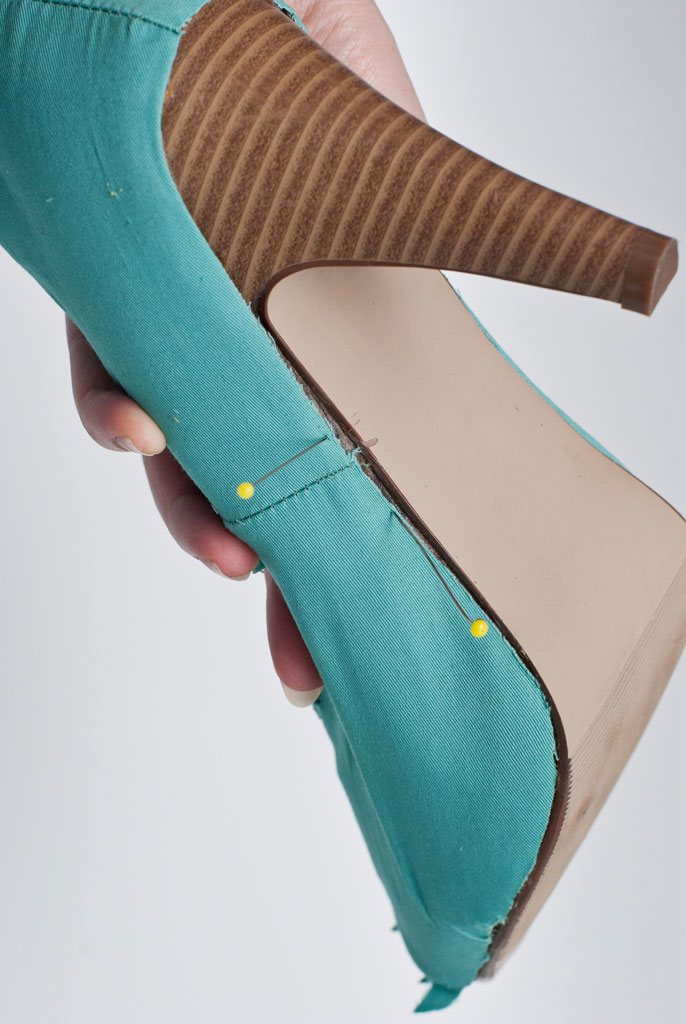
Wrong sides out, pull the cover over your base shoe. It should be stretched taut over the curves of the shoe and not bulge out at the bottom. If it does, take in the seams as needed, or add an extra dart (e.g. on the shoe cap) to make the fabric hug the curves of the shoe.
Take in the seams if needed… …to improve the fit
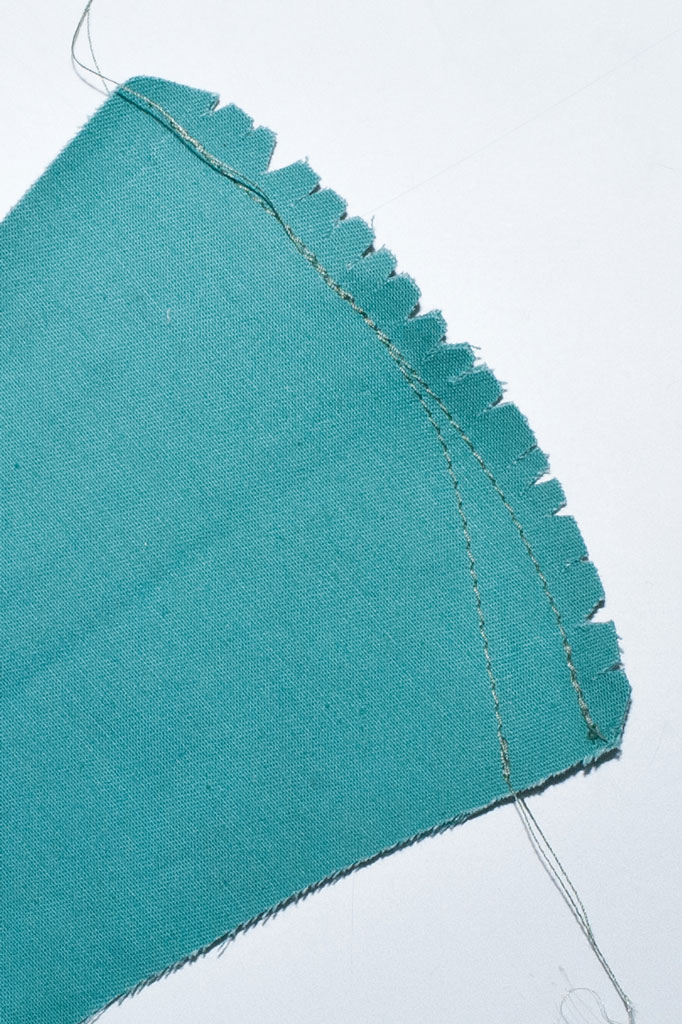

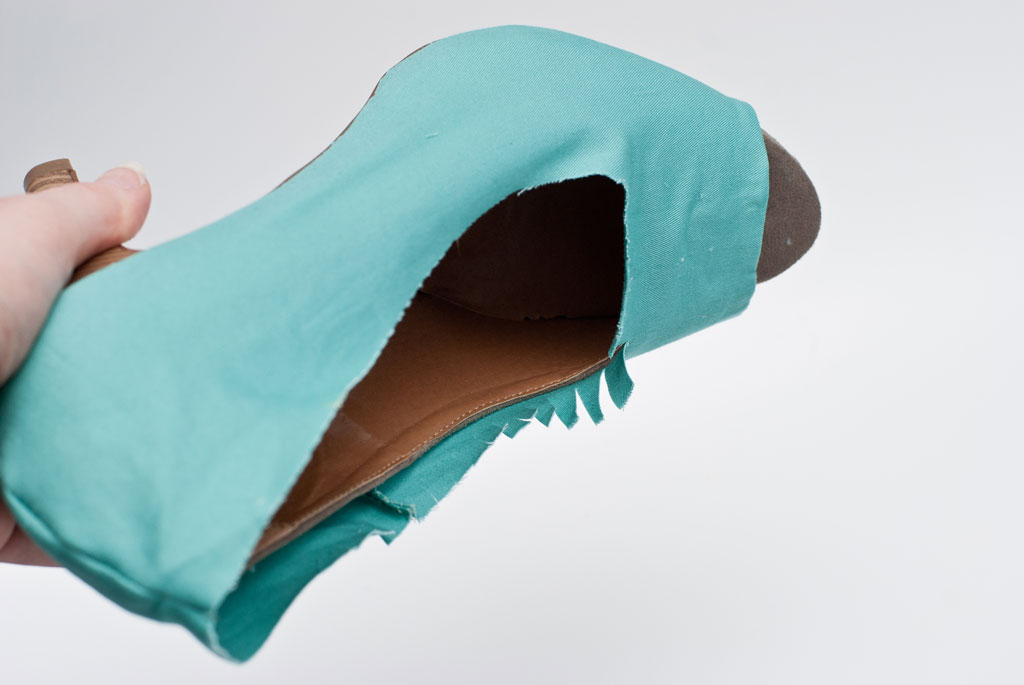
Clip and notch the seam allowances to make the fabric lay flat inside curves. Press the seams and turn the cover right side out. Test the fit one last time, making sure the fabric is stretched taut over the shoe and does not bulge out. The bottom edge of the fabric should end exactly where the sole starts. If the shoe cover is too long, clip the fabric until it fits perfectly.
Attach the cover
Now it’s time to attach the cover to your base shoe! This is best done with glue.
Note: if you would rather make your shoe covers detachable so you can re-use the base shoes, I’ll show you how in my boot cover tutorial (coming soon). Detachable covers work best with boots.
Shoe and leather glue, foam glue, and contact cement work well with most materials. Always test your glue on a fabric scrap, especially when you are using man-made fibers. The glue should be somewhat transparent and elastic when dry.
Start attaching the fabric cover on the front and sides. Use the seamlines as a guide when placing the fabric on the shoe. Use a wooden spatula or a strip of cardboard to spread out the glue evenly to a small portion of the shoe. Let it dry until it is barely sticky. You do not want to press your fabric into wet glue and risk it seeping through the fabric, or squishing out at the bottom!
Pull the fabric over the glued portion and gently press it down. Use your fingernails or a pointy tool to press down the fabric edge. Fix the edges with sewing pins until the glue has dried. Work on the second shoe while the glue dries, and continue attaching the fabric bit by bit.
Use a wooden spatula or a piece of cardboard to spread out the glue Use your fingernails to press down the fabric edge Fix the fabric with pins until the glue has dried


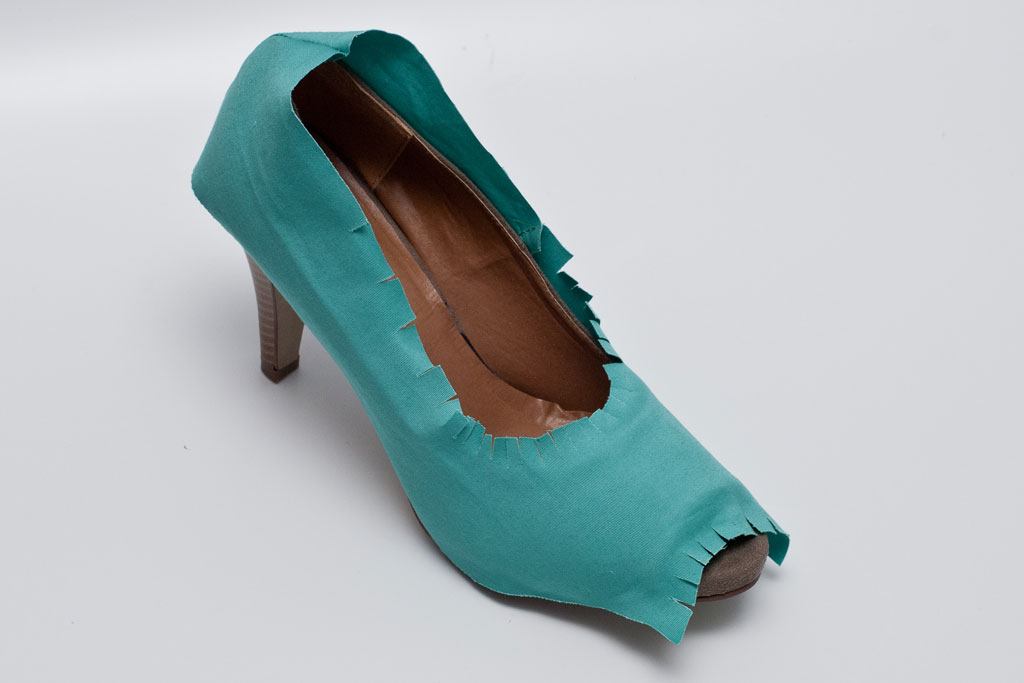
Clip the seam allowance along the top edge, so you can fold it neatly around curves and corners. Apply a bit of glue to the fabric and more glue to the inside of the shoe, wait until it’s barely sticky, then fold the fabric to the inside. This will give you a clean edge from the outside.
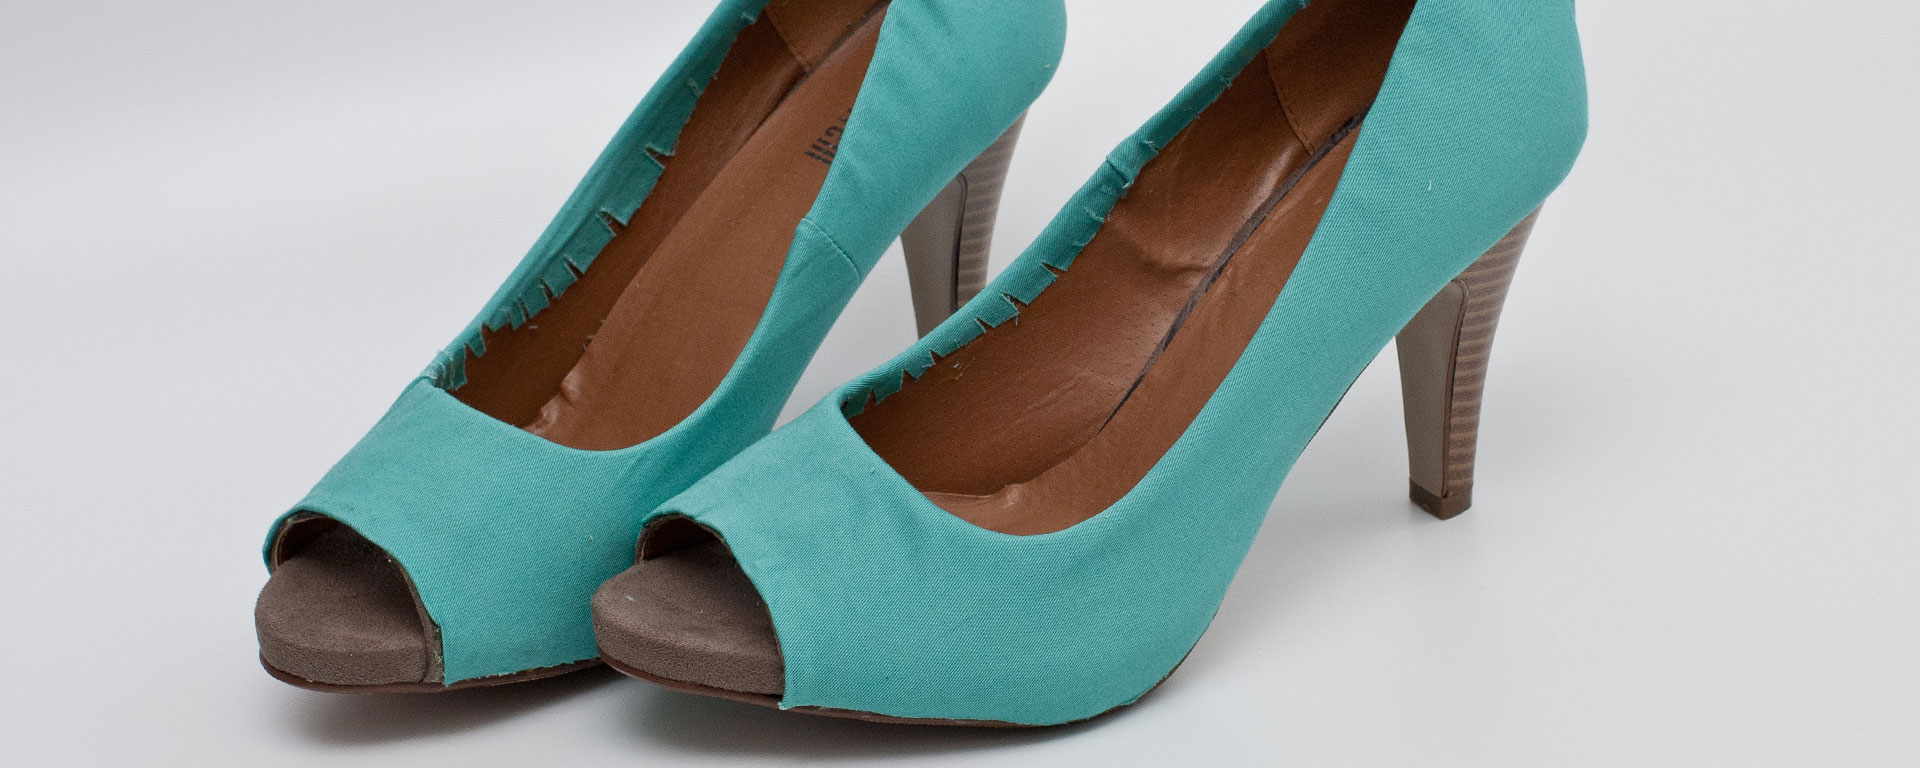
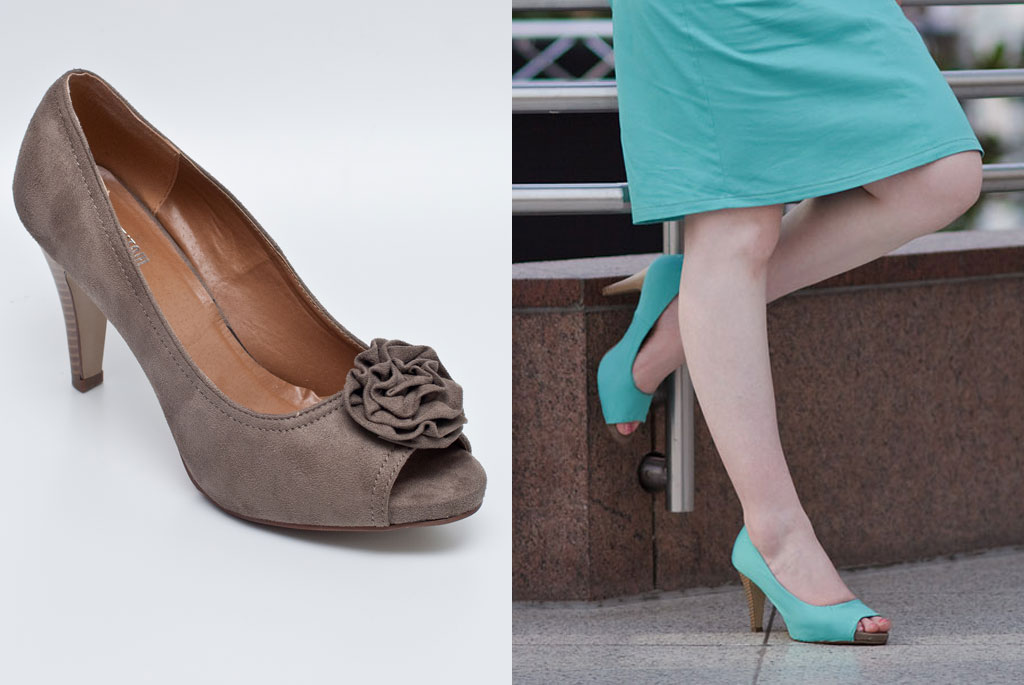
Clip the fabric edge in curves and corners Finished shoes with fabric cover
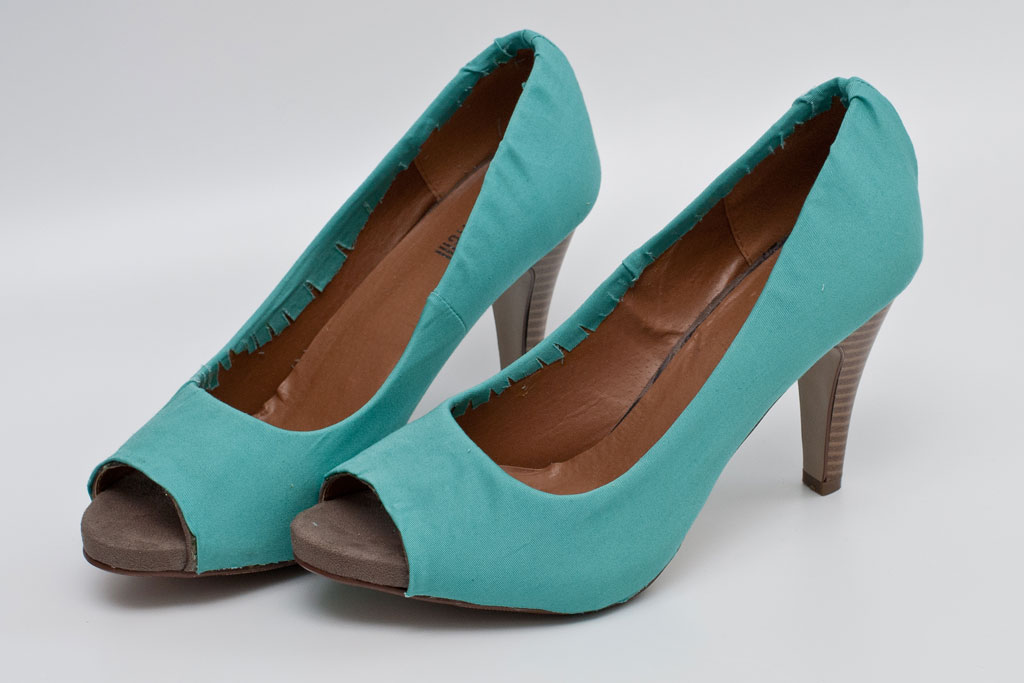
Casual Makoto with shoe covers to match the skirt – photo by MissKatashi

Finishing Touches
Check if the fabric edges are glued on cleanly so they won’t peel off when you wear the shoes. Use a small wooden spatula or a toothpick to fix any fraying edges with glue.
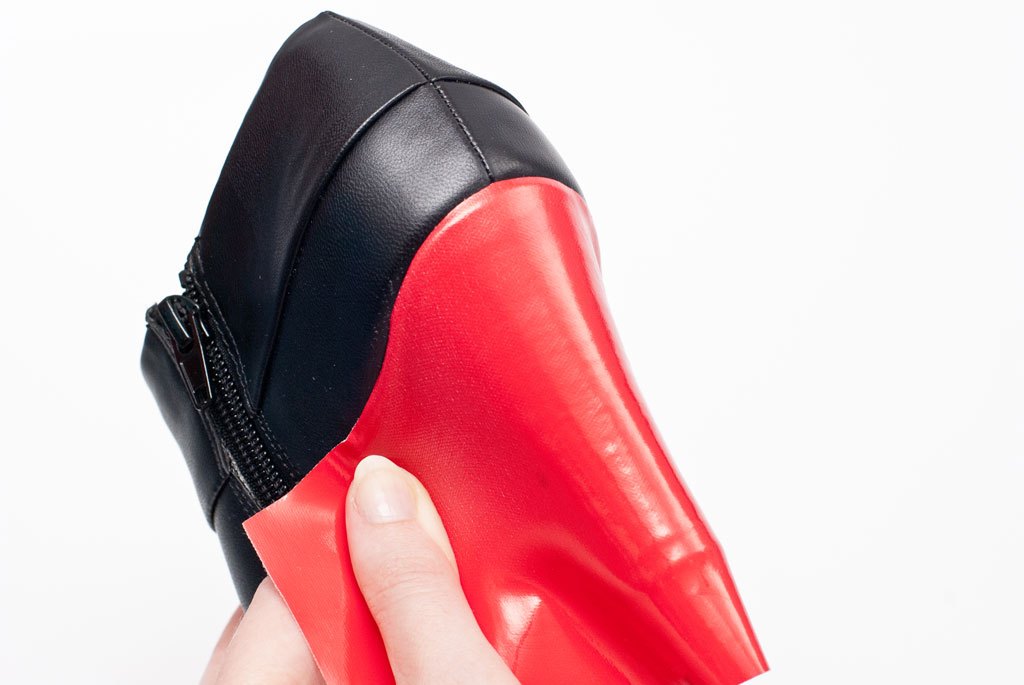
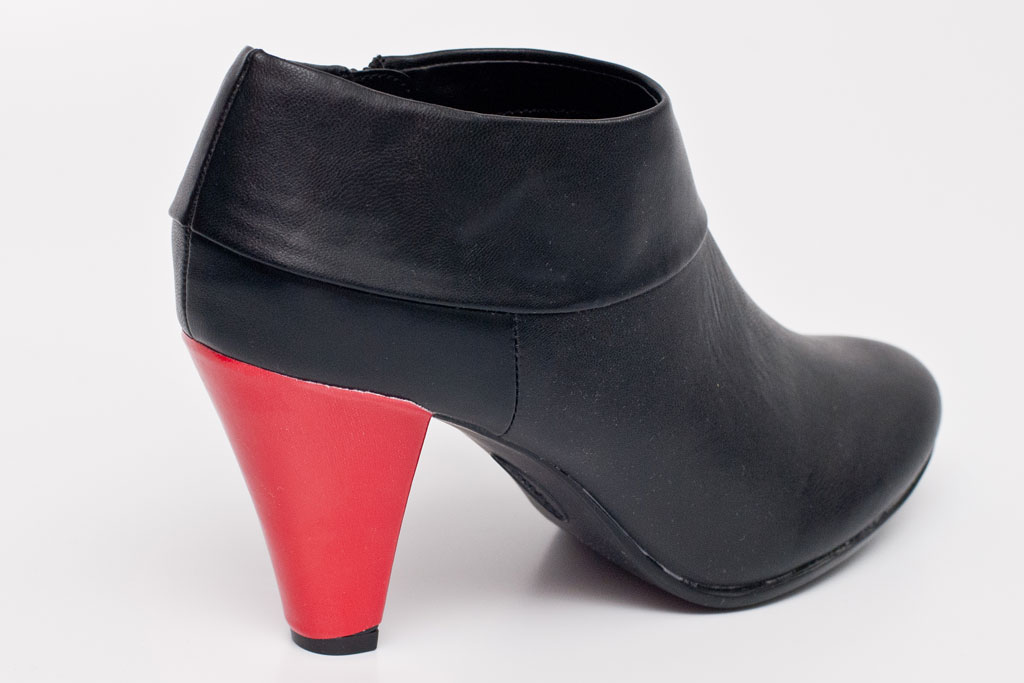
Heels can be covered in fabric as well. You do not need a pattern for this.
Cover the heel with a piece of stretch fabric Wrap the fabric around the heel Place the seam in the front… …where it is least visible
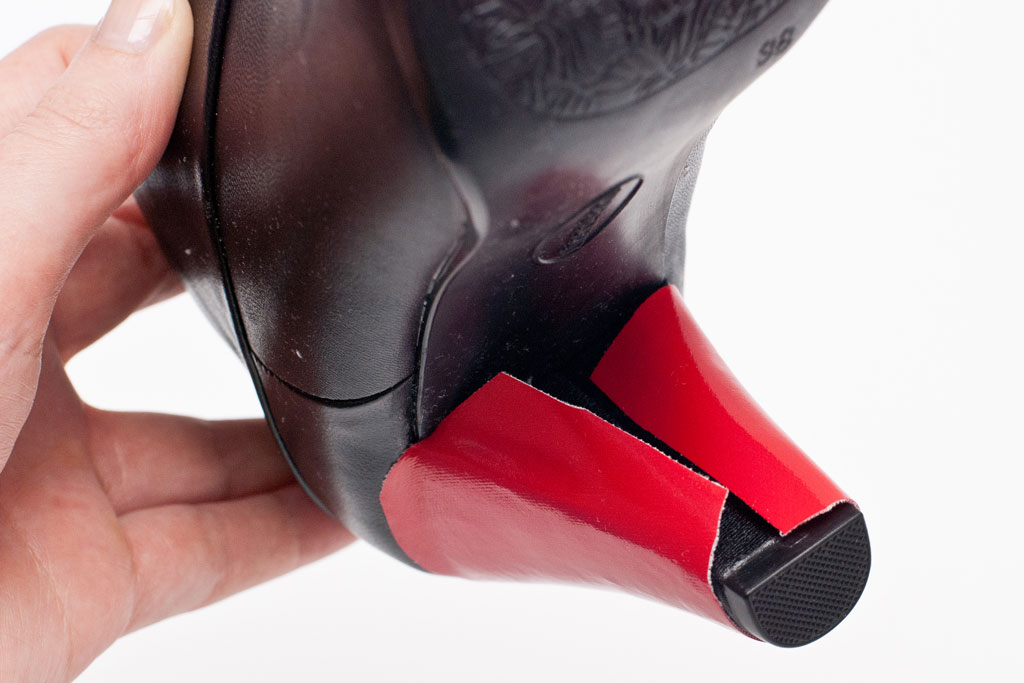

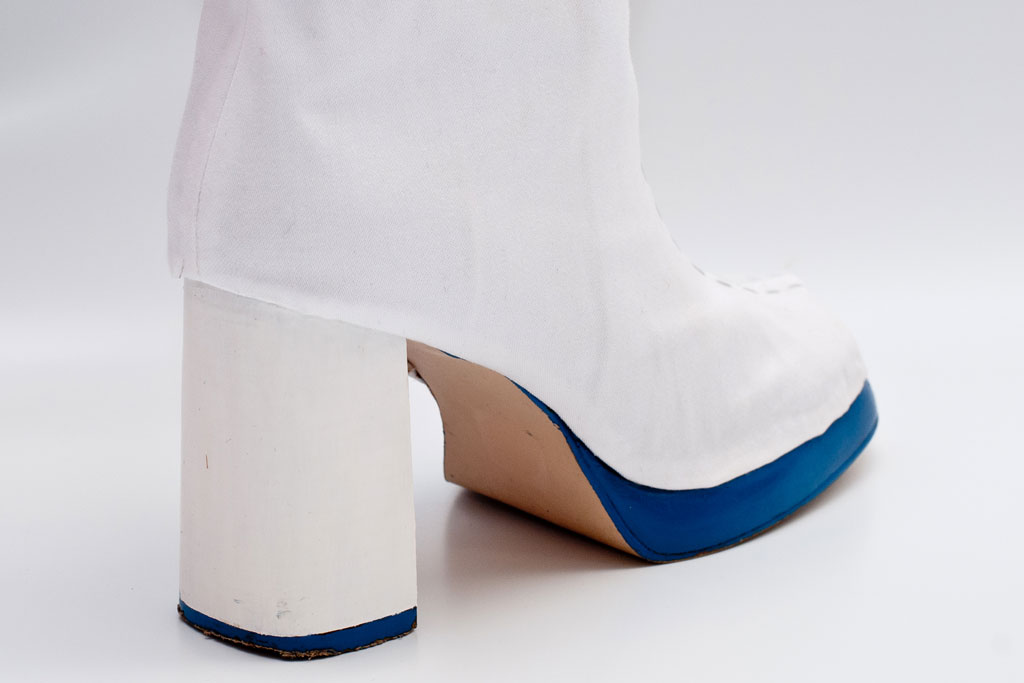
Or you can paint the heels and soles with acrylic paint to match your reference! Roughen up the material with sandpaper to make the paint stick better, and coat it with clear varnish. Keep some of the paint in a small container for touch-up jobs after the con.
Do you want to learn how to sew covers for boots, add a zipper or embellishments? Read my boot cover tutorial!
Ein Gedanke zu “How to Make a Shoe Cover”