Do you need a simple face mask that will fit anyone? Here’s my beginner-friendly tutorial for a pleated mask with adjustable straps. It’s adaptable to all sizes, no pattern needed!
When you’re making masks for people other than yourself, it’s best to give them a way to adjust the straps to their head size. That’s why these masks have a casing in the side seam. You don’t have to sew on any straps or bias tape, which makes them easy to mass-produce!
Disclaimer: The face masks shown here are not medical or surgical masks. Use them in an everyday setting and to leave the PPE (personal protective equipment) to the health workers we all depend upon. Homemade masks are not guaranteed to protect you from viruses and bacteria. However, they can reduce the risk of exposing other people to your droplets, or exposing yourself to theirs. It is still important to keep your distance and wash your hands often.
Masks with casings for adjustable straps are bulkier on the sides, compared to simple pleated masks with sewn-in elastic bands – see my basic face mask tutorial. To reduce the amount of fabric in the side seams, I’m using a smaller lining on this model. This will also make the mask easier to fold and sew.
I’ll give you a few tips on how to wear and care for your masks at the end of the tutorial. You’ll also find links to more mask variants at the end!
What you need
Everyday face masks are fairly low-tech and easy to make without a pattern.
- cotton fabric
- contrasting cotton fabric for the lining (optional)
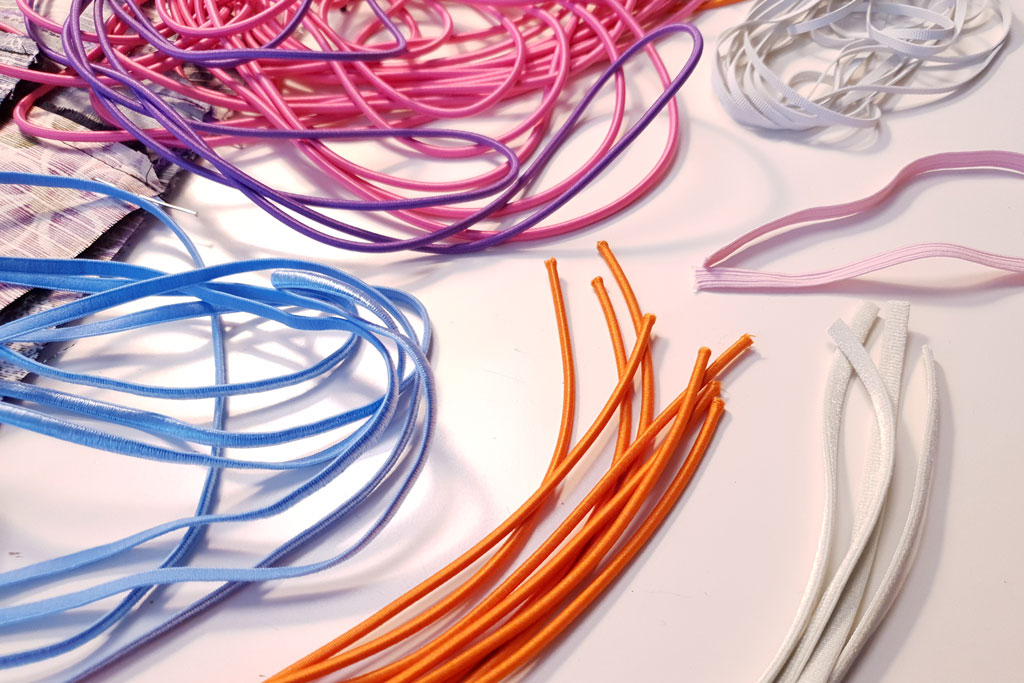
- elastic band or cord
- sewing machine, yarn, needle
- sewing pins or fabric clips
- wire
- tape measure
Face mask materials must be washable at high temperatures, they should be breathable and able to absorb sweat.

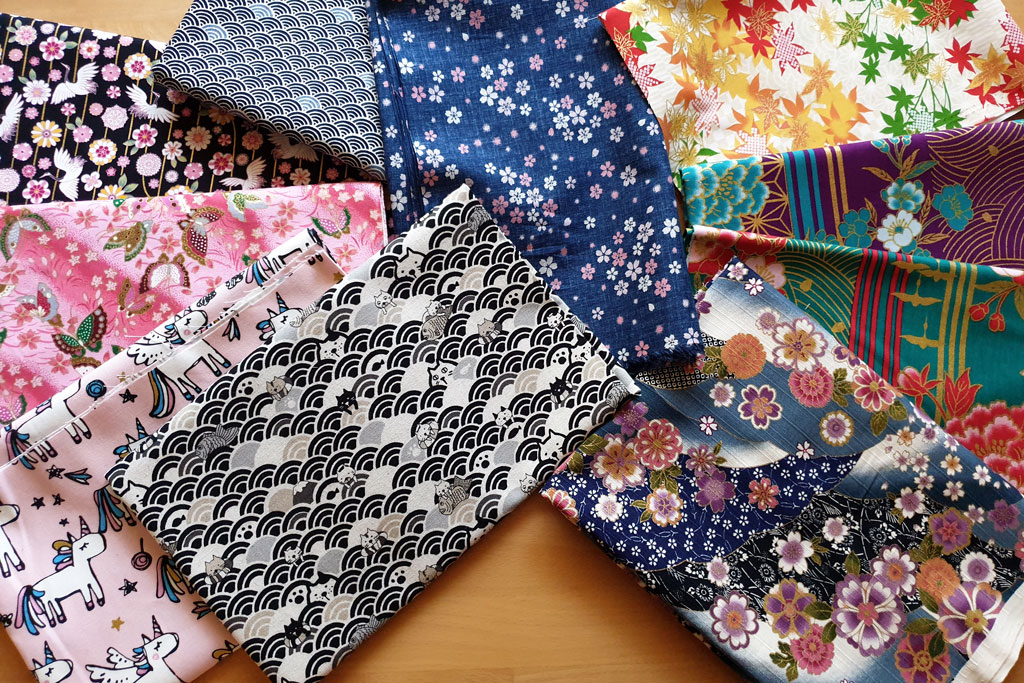
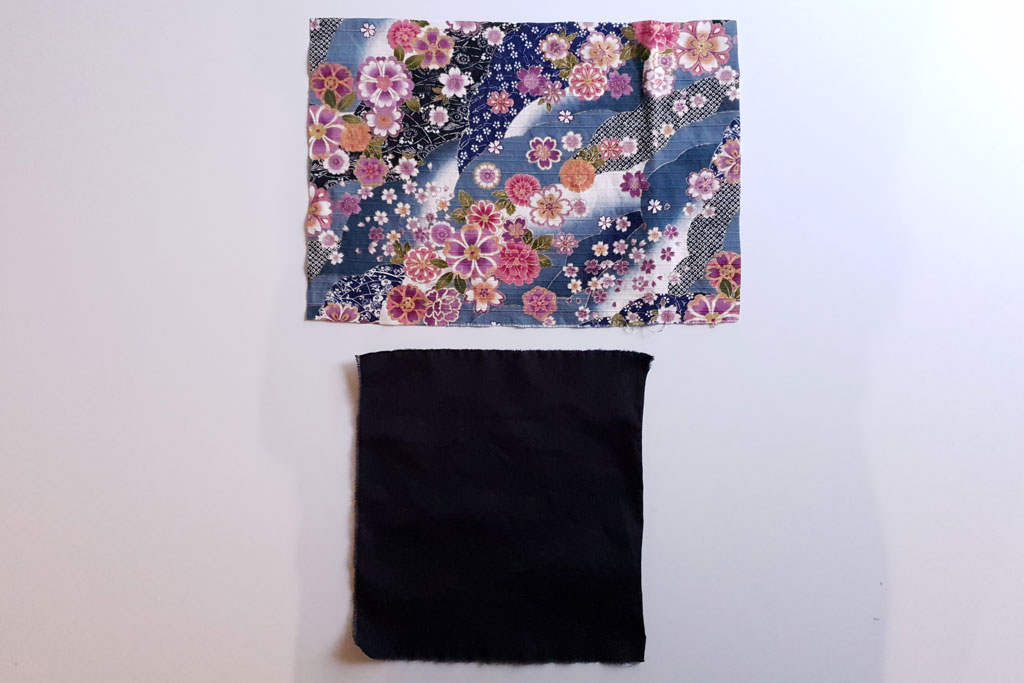
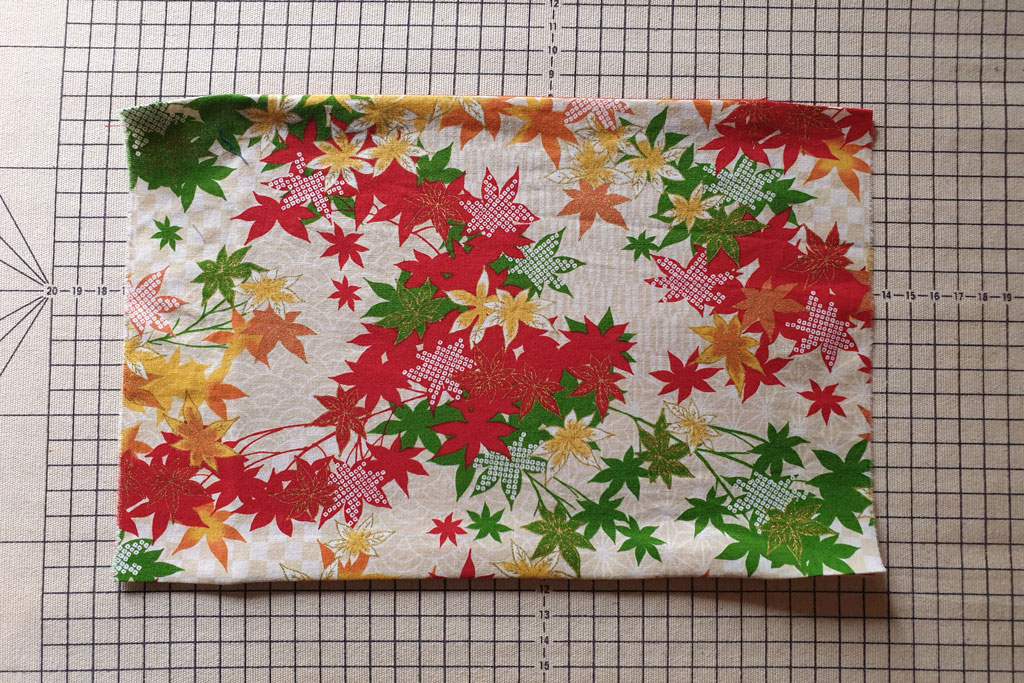
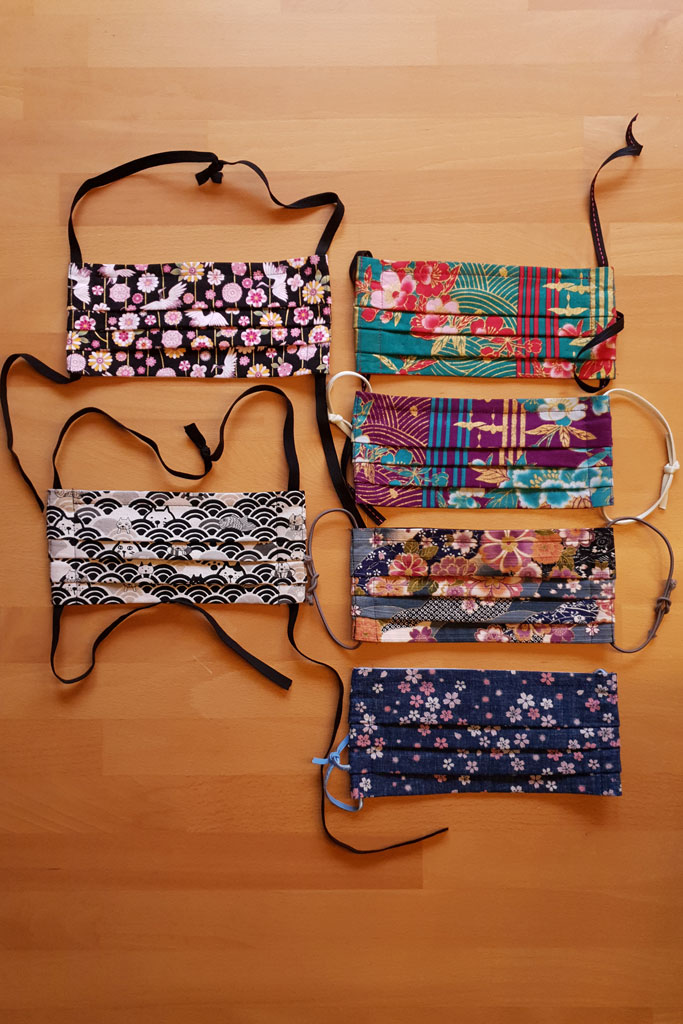
Japanese cotton print fabrics from kiseki.de (Berlin) that I used for my face masks
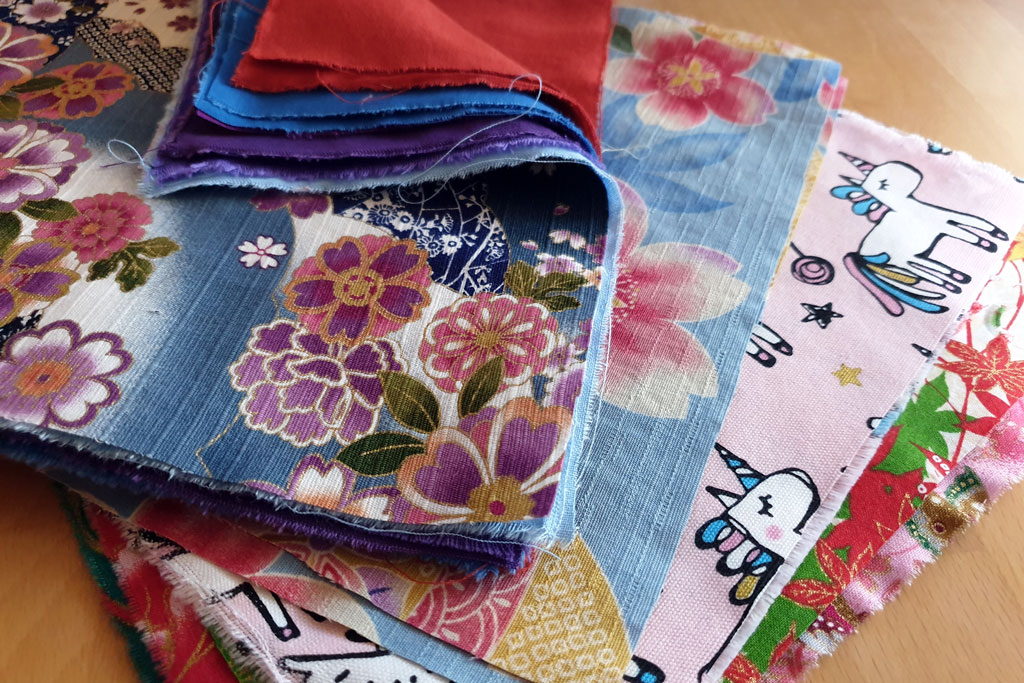
Fabric: Use a densely woven yet lightweight, 100% cotton fabric. Broadcloth – such as quilting fabric or shirting – or cotton satin is best. Avoid synthetic materials, knit fabric (jersey) and thick, heavy fabric like twill or denim.
Pre-wash your fabric at 60°C to pre-shrink it and to remove chemical residue from the factory.
Colorful cotton print fabric and plain cotton broadcloth for the lining
Sizing: You’ll want to adjust the mask to the dimensions of your face, so depending on your size and how many layers you’re using, you’ll need more or less fabric.
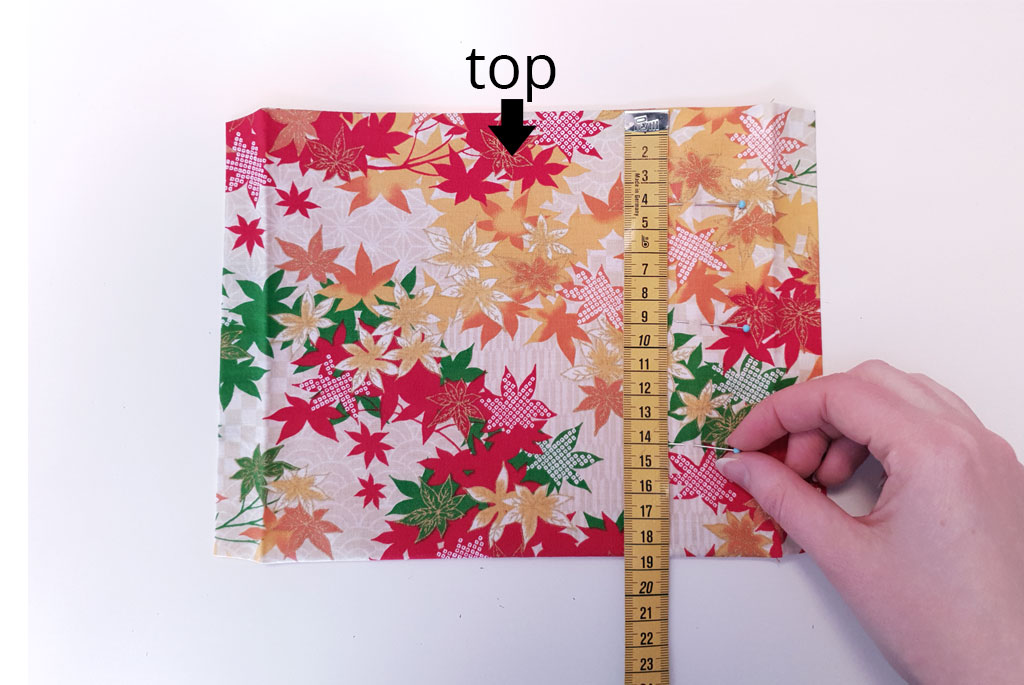
Measure how wide you want your mask to be. It should go over your nose and stop short of the ears. Add to that measurement 3.5cm on each side, this is the seam allowance that you’ll need to make the casing for the adjustable straps. For the lining, take your base measurement and subtract 1cm on each side.
Example:
- My base measurement (width) is 23cm
- Add 2×3.5cm > cut the fashion fabric 30cm wide
- Subtract 2x1cm > cut the lining 21cm wide
Now measure from the bridge of your nose to the tip of your chin. Multiply that measurement by 1.5 to 2, that is how tall you cut the fabric.
- My fashion fabric is 30cm (12″) wide and 21cm (8″) tall
- My lining is 21x21cm (8×8″)
(Seam allowances included)
Cut the pieces for the mask and the lining
Elastic bands are most comfortable behind the ears when they’re 3–6mm (1/8–2/8″) wide. Since everyone is making face masks now, elastic can be hard to obtain, so you may need to get creative and use something else – like strips of stretch fabric (jersey noodles), bias tape, or shoelaces.
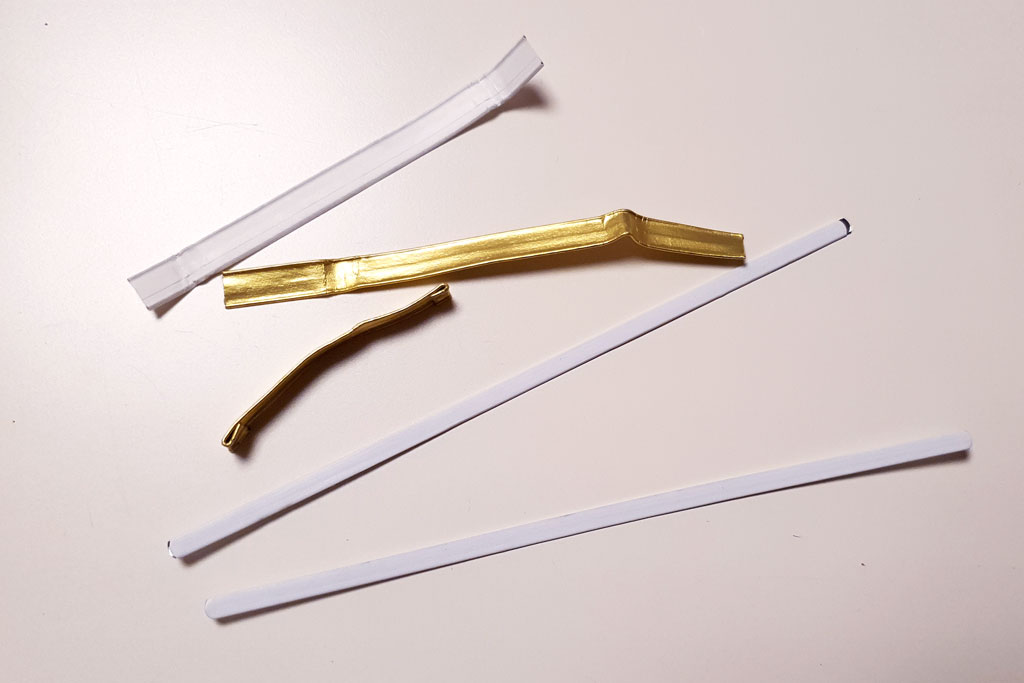
A nose wire helps the mask fit more snugly to avoid gaps through which the air can escape unfiltered. It makes your mask safer and it’s essential if you wear glasses like me! You can buy pieces of flat, coated wire that are made specifically for face masks, or just use any wire you can find around the house and blunt the ends with tape or by folding the wire. For my first masks, I used twist tie closures („bread ties“) from bulk tea bags…because I drink a lot of tea and I already had them in the house!
3-6mm elastic bands and 3mm elastic cord Bread ties and coated wire
Start sewing
Cut 1 piece of fashion fabric (for the outer layer) and 1 piece of lining (for the inner layer) in your size.
Tip: If you’re making many masks, try ripping the fabric instead of cutting each piece individually! Make a small cut into the fabric edge, then rip the fabric apart along the grain line. Thin cotton broadcloth is easy to rip without damaging the fabric, though you should test it on a small piece first.
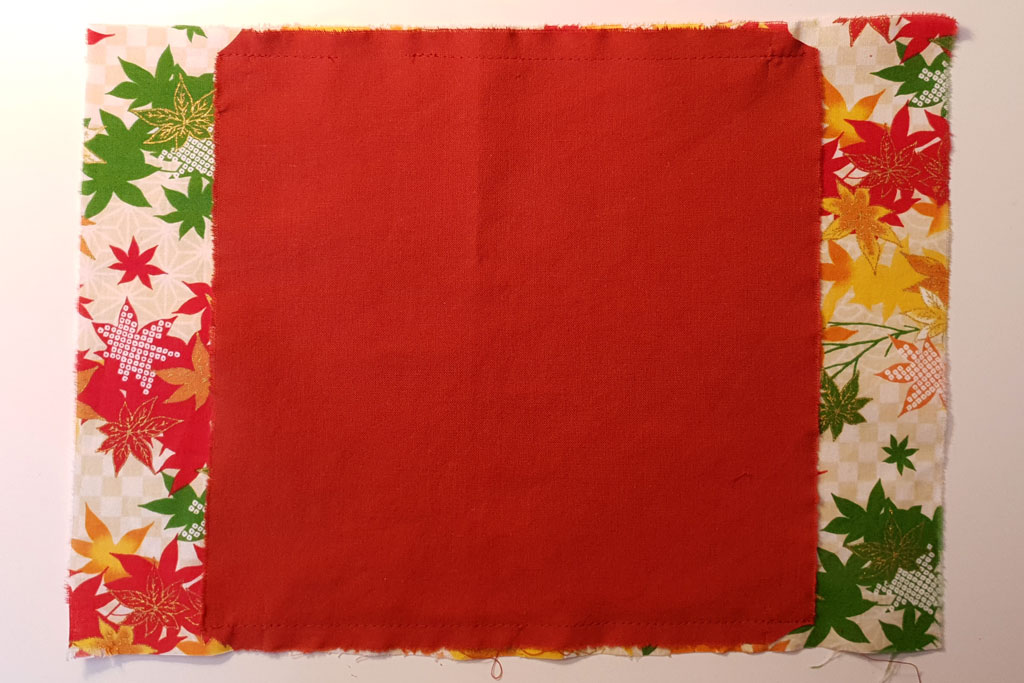
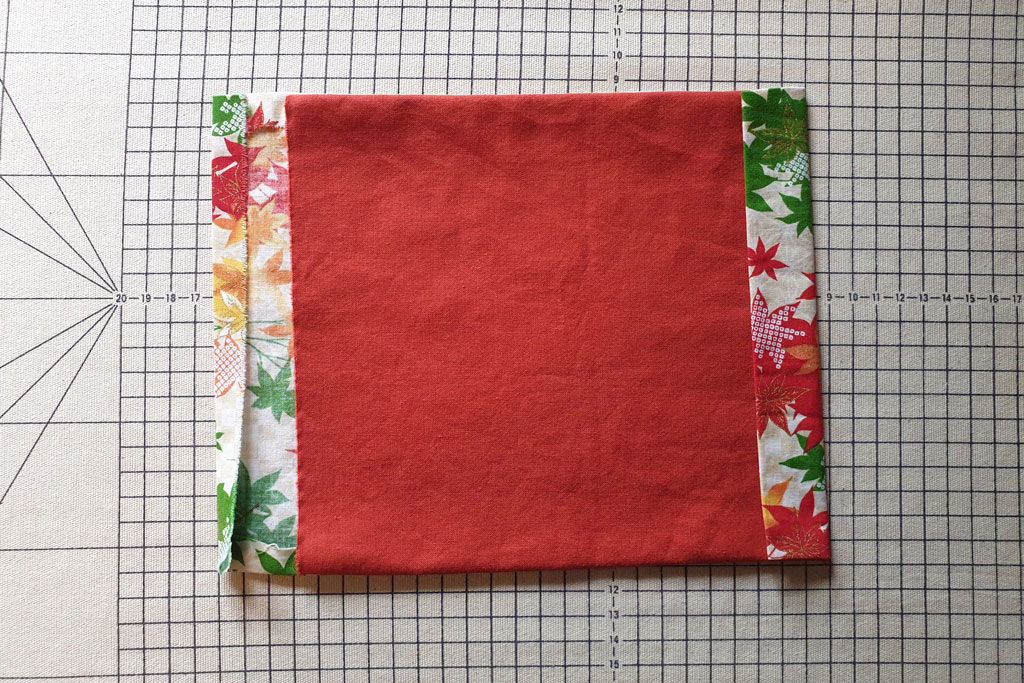
Place lining on fashion fabric, right sides facing each other
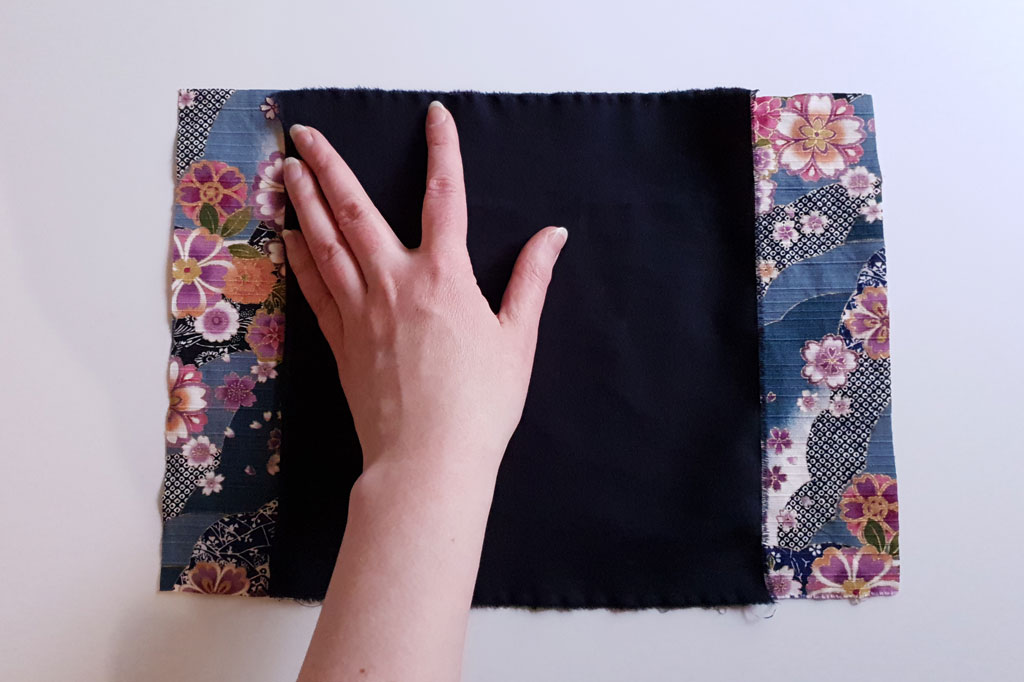
Place the fabric lining on top of the fashion fabric, right sides facing each other. That means the „pretty“ sides of the fabric now lie on the inside. Place the lining in the center so that the seam allowances on both sides are equally wide.
Stitch the pieces together along the top and bottom edge, using a straight stitch (with 1cm / 3/8″ seam allowance).
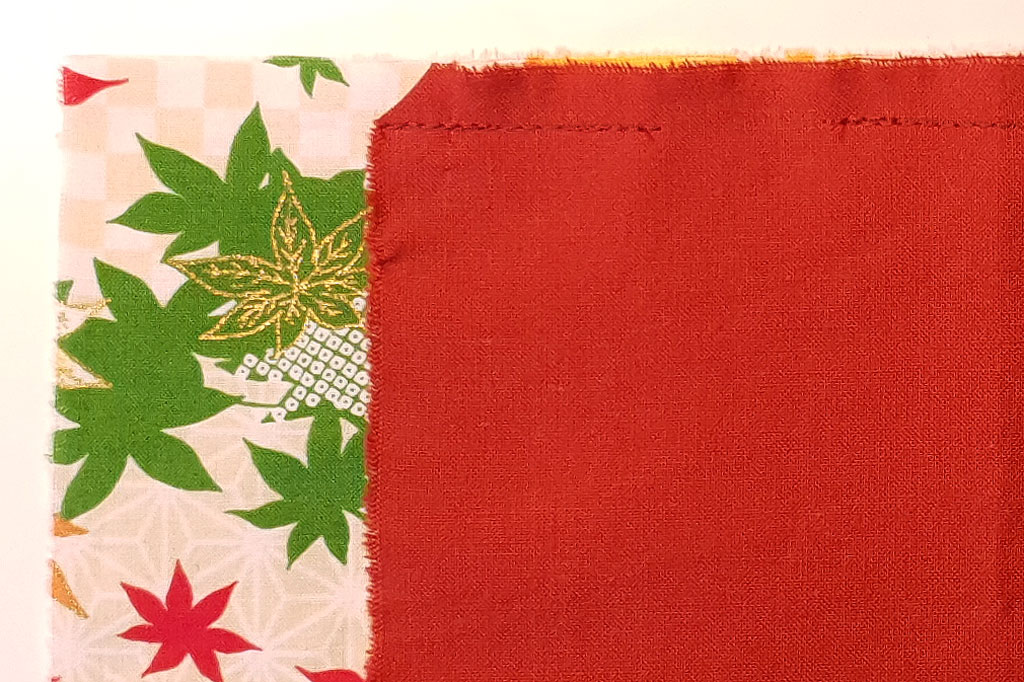
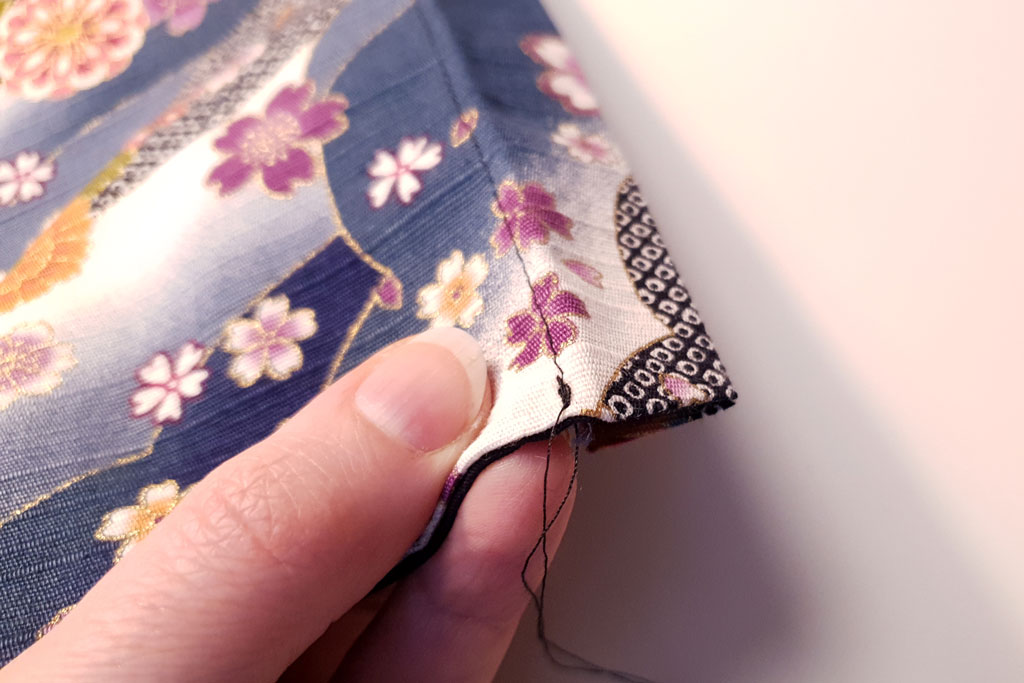
Note that I am leaving a small opening at the top edge – about 2 cm wide, halfway between the center and the side edge. I’ll use this opening to insert the nose wire later. Make sure to lock all seams by stitching back and forth at either end of the seam.
Trim the corners of the lining. That will reduce the amount of fabric bunching up in the corners later. (I am using a different color here so the seams are easier to see.)
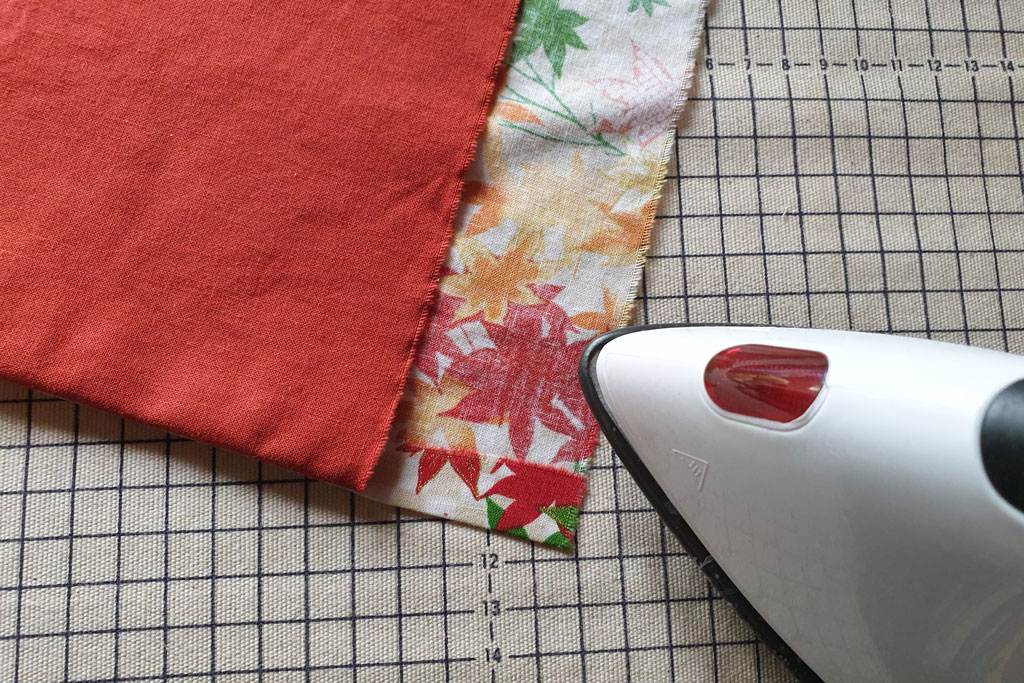
Press the fabric
Turn the fabric right side out and press it flat (max. temperature with steam). It helps to steam the seams first, then roll the seams between your fingernails to flatten them. The edges should form straight lines.
Steam the seams Roll the edge seam between your fingers to produce a crisp edge

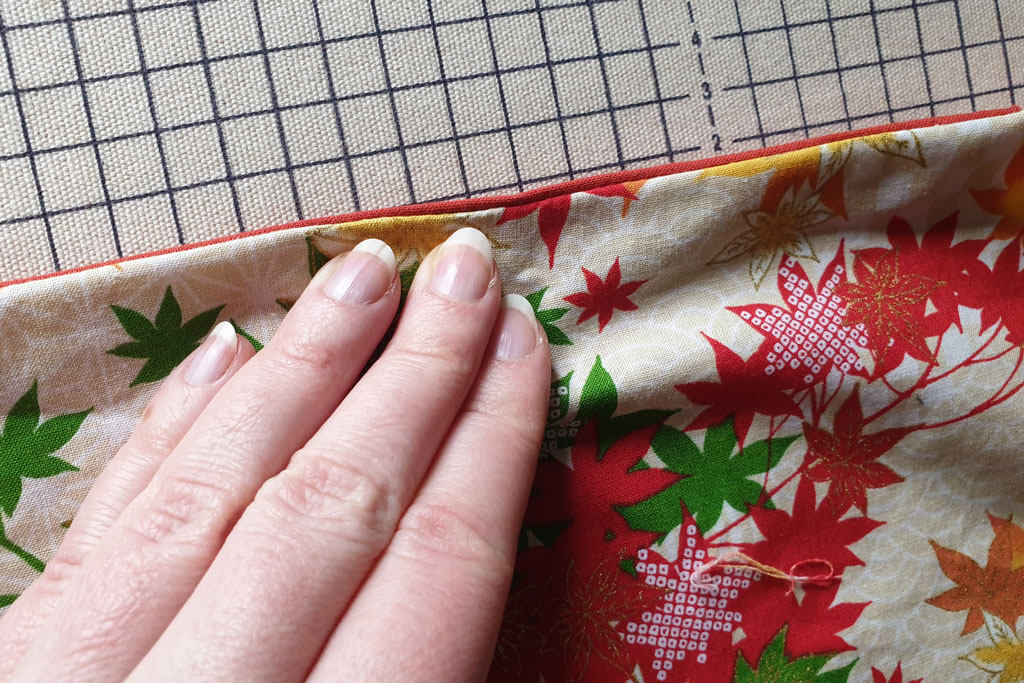
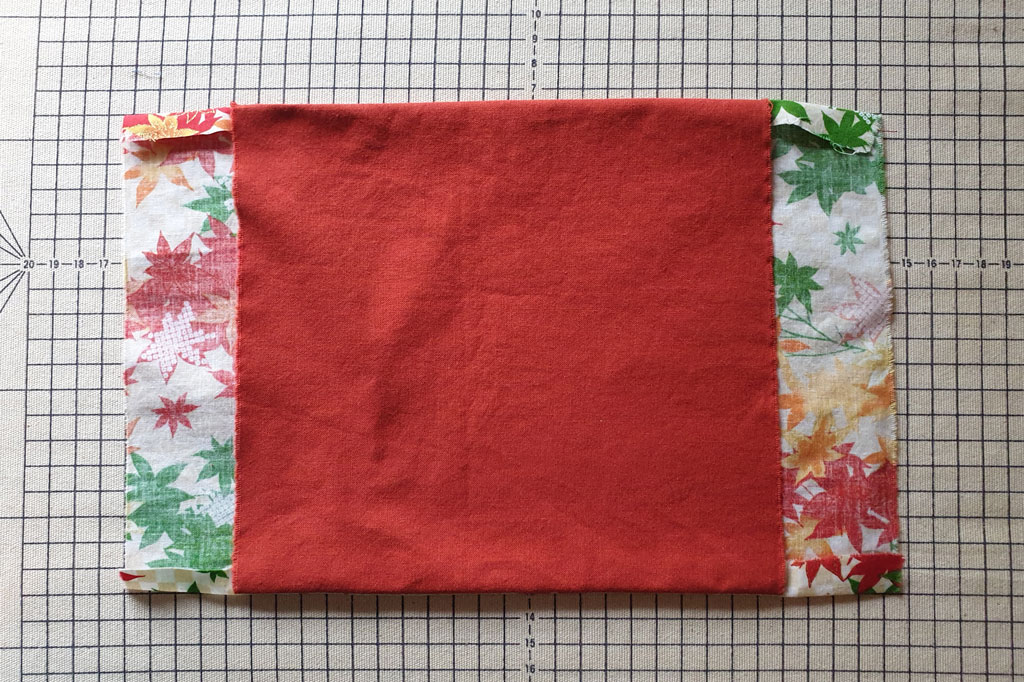
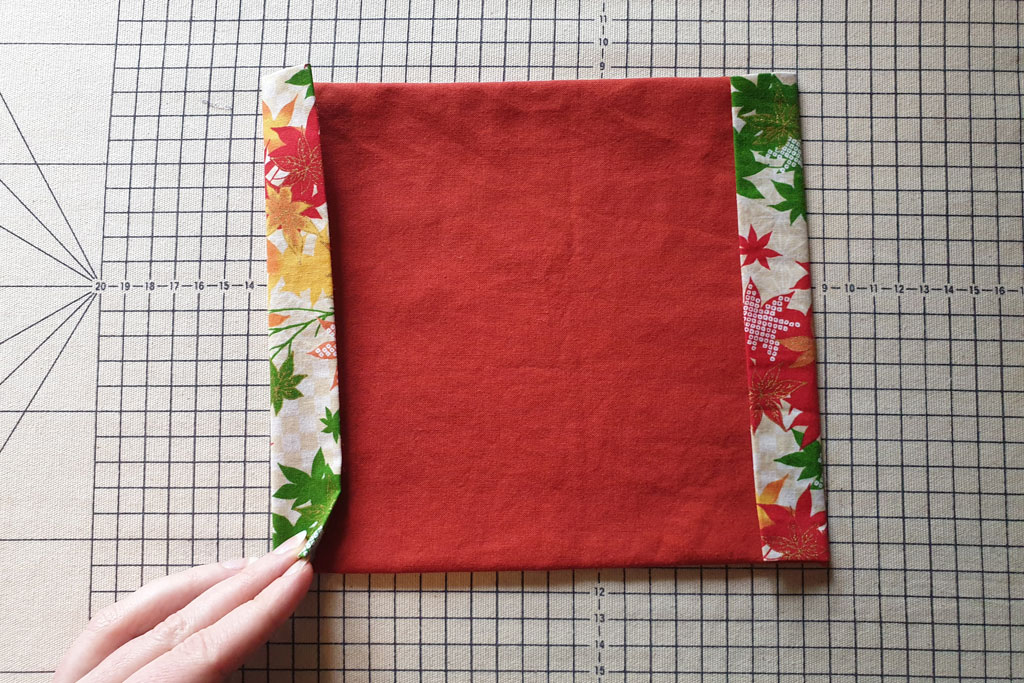
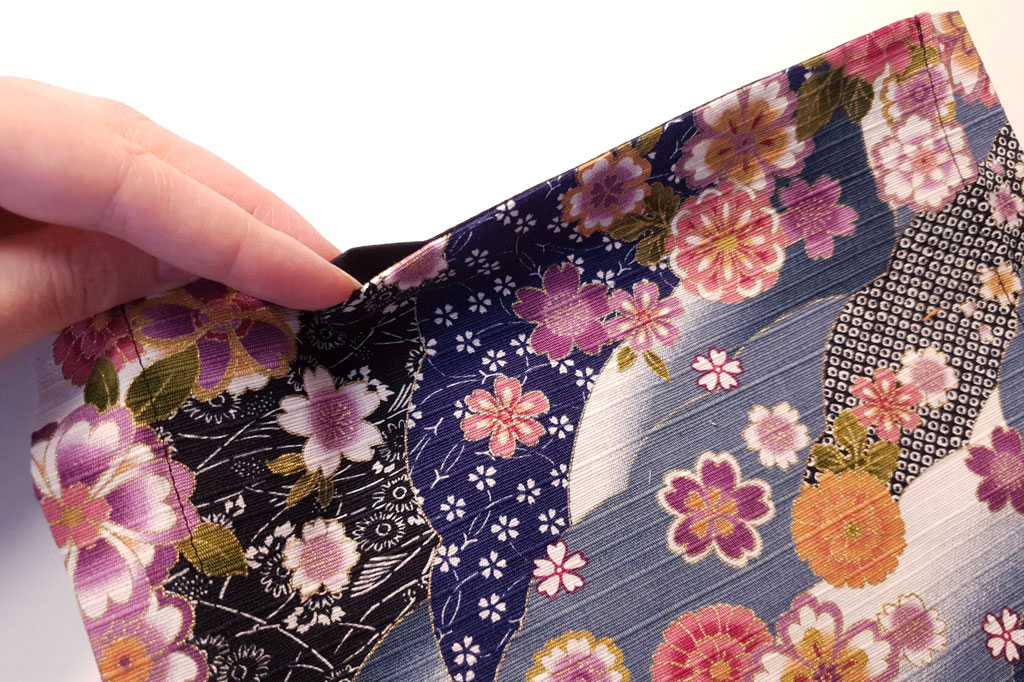
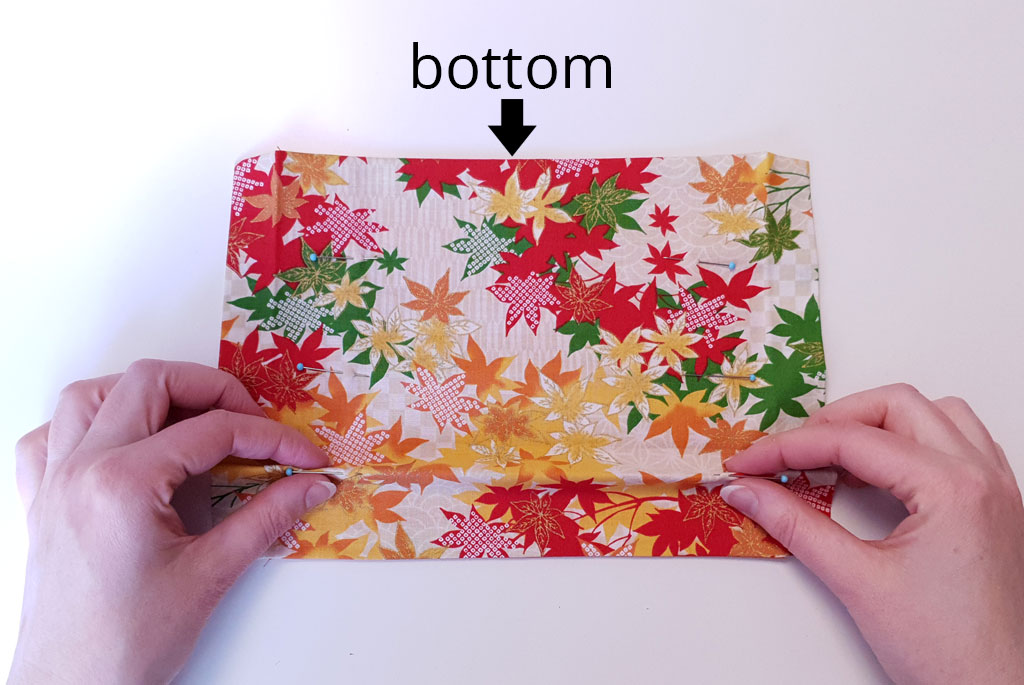
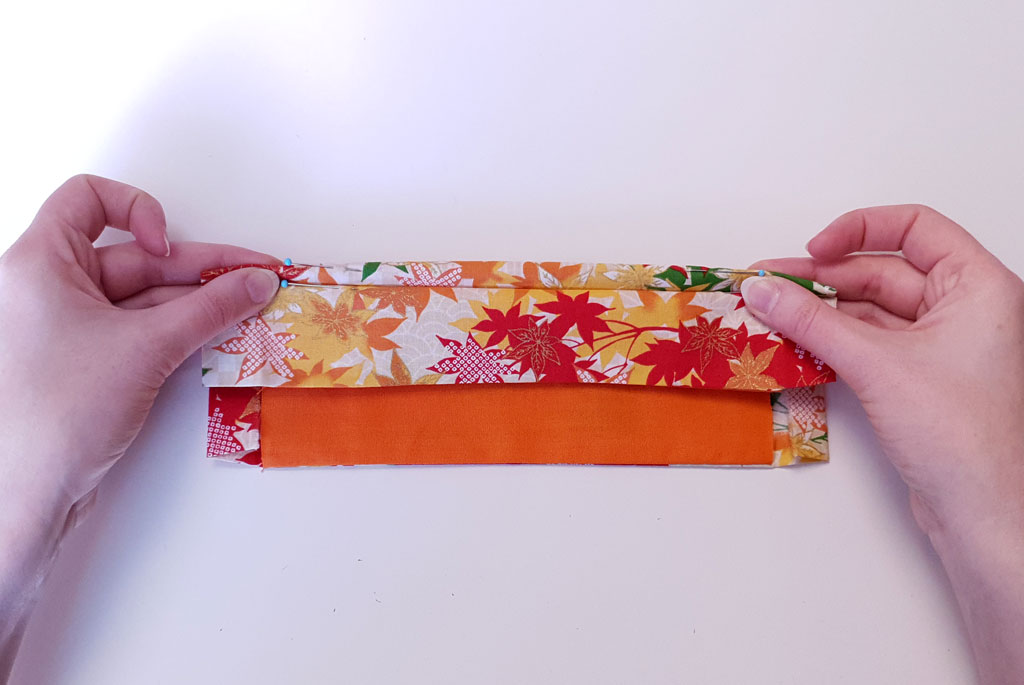
Place the fabric right side down on the ironing board. Turn in and press the seam allowances in three steps.
Step 1: Press the seam allowance in the corners where it emerges from the edge seam. Instead of folding the fabric straight along the seamline, I’m tapering it a bit so that the fabric piece grows more narrow towards the ends. (This will make sure that the seam allowances disappear on the inside of the mask when folded under.)
Step 2: Fold the side seam allowance towards the center. It should not overlap the lining.
Turn and press the seam allowances… …tapering them slightly Turn and press the seam allowance on the sides For a narrower tunnel, you can turn in more seam allowance, up to the edge of the lining
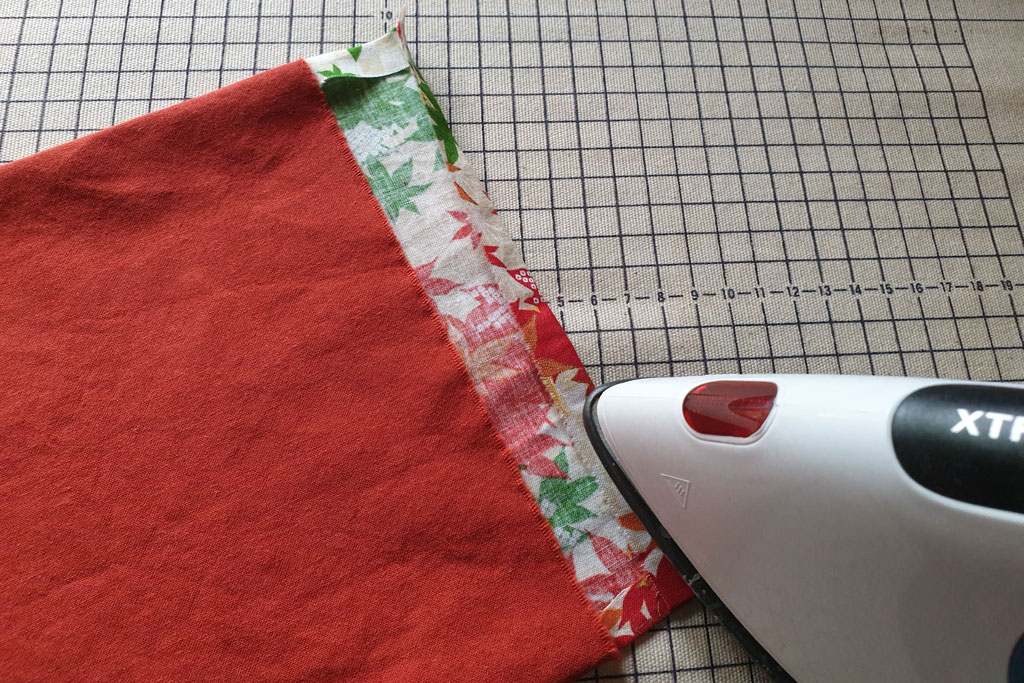
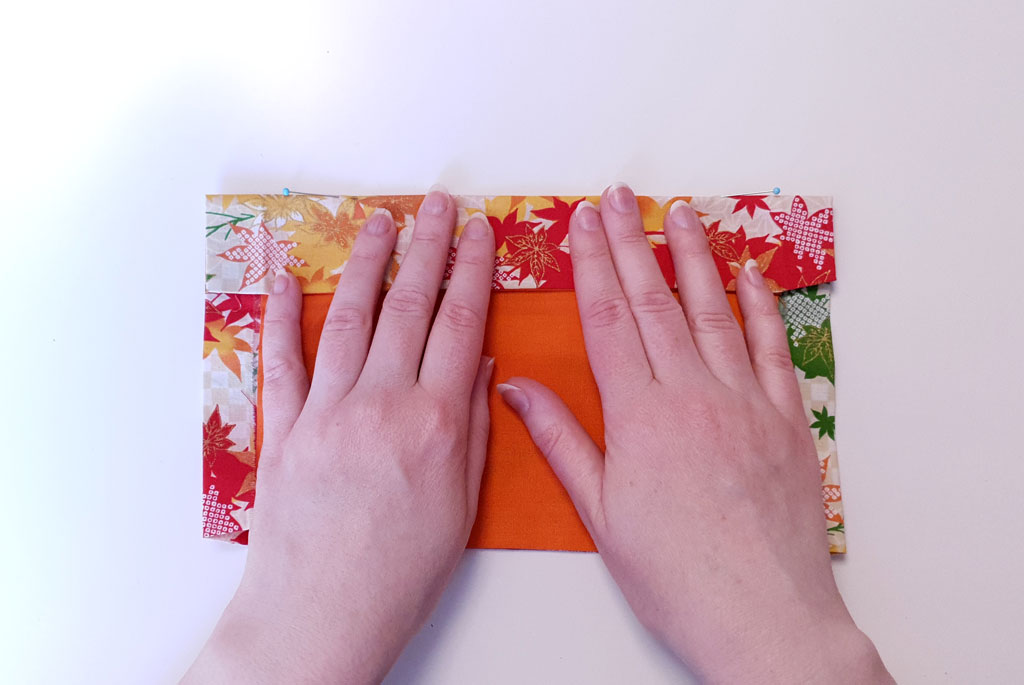
Step 3: Fold the seam allowance again so that it fully covers the raw edge of the lining. This forms the tunnel or casing for your adjustable straps. Press flat.
If you’re using wide elastic or ribbon, you’ll need to make the tunnel wider. Simply fold over less fabric in step 2, which leaves you with more seam allowance to fold over in step 3.
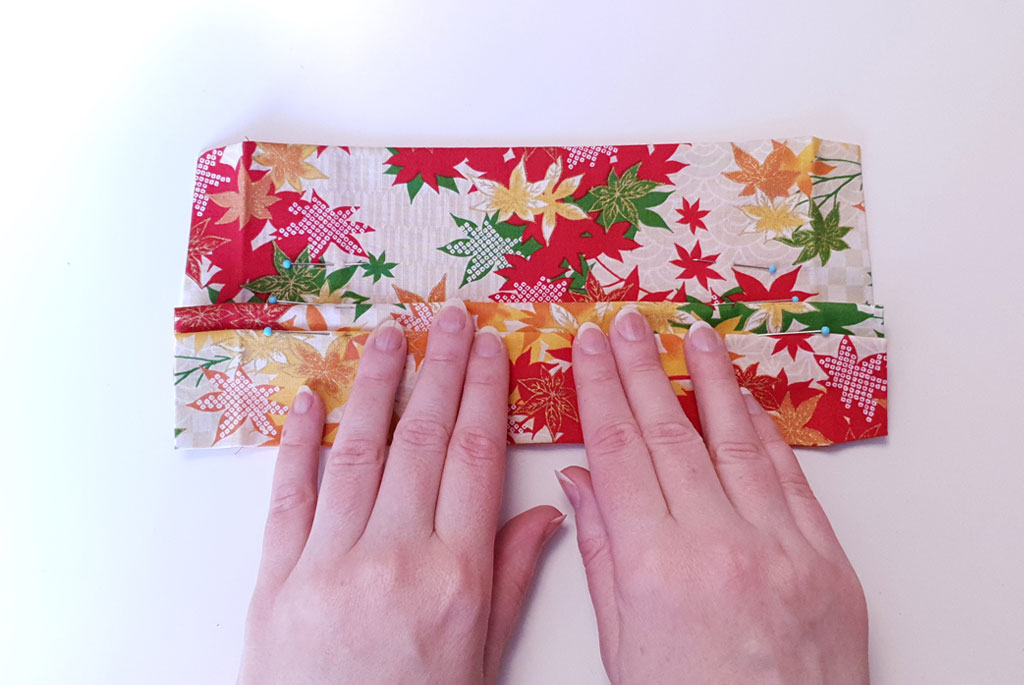
Fold the seam allowance again, fold line is the edge of the lining Press the fold, then open it again. For now, we only need the sharp fold line.
Pleat the mask
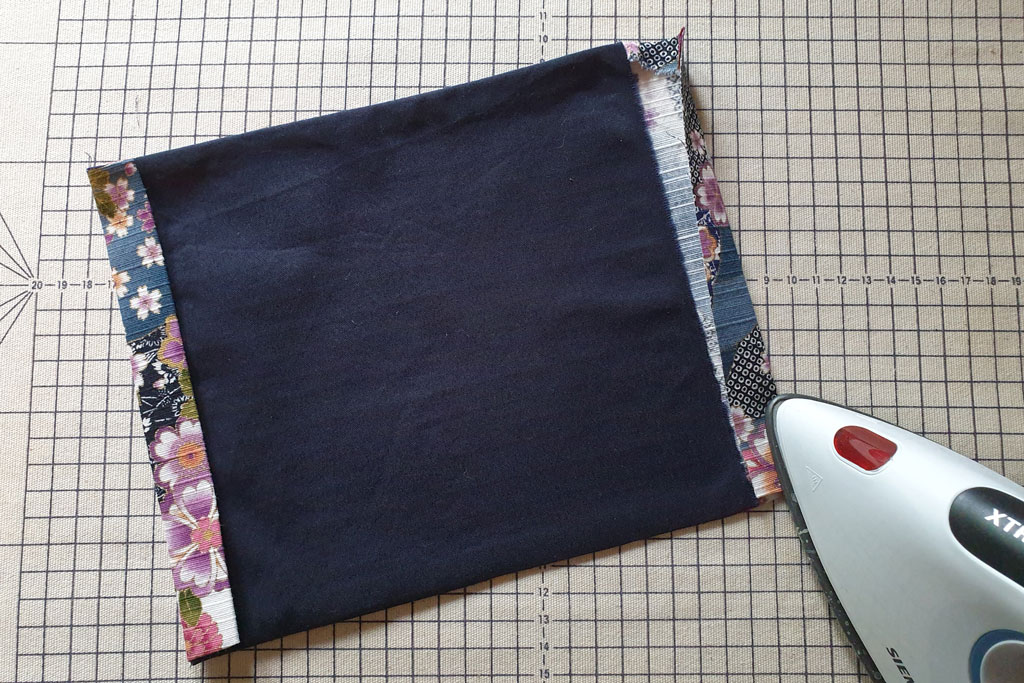
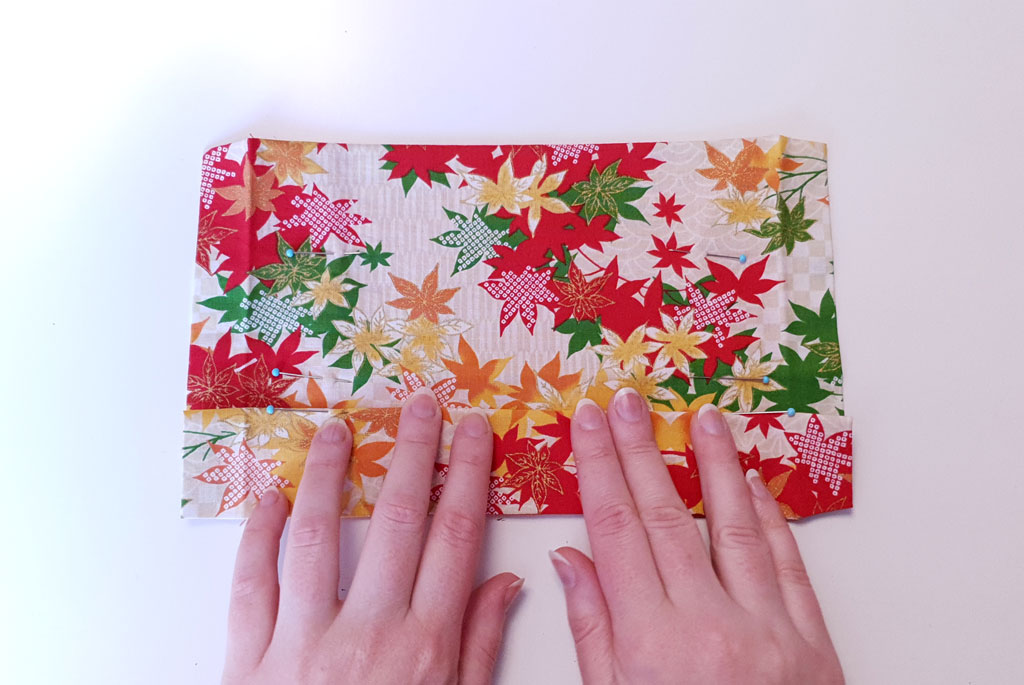
Open the last fold again so that you can see the raw edges of the lining. Stitch close to the edge of the lining to fix the fabric layers in place. This step is optional, it will make the next step easier but you can skip it if you’re confident in your pleating skills!
Stitch close to the edge of the lining Lining stitched in place (back view) Lining stitched in place (front view) Lining stitched in place (detail)

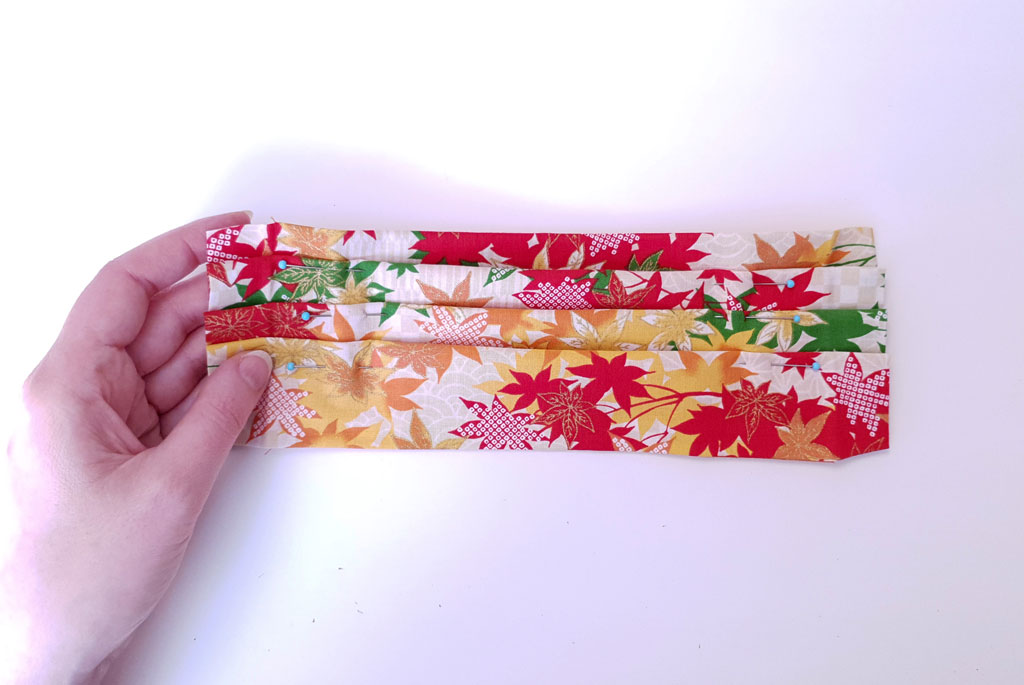
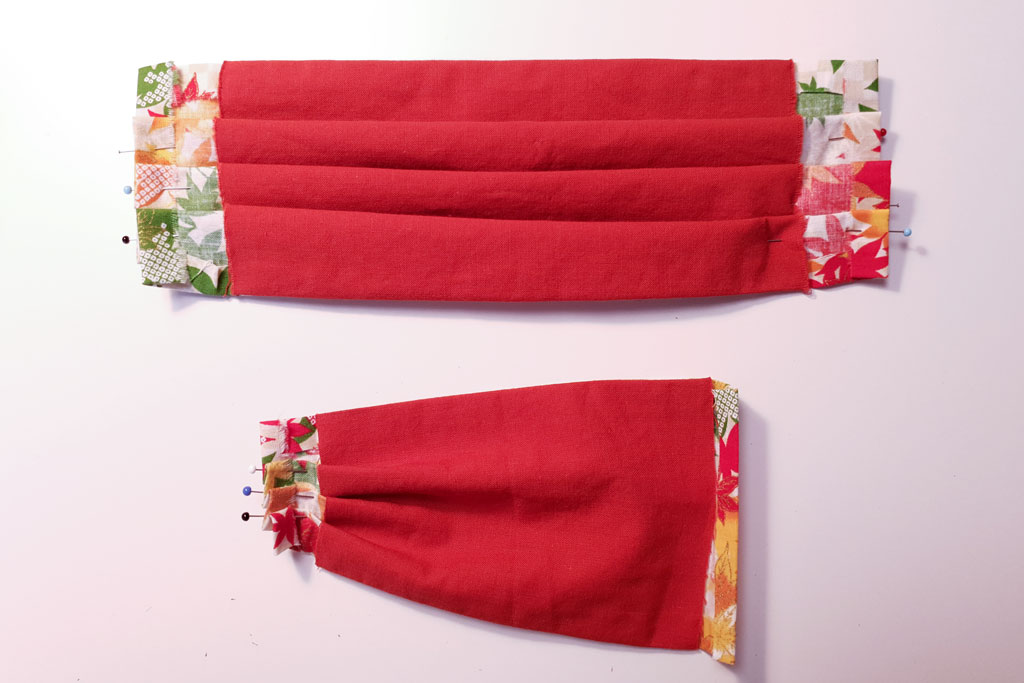
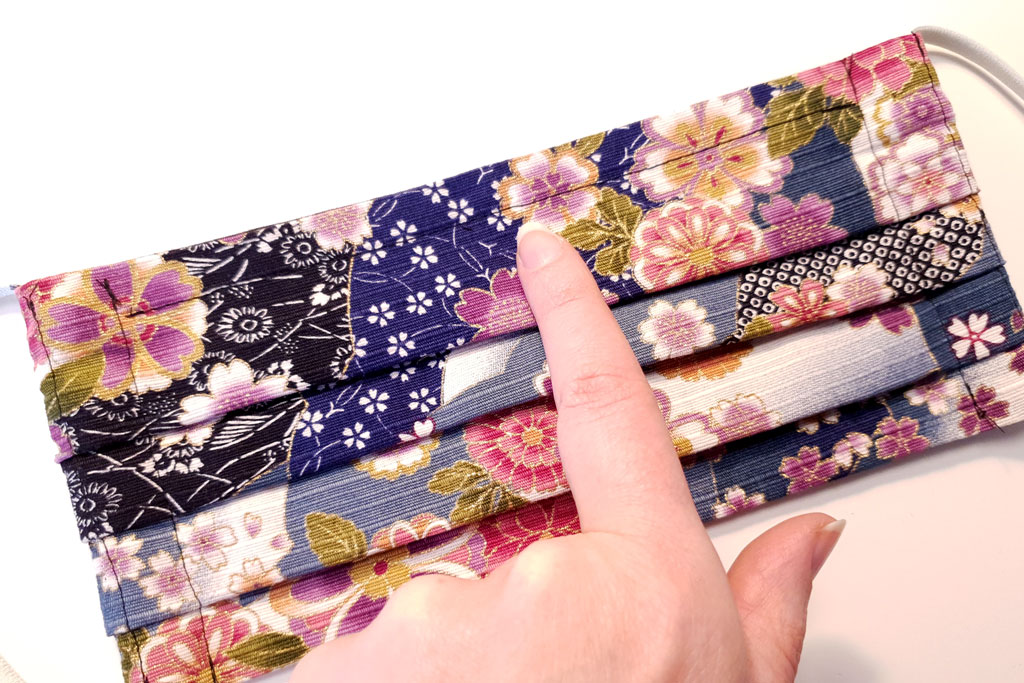
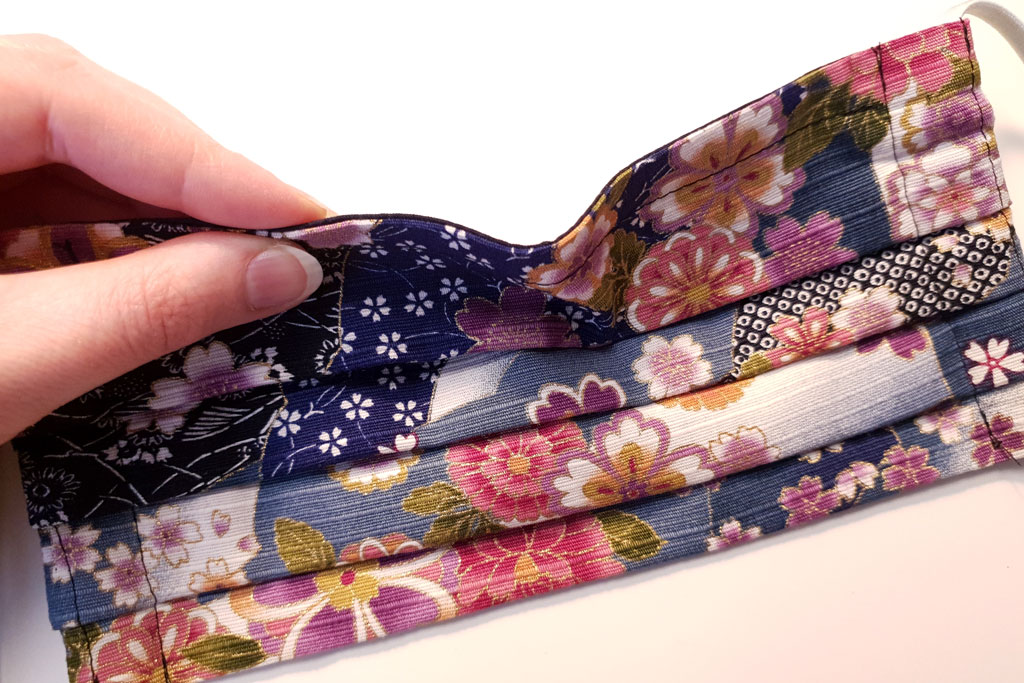
From top to bottom, put the mask in horizontal pleats.
Note: the top of the mask is where you left the opening for the nose wire in the seam.
The opening marks the top edge of your mask
Pleats should fold downwards so that particles don’t get caught in the folds on the outside. I also find that the mask can better adjust to your face shape when the pleats are folded that way. Three pleats are common, but you can do four pleats (or deeper pleats) when making a mask for a larger face.
Fix the pleats with pins
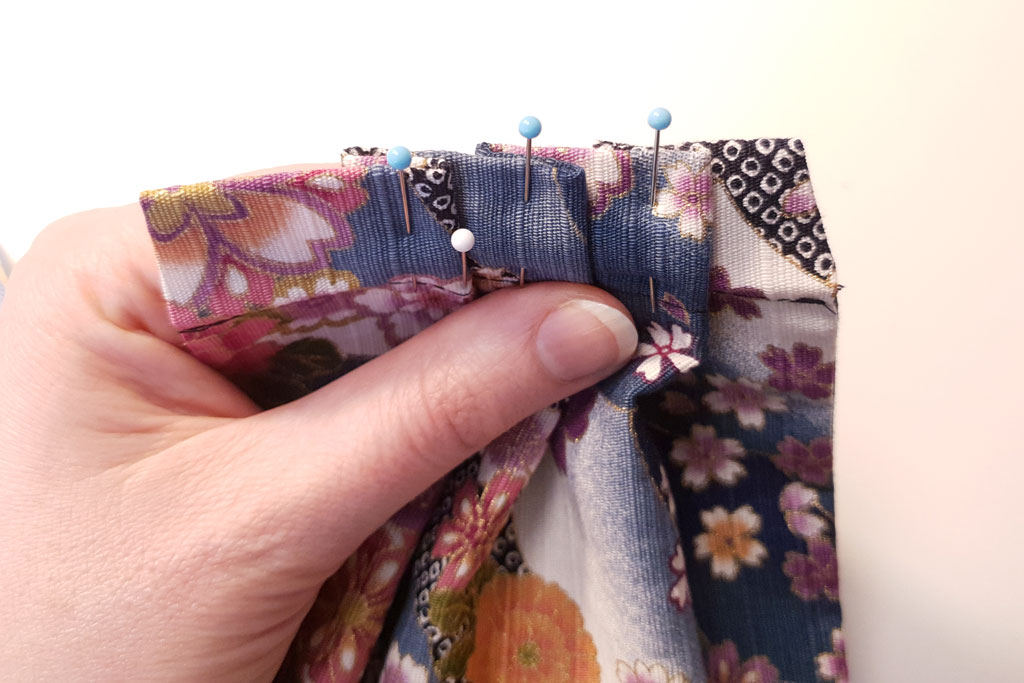
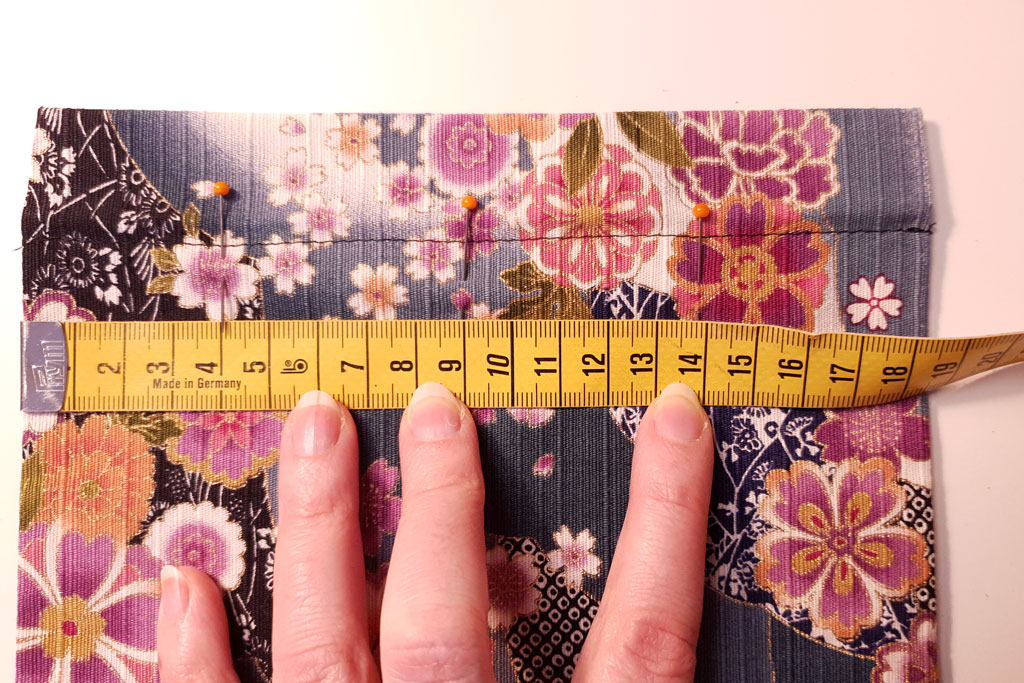
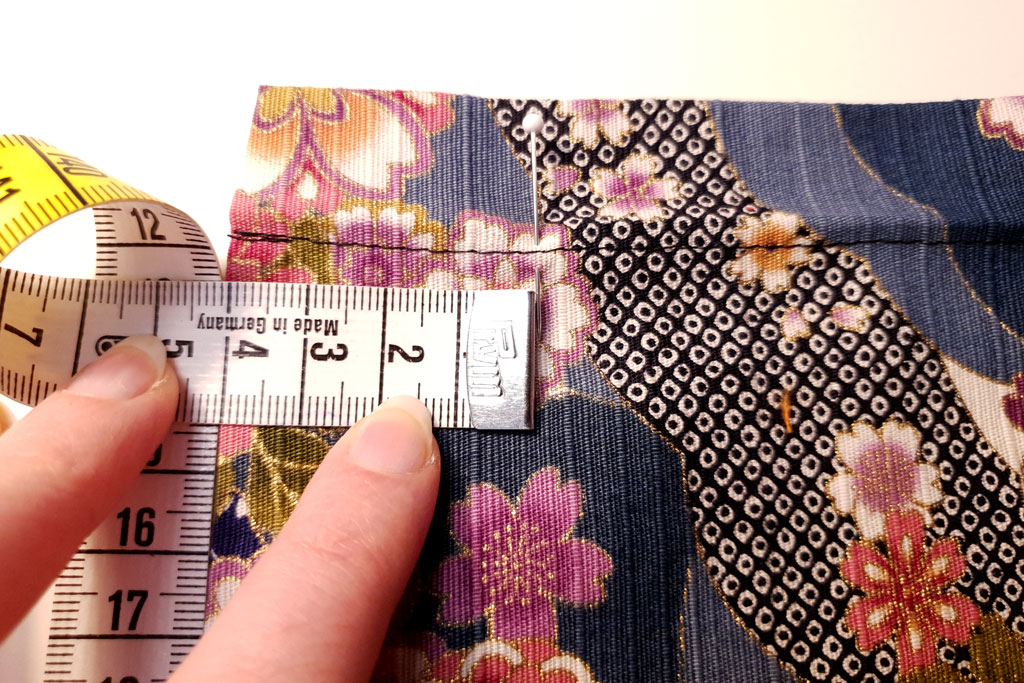
You can eyeball the size and placement of the pleats, or you can measure them for an even result. On both sides of the mask (left and right), on the outside, mark the points where you want the pleats to start.
My mask is 19cm tall (21cm minus 2x1cm seam allowance). I place the pleats at:
- 4cm
- 9cm
- 14cm from the top
I mark the position of the pleats, spaced 5cm / 2″ apart I place the first pleat 4cm from the top edge
Treat the fashion fabric and the lining as one, careful not to let the fabric layers shift and bunch up in the pleats. (Stitching the layers together before pleating helps with that.)
The pleated fabric should still be tall enough to cover your face from jaw bone to ears. 9–10cm (3 1/2 – 4″) is a good fit for adults. If your pleats are too deep, your mask will end up being too small on the sides.
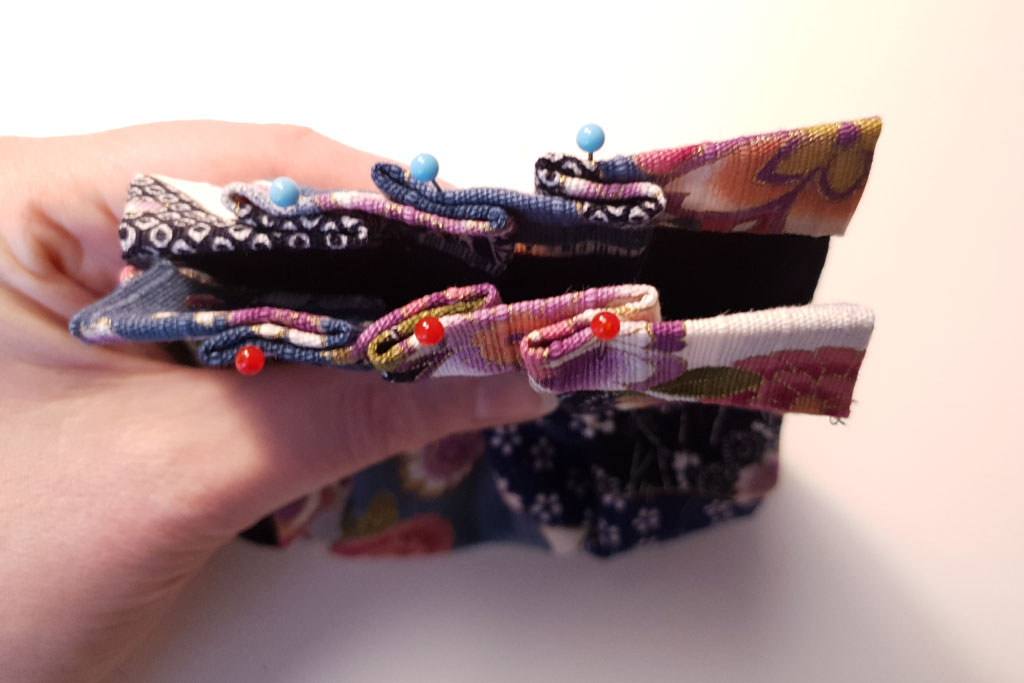
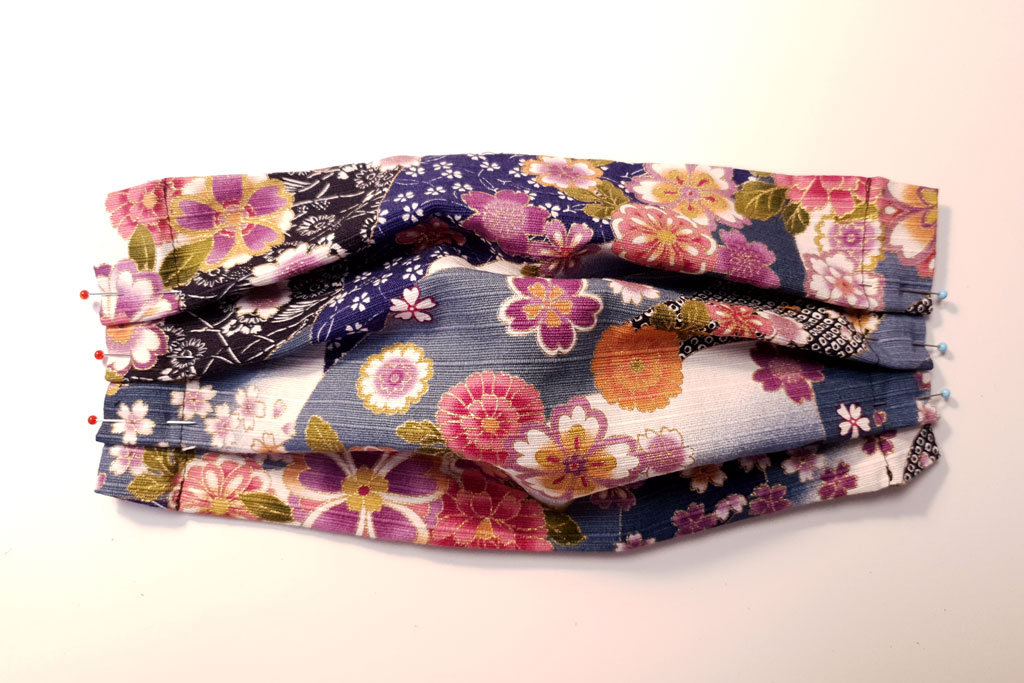
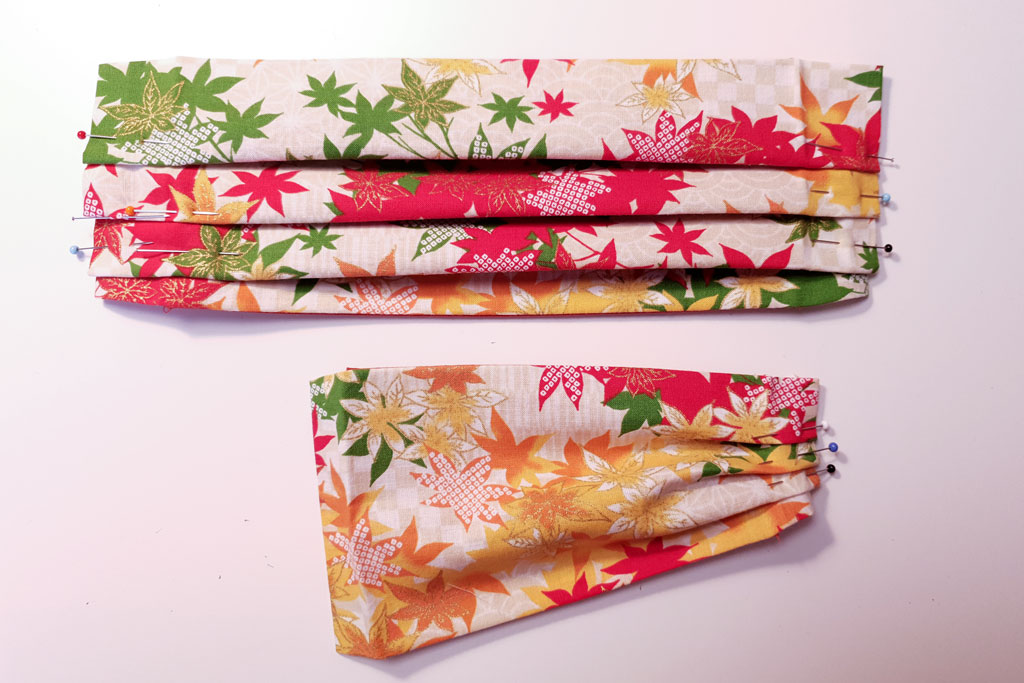
To ensure the pleats are symmetrical, fold the mask in half and align the pleated edges. If one side is longer than the other, or the pleats are uneven, you can correct it now before you fix the pleats for good.
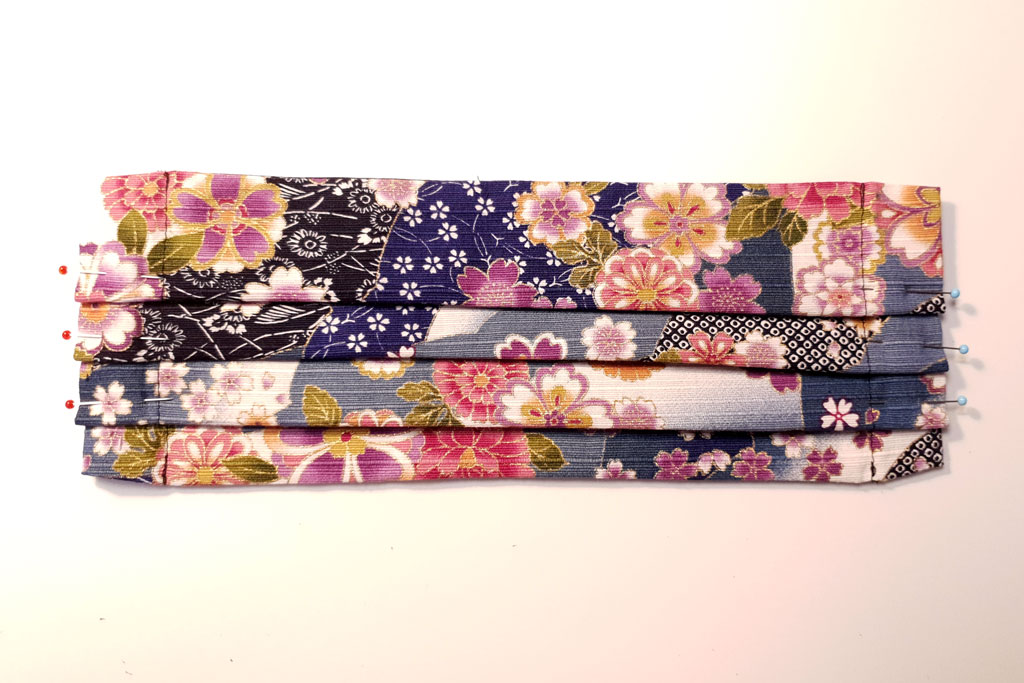
When you’re happy with the pleats, press them flat.
Fold the mask to align the pleats on the left and right side Mask with pinned pleats Press the pleats to make them lie flat
Because I know it can be tricky, here’s a step-by-step where you can see the process more clearly. Lay the mask down on the tabletop and use both hands to fold it. This method helps me get even pleats, fast.
Mark the position of the pleats with pins. I space them 5cm / 2″ apart Turn the fabric around so that the top edge points towards you. Pinch the fabric at the marking to start the first pleat Flip the fabric to sharpen the crease Flip it back and fold the first pleat forward Pinch the fabric at the second marking to start the second pleat Fold the pleat forward Repeat with the third pleat. Fix the pleats with pins on both sides Pleated masks for an adult and child (front) Pleated masks for an adult and child (back)
Sew the casing
To fix the pleats, stitch over them close to the fold line, so that you catch both the fashion fabric and the lining. If you stitched the layers together earlier, use that seamline as a guide.
Stitch over the pleats to fix them in place

Turn in the seam allowance at the fold line to form a casing for the elastic band or straps. Make sure to keep the pleats neat and pin them in place if needed.
Turn in the seam allowance… …at the fold line… …to form the casing Casing (back view)
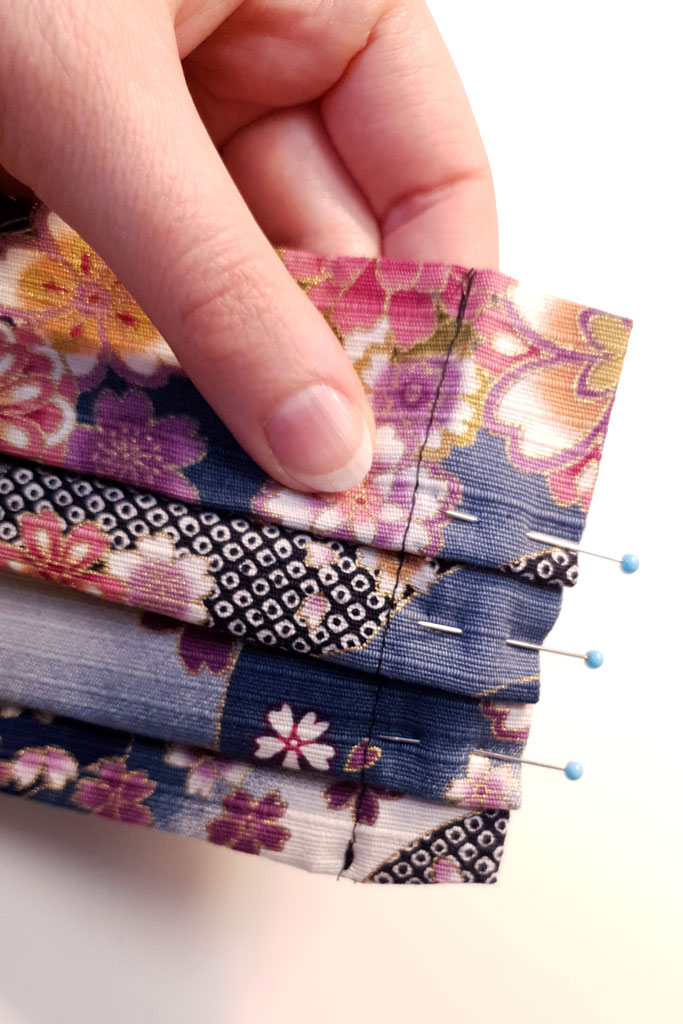
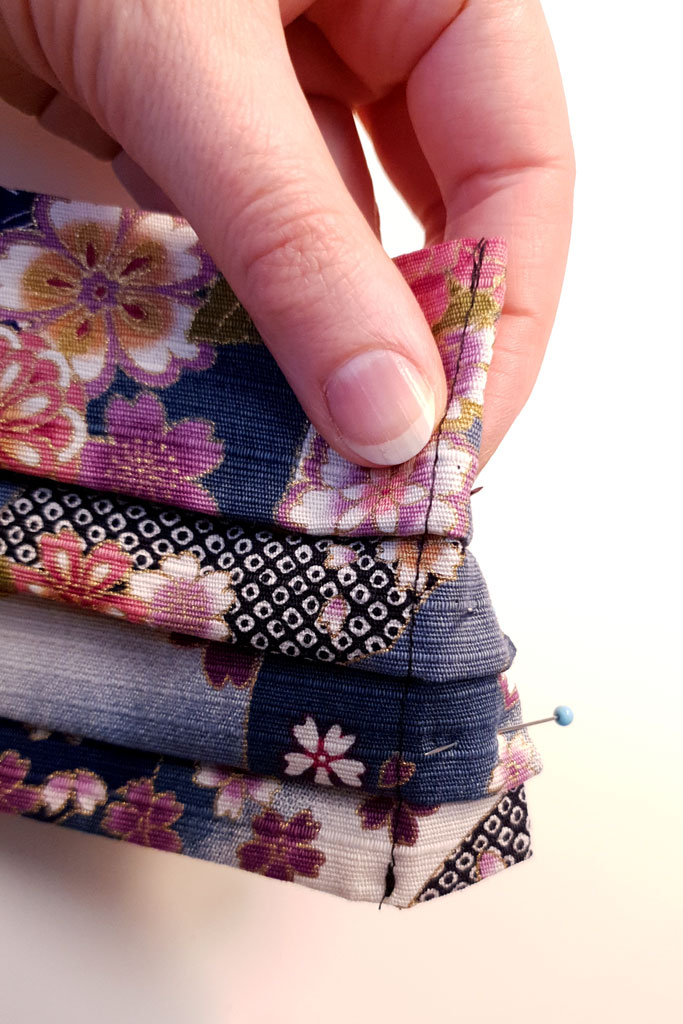
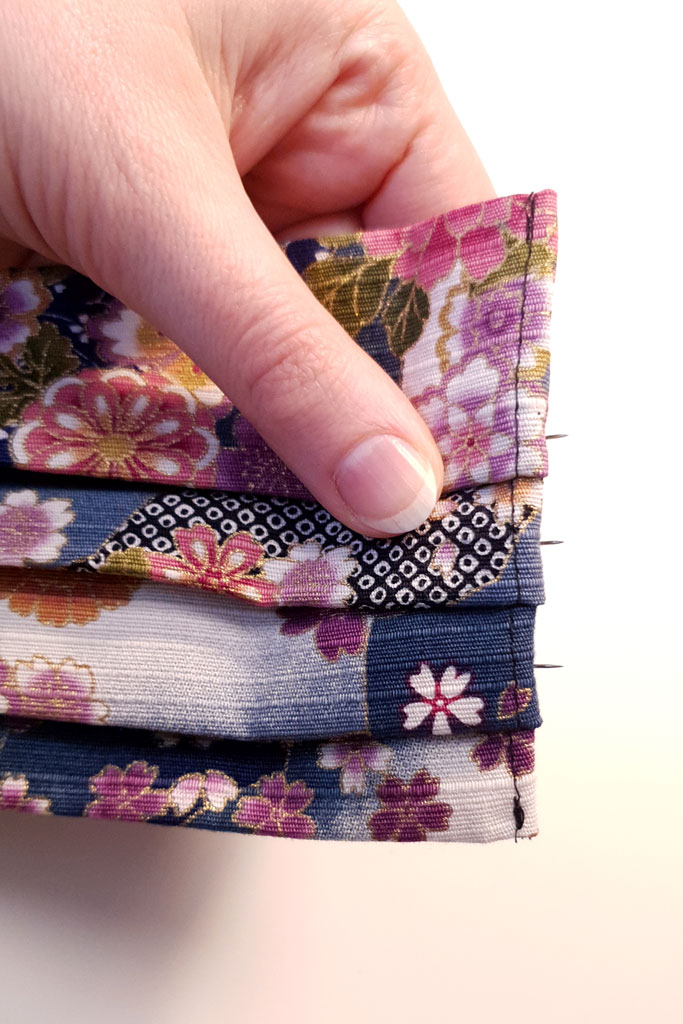

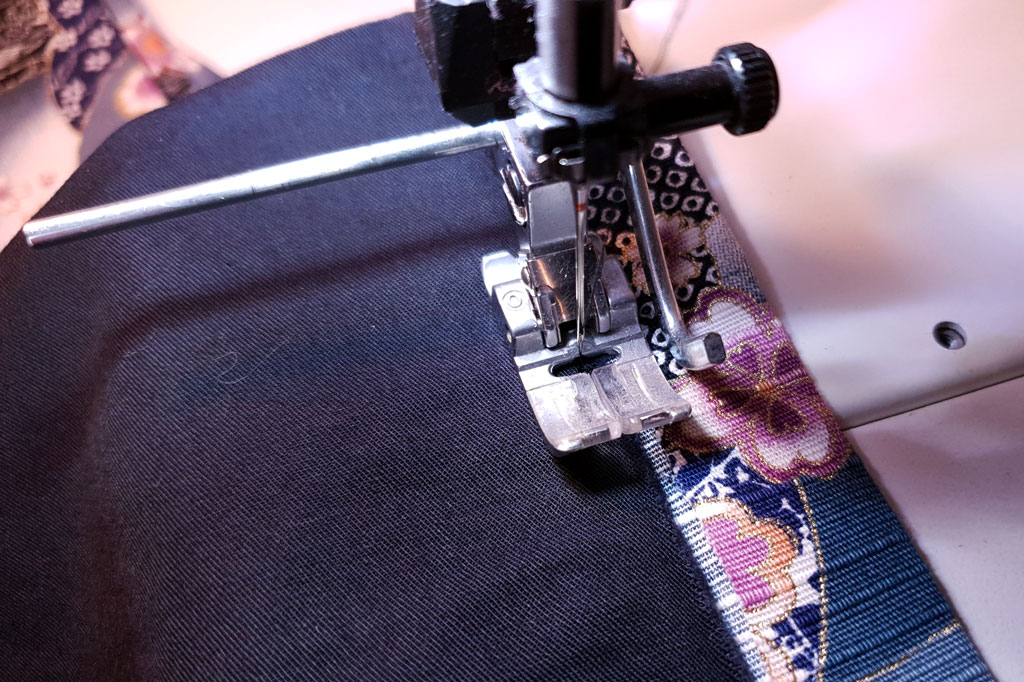
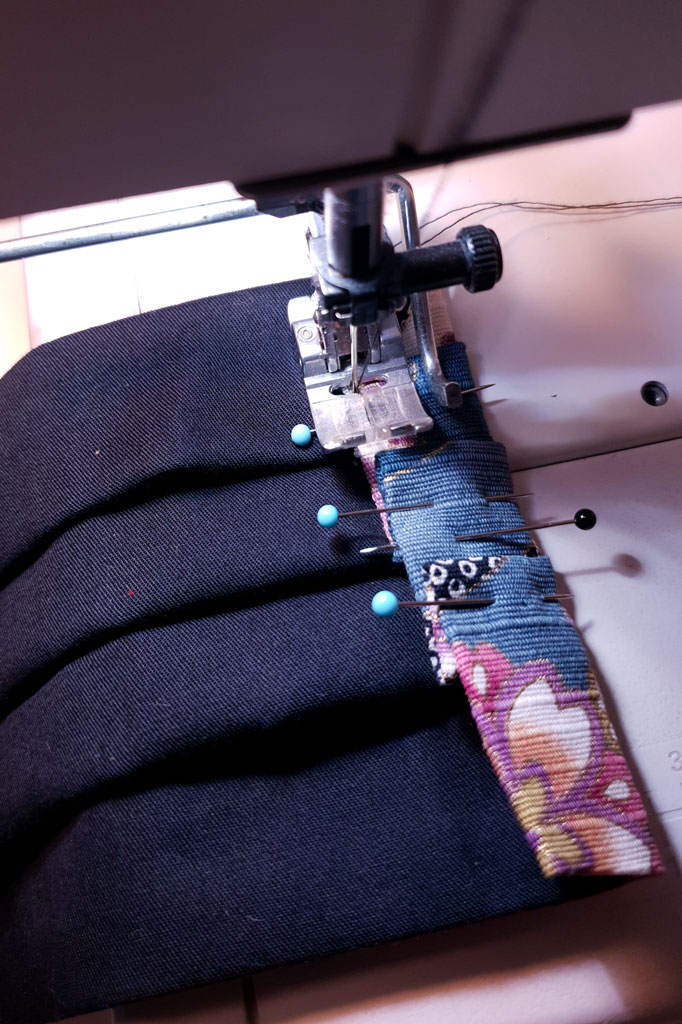
Stitch over the pleats. The distance from the mask edge must be 2x as wide as the elastic band you’re using, to make sure the straps will fit inside the casing.
You can sew over the pins as long as they’re parallel to the seamline.
Weaker machines may struggle with the many layers of fabric. Use a strong needle (90 or 100, standard or denim) that won’t break as easily, and use the hand wheel if your machine gets stuck.
Your mask is almost finished!
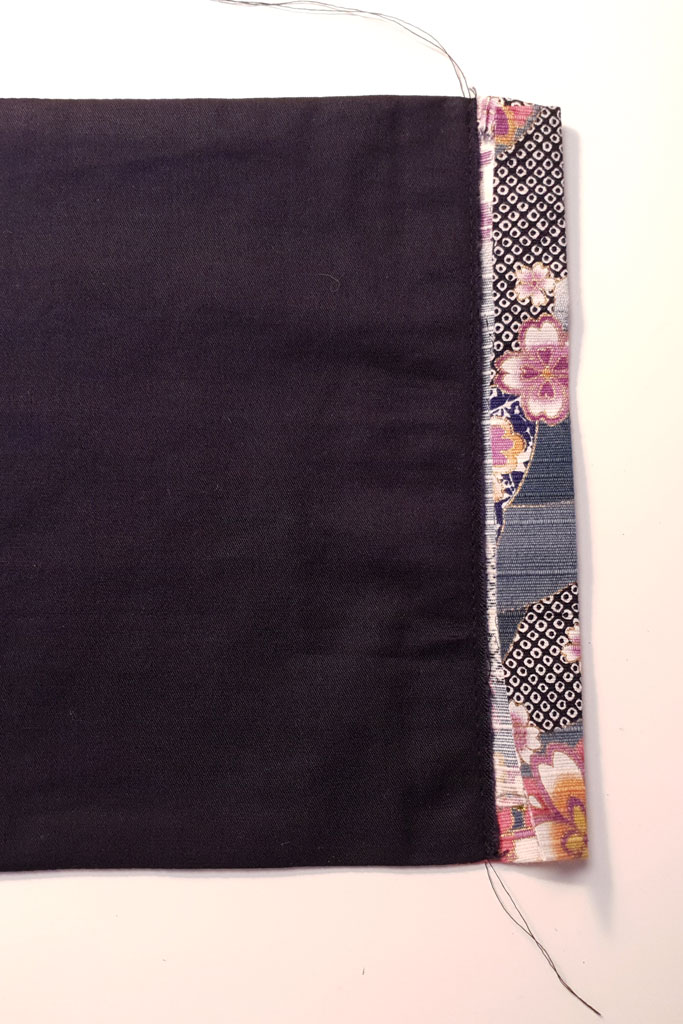
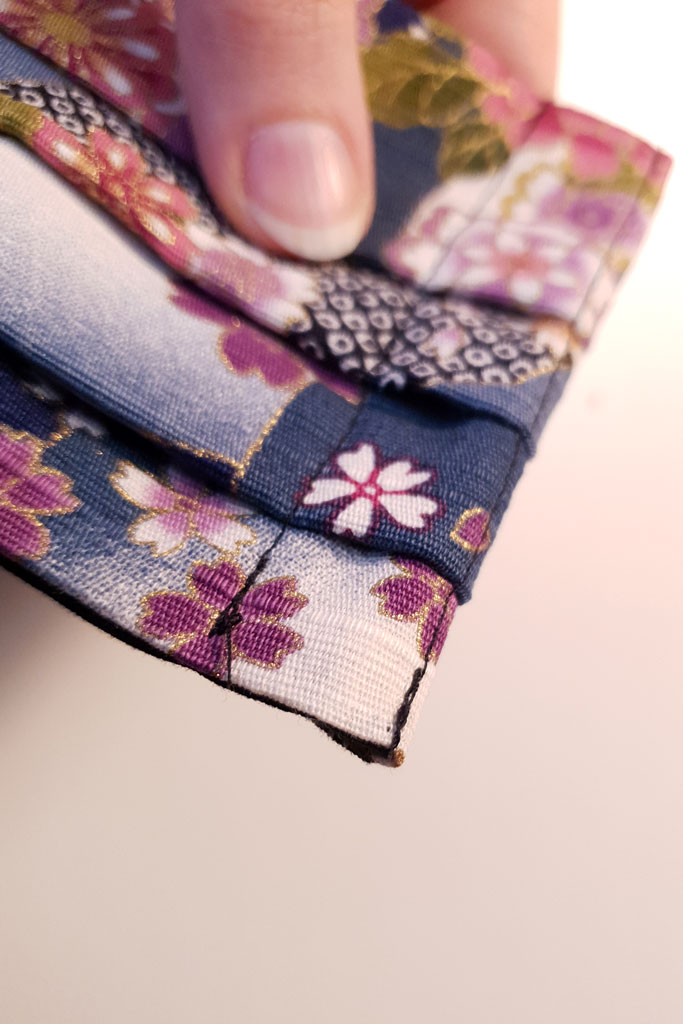
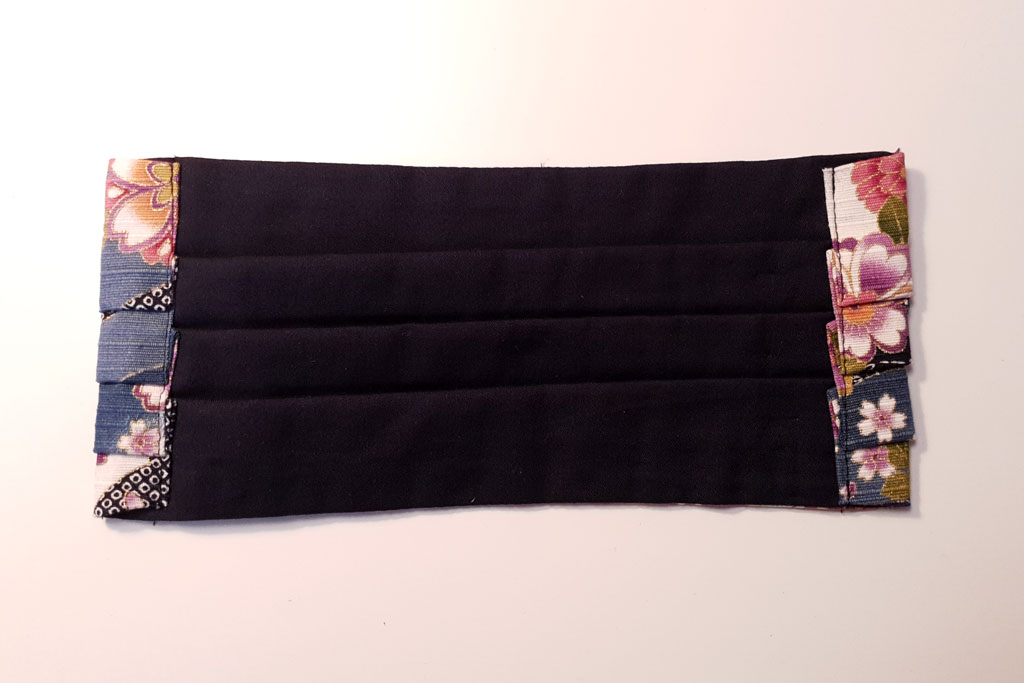
Stitch the casing Finished casing for the elastic band with double stitching line
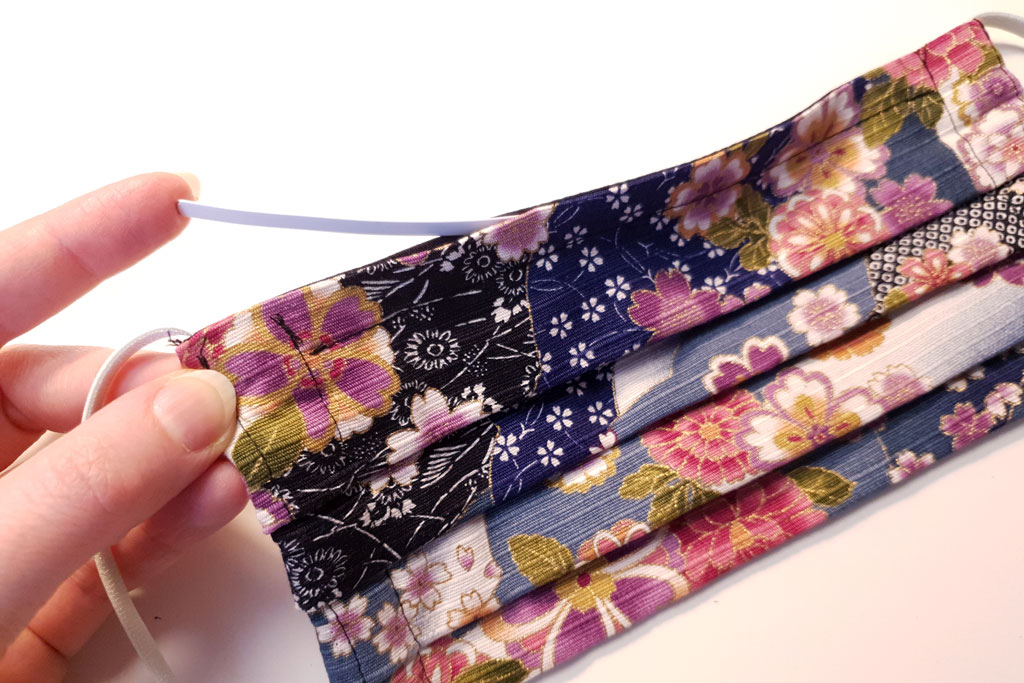
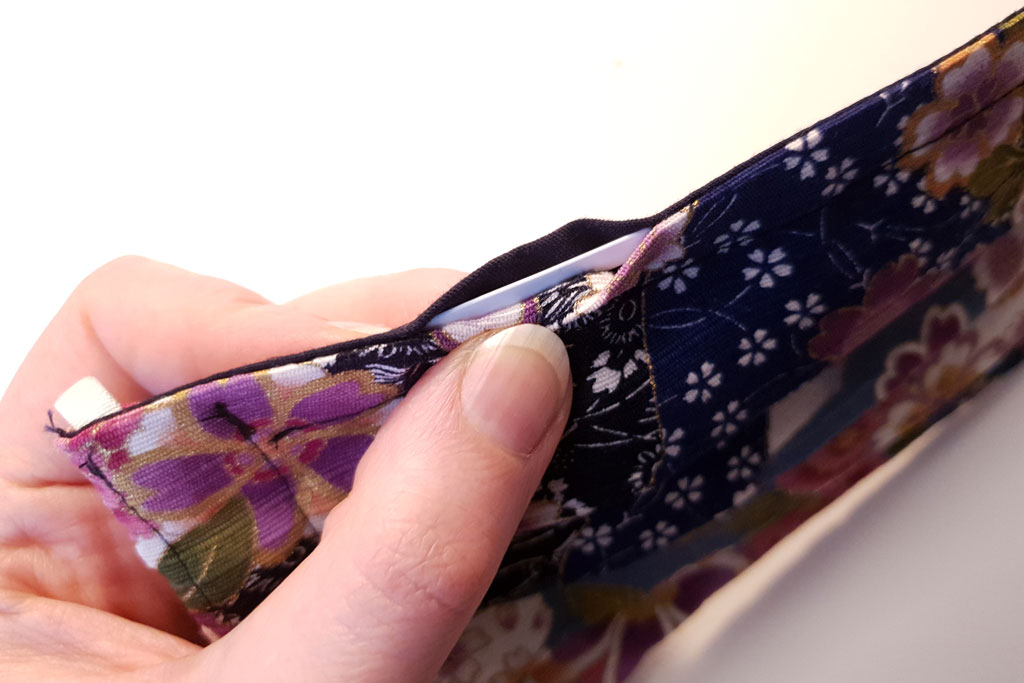
Insert the wire
Face masks work best when they hug the face, forcing you to breathe through the mask and catching droplets that try to go in our out. To shape the mask to your nose and close the gap over your cheek bones, you’ll want to insert a wire into the top edge. That’s why we left that small opening in the top edge seam!
To keep the wire in place, it needs a casing. Stitch a seam parallel to the top edge to form a tunnel. You’ll want to make the tunnel at least 1cm (3/8″) wide, or 5 mm wider than the wire you’re using.
Insert the wire through the opening in the seam. Move the wire inside the tunnel so that it doesn’t slip out of the opening and poke you.
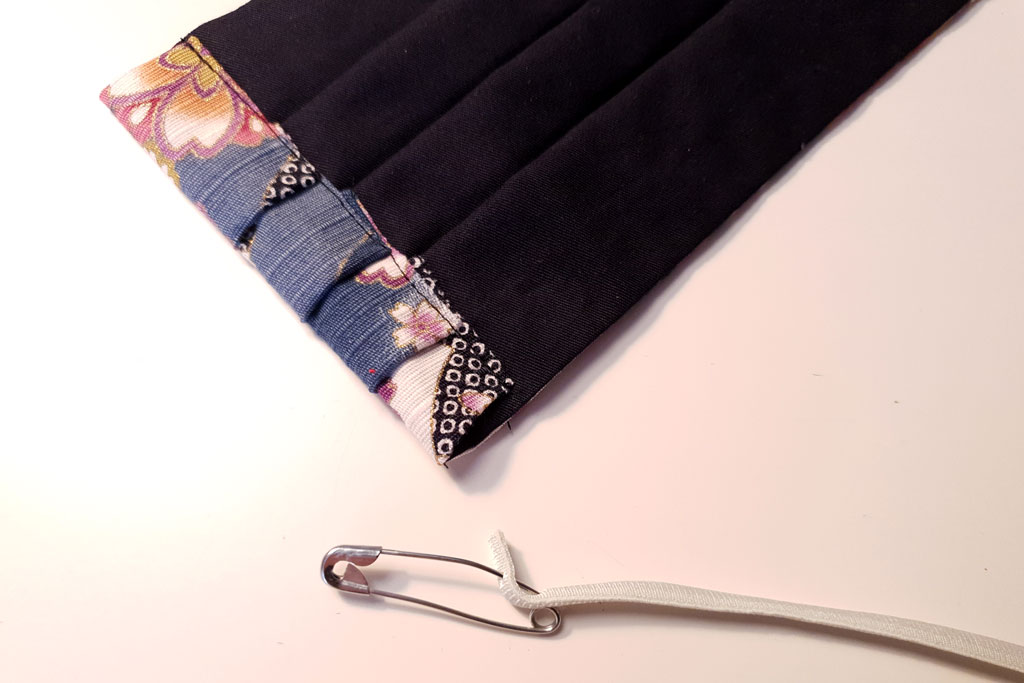
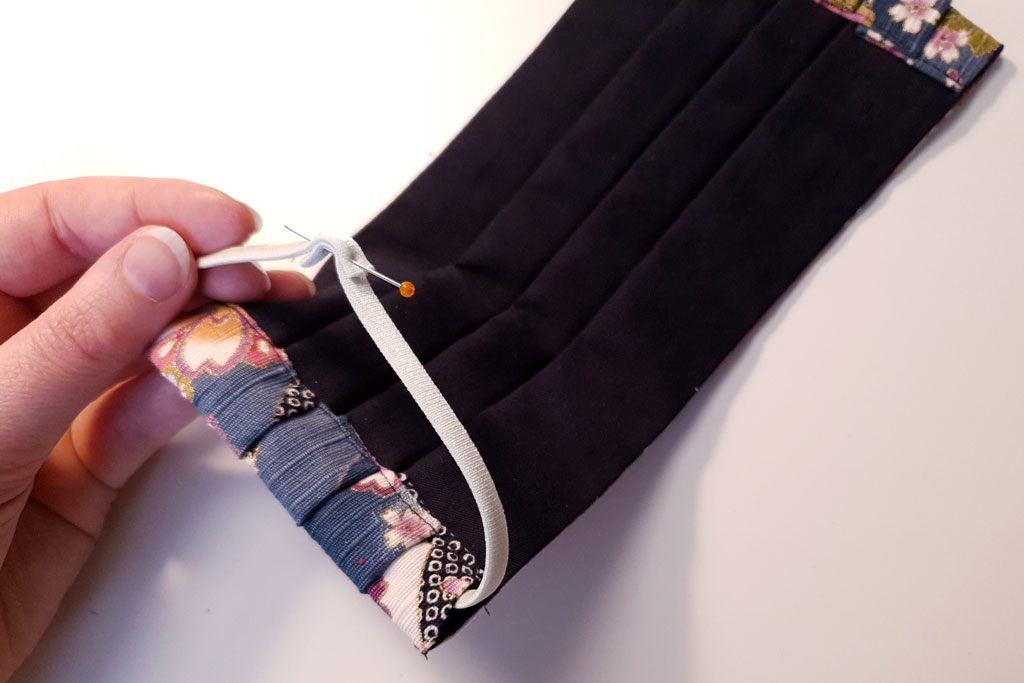
Add the elastic band
To wear your mask with elastic loops behind the ears, cut two pieces of elastic band or cord, each 25–30cm long. The elastic should not be more than 3mm-6mm wide for comfort.
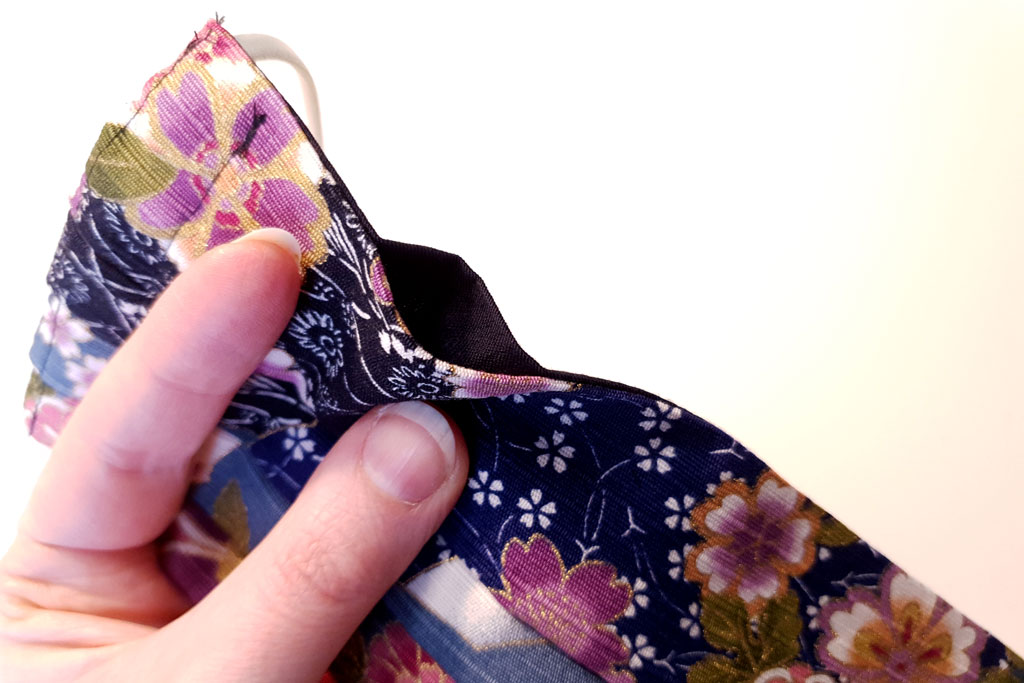
Insert the loose ends of the elastic bands into the casing on the sides of the mask. Use a safety pin to pull the elastic through. This can be a bit fiddly because there are so many layers of fabric inside the casing. Start at the bottom edge, so you’re pushing the pin towards the pleats.
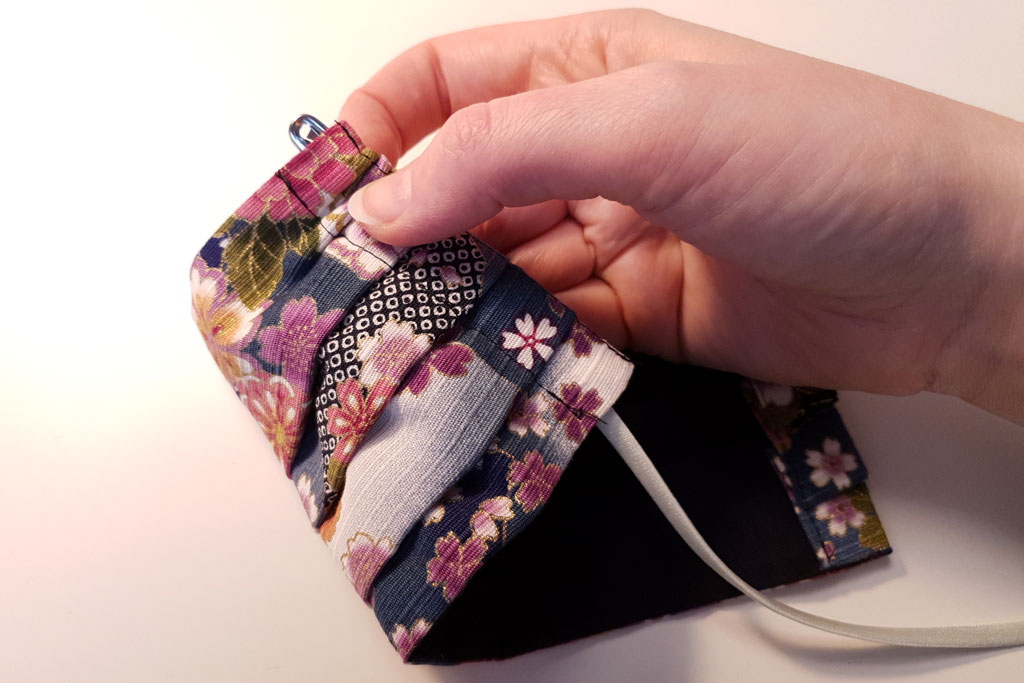
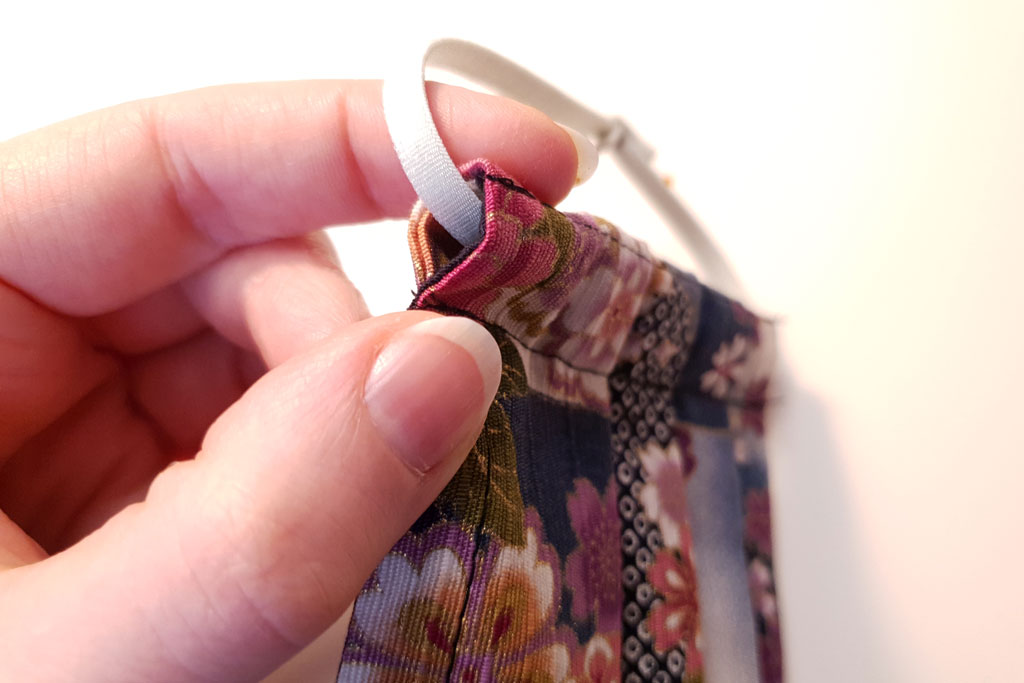
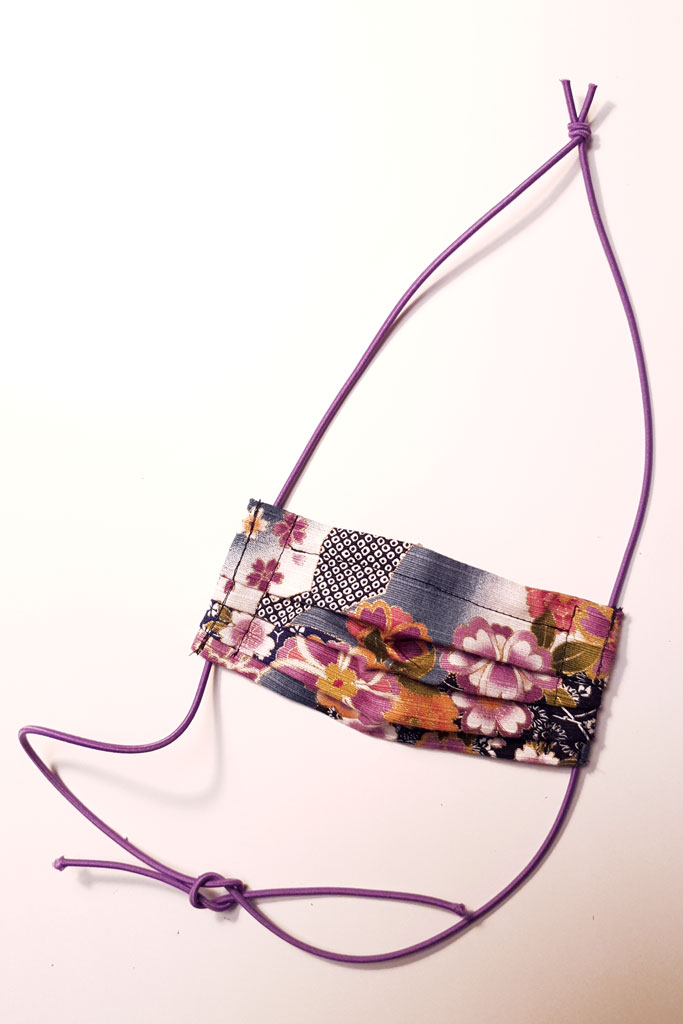
To form a loop, you can either tie the elastic band into a knot, or sew it closed. The knot or seam can be pulled inside the casing to make it disappear. A seam is less bulky, but it’s only recommended if you know the wearer’s size. Before you sew the ends together, fix them temporarily with sewing pins and try your mask on for fit.
Try on your mask and adjust the elastic if it feels too loose
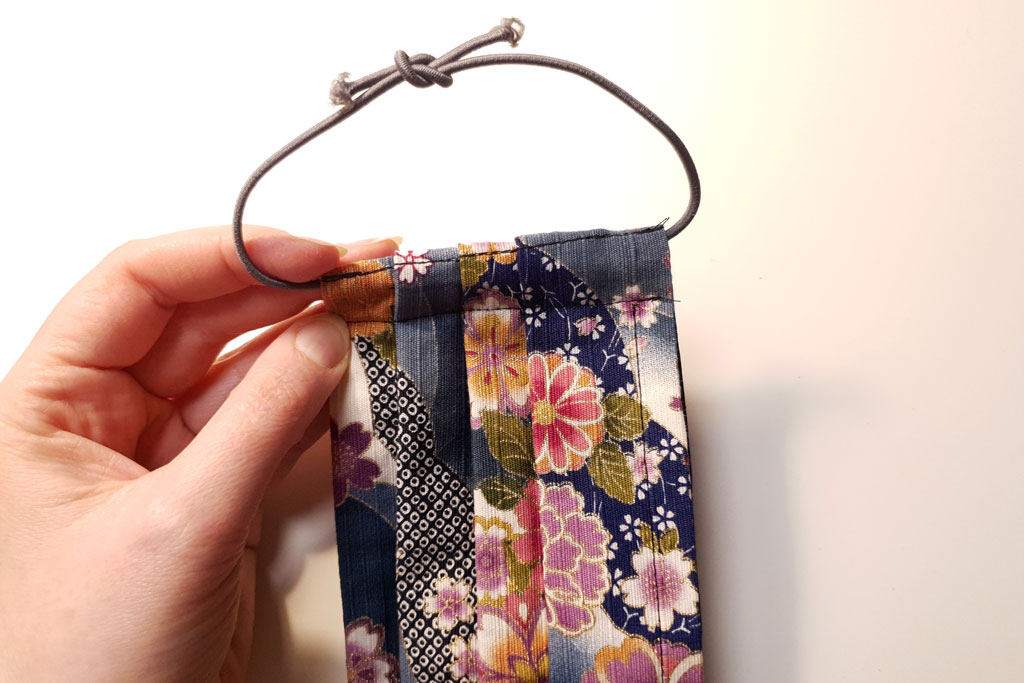
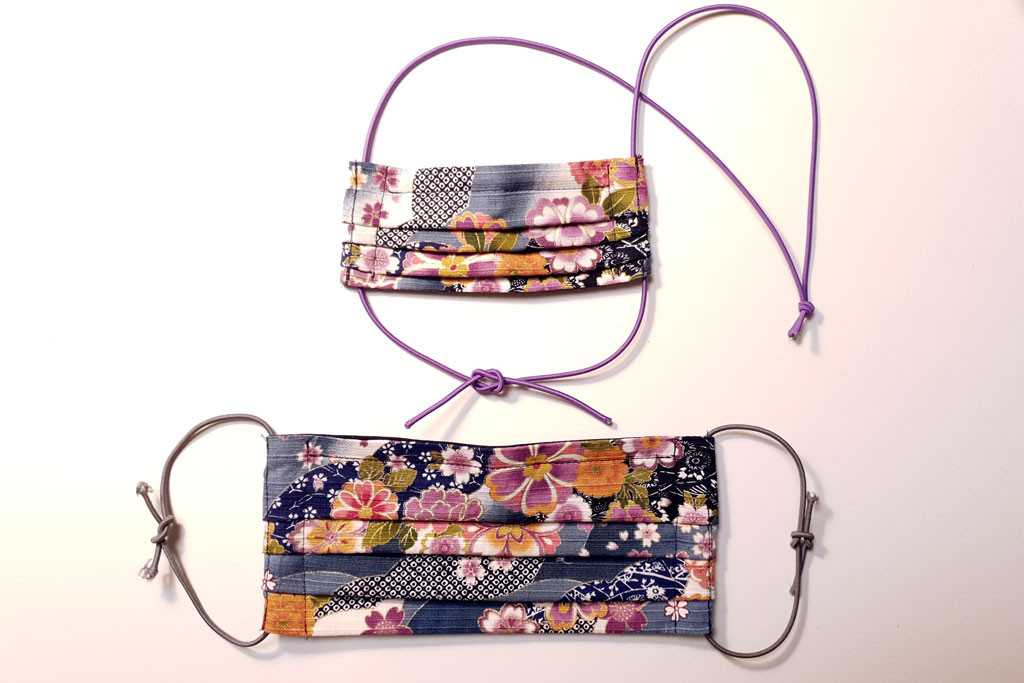
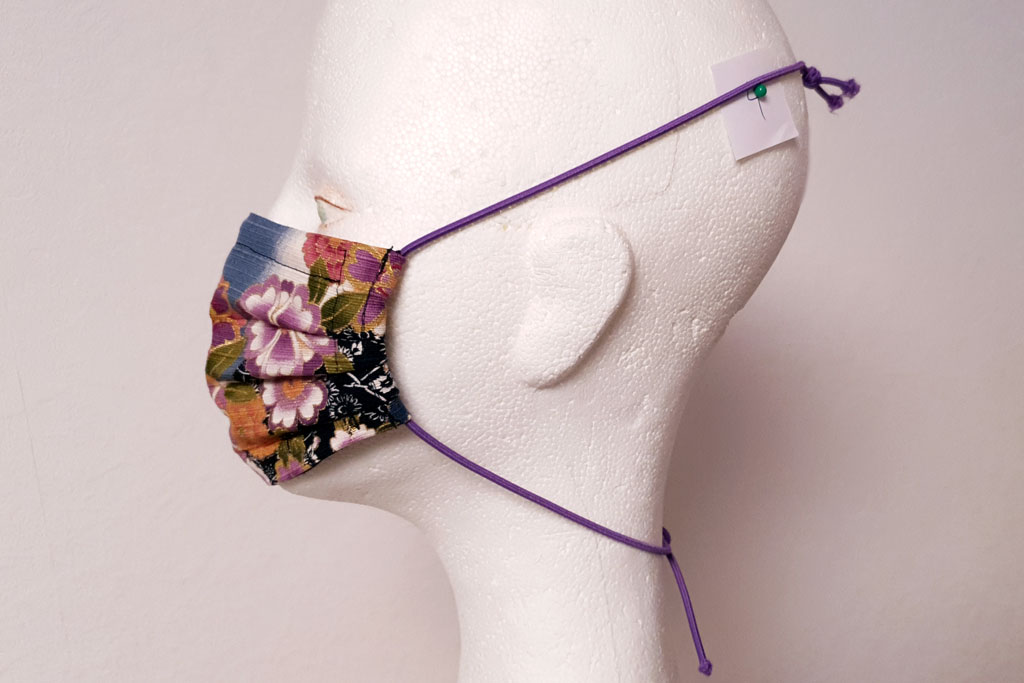
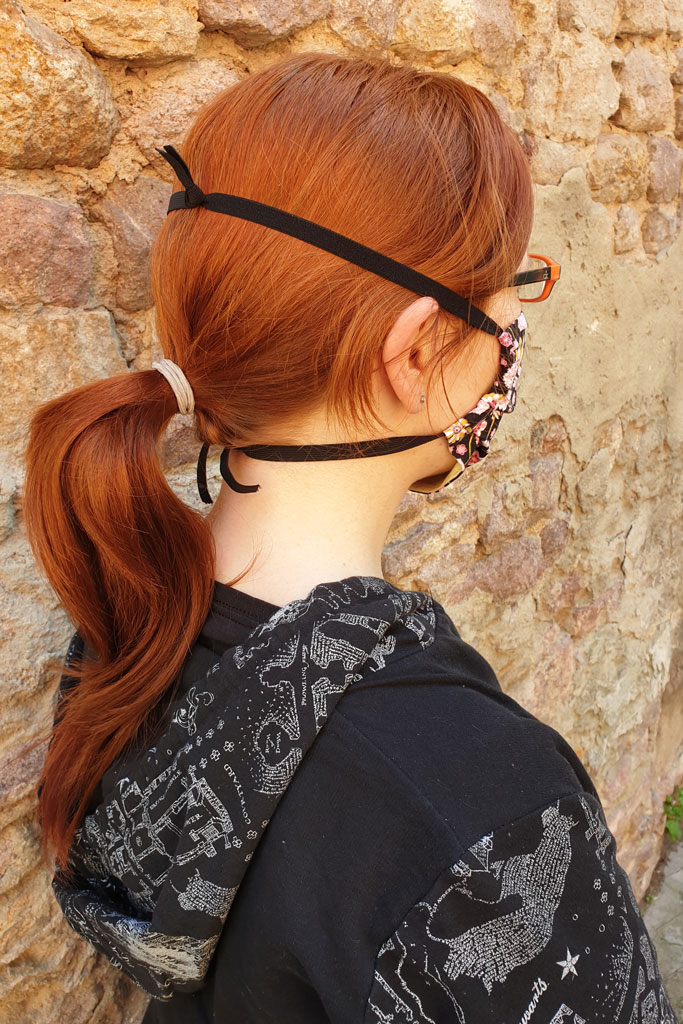
Alternatively, you can tie the elastic bands behind your head and in the nape of your neck. For this method you’ll need more elastic (2x 40–50cm). Try this if you find the loops behind the ears uncomfortable, or if you need to use wider elastic or non-stretchy materials like shoe laces. It’s also great for kids!
Face mask for a child
Wear your mask
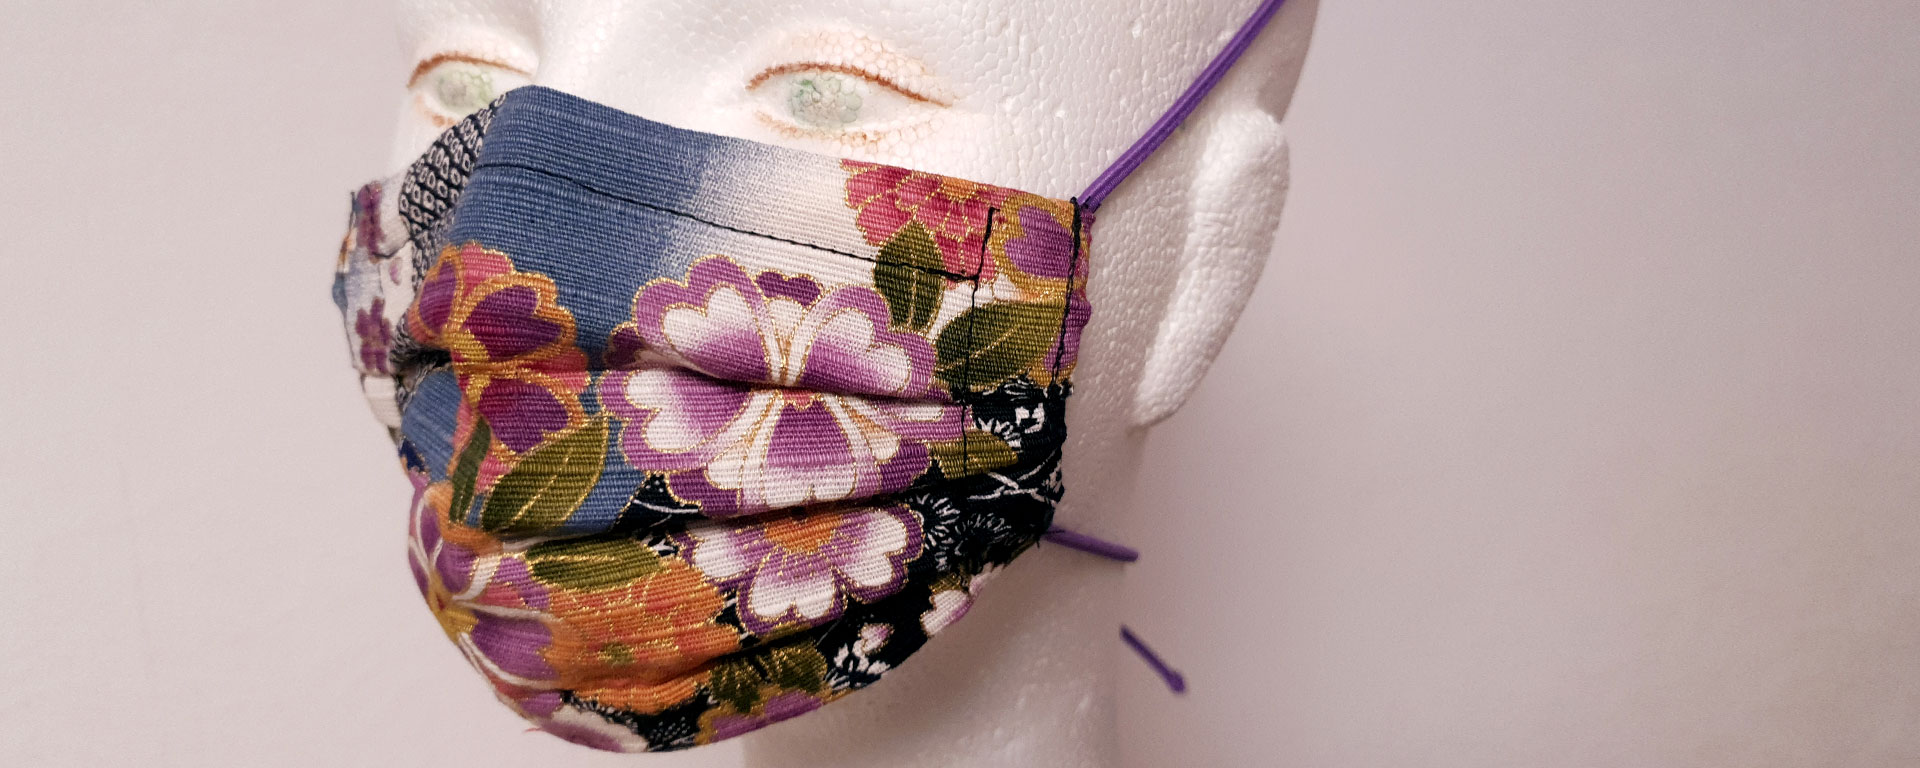
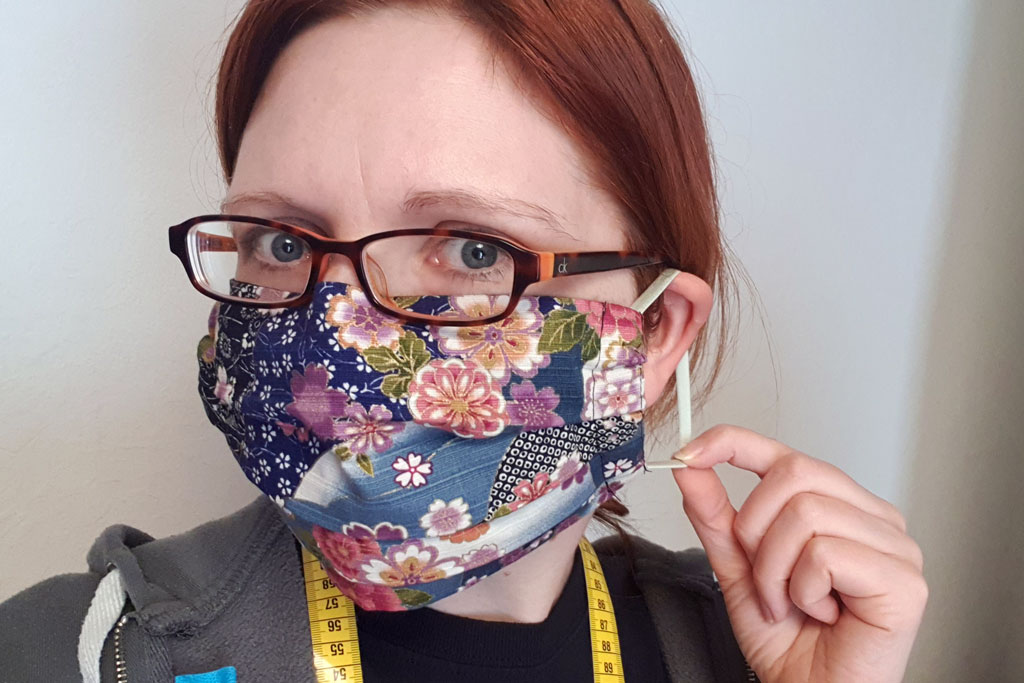
Place the mask on your nose. Press to shape the wire to your nose. Pull the elastic bands over the ears or tie them behind the head (depending on the method you’re using), then pull down the mask over your chin so that the pleats unfold. Press your fingers against your nose and cheekbones to adjust the mask to your face and close the gap.
Make sure you only touch your mask with clean hands. Once you’ve put on your mask, try not to touch your face or the mask anymore, except by the elastic bands.
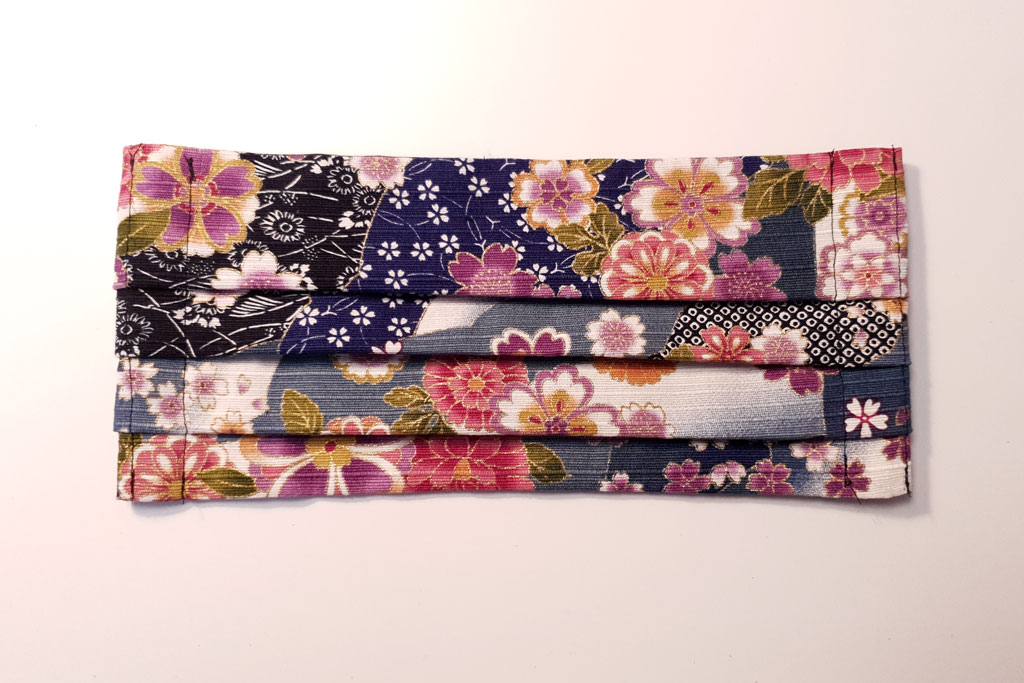
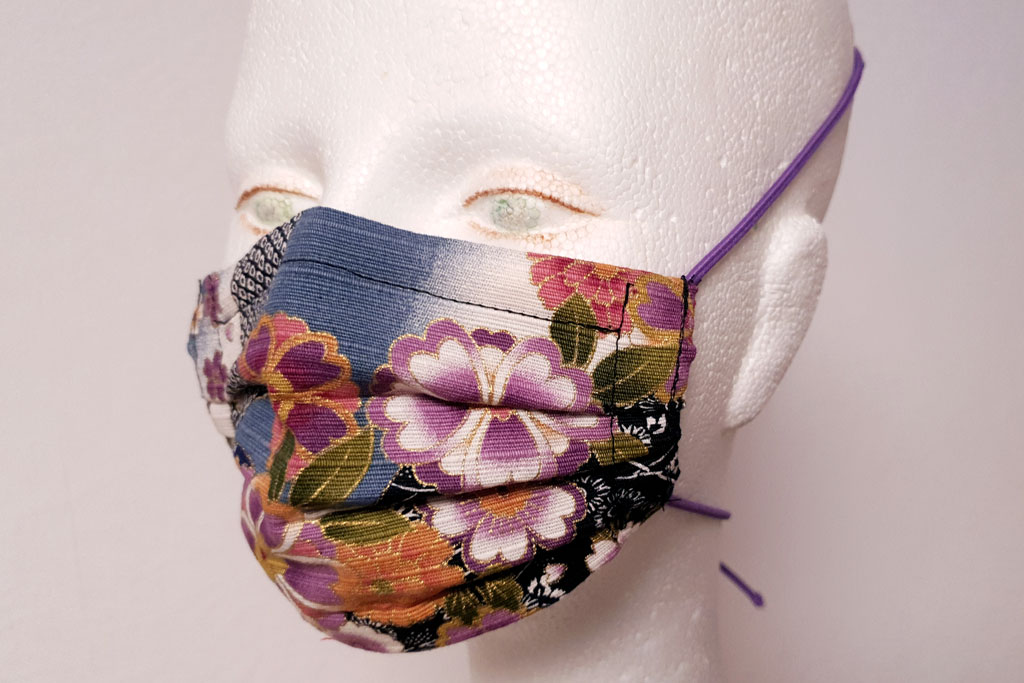
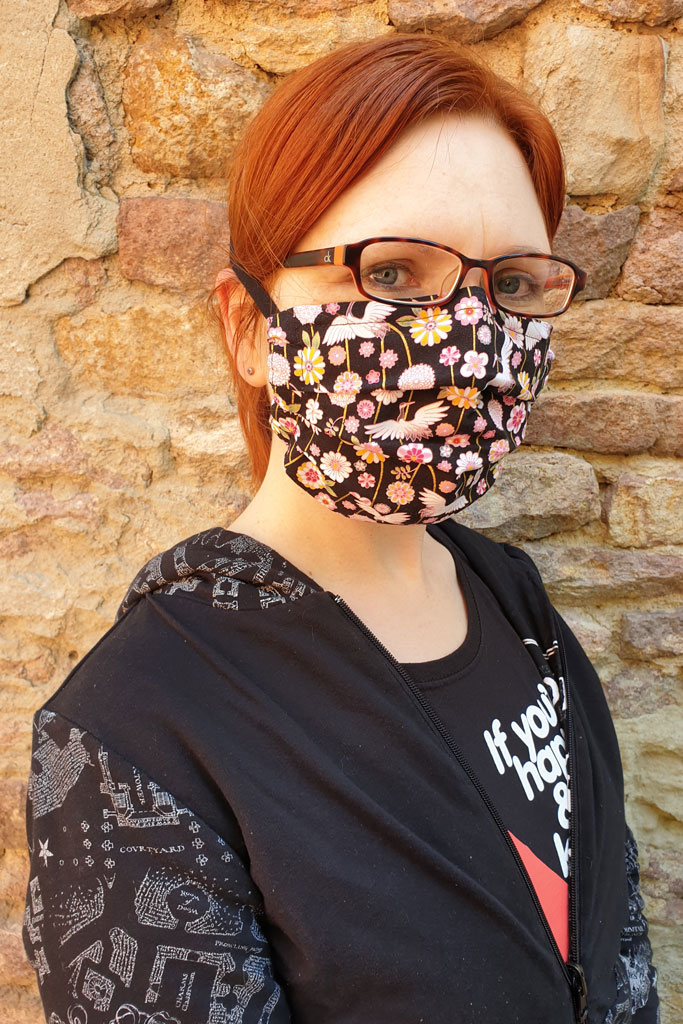
Your adjustable face mask is done! Tie the straps behind the head for comfort Left: with long straps to be tied behind the head;
right: with short straps to be worn over the ears
To take off the mask, grab the elastic bands and pull the mask away from your face without touching it. It’s the mask’s job to protect you from dust and droplets, so it could be contaminated. If you’re sweating or sneezing in your mask, exchange the wet mask for a fresh one as soon as you can. Place used masks in a ziploc bag and wash your hands before touching your face again.
Used masks must be washed at 60–90°C after every use, no matter how short a time you’ve worn them! Remove the wire because it may not be rustproof, and it can damage your washing machine if it slips out of the casing.
Variations
For added protection, you can add a filter layer inside your mask that you exchange every time you wear it. Check out Yaya Han’s video tutorial for a pleated mask with filter pocket. She’s also selling these masks in her U.S. based store.
Pasta & Aby Cosplay on Etsy sell patterns for fitted masks, including a mask for bearded men! Fitted mask patterns have more seams and require some sewing skills.
For an even simpler model, see my basic face mask tutorial. Take care and stay healthy!
Can’t get enough of sewing? Explore my cosplay tutorials, like this basic fabric tutorial.
2 Gedanken zu “How to Sew an Adjustable Face Mask”