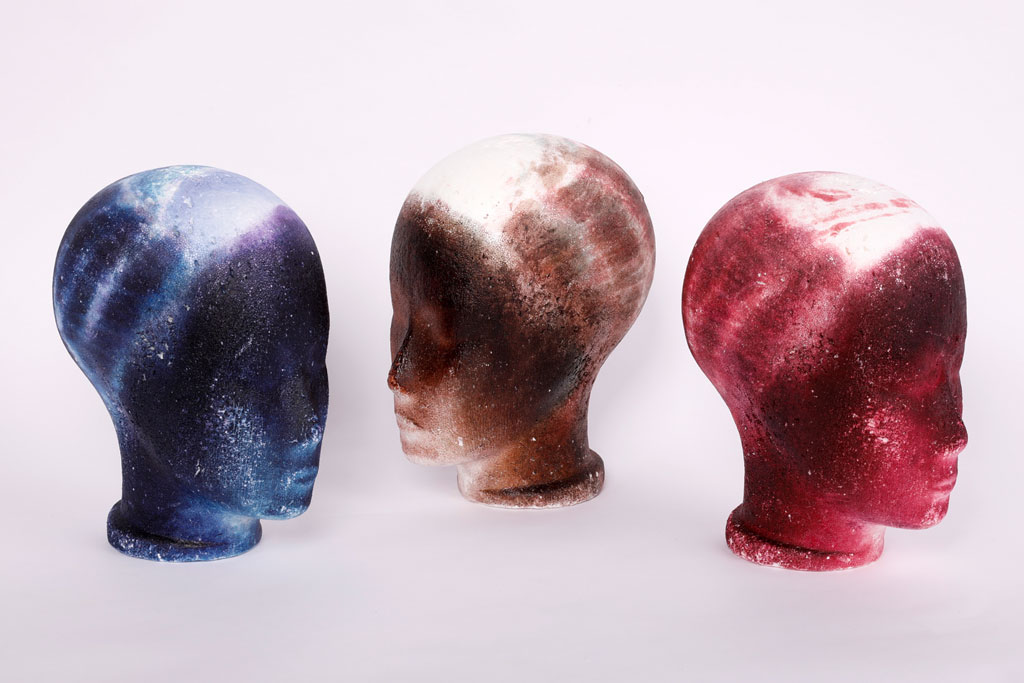
A hero’s hair comes in all colors of the rainbow. From raspberry pink to deep ocean blue – finding the perfect wig color for your cosplay isn’t easy! Knowing how to dye a wig in the color of your choice can be a life-saver.
Synthetic wigs are made of plastic, so real hair dye is not an option. There are a number of ways to color wig fiber, including:
- acrylic ink or paint
- polyester fabric dye (iDye Poly or RIT DyeMore)
- alcohol-based markers (Copic or Sharpie)
My favorite method, and the one I’ve been using for over 10 years, is Copic ink. When you use their refill tanks, you can dilute the ink with alcohol and use it as a spray dye, so you don’t have to paint the wig by hand or crack the markers open to harvest the ink. Copic comes in over 300 shades and it is very easy to mix your own unique colors.
The spray-dye method is more time-consuming than dip-dyeing your wig in fabric dye, so it may not be the weapon of choice if you want to dye a full wig. However, it’s very precise and gives you more control over the result – perfect for streaks, gradients or pastel shades, and when you want to make sure you get the shade exactly right.
Credits: my wig dye method owes a great deal to cosplay wig pioneer, Katie Bair of Petting Zoo Wigs. Although she didn’t use Copic inks in her custom-made dyes (that’s something I picked up from other cosplayers in the 2000s), the application process is much the same. Her tutorials helped me on my trial and error journey to master this technique – and I’m sharing it with you so you don’t have to make the same mistakes!
Material
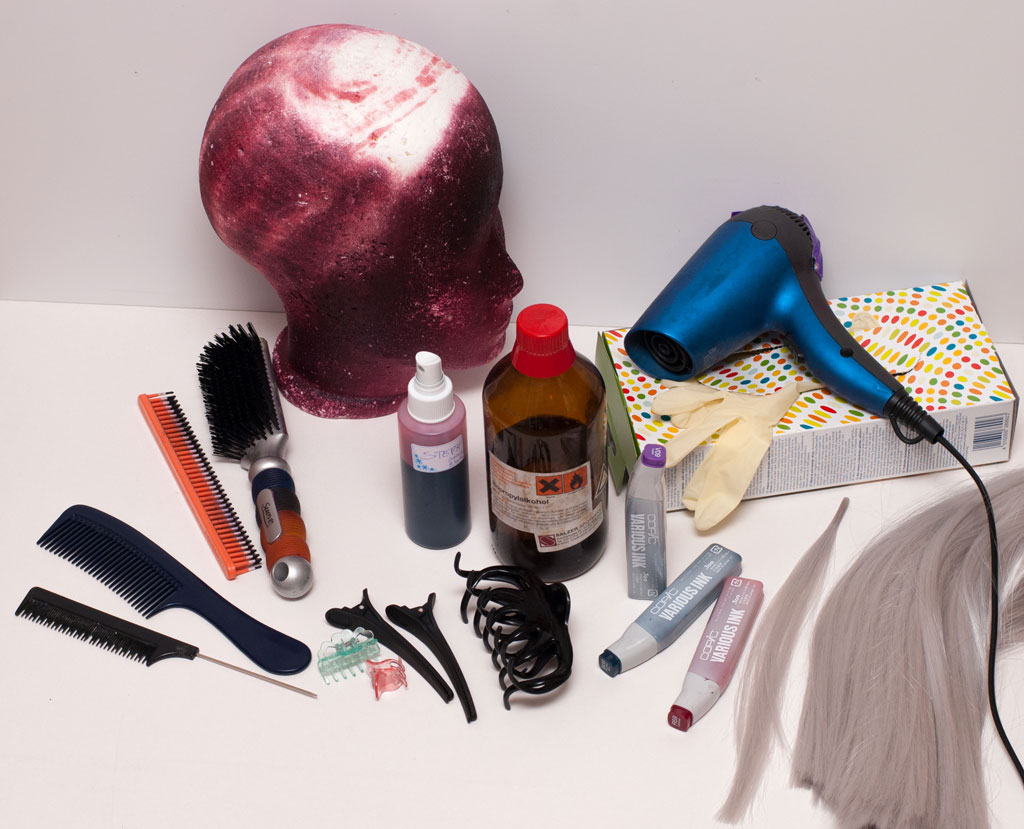
Here’s what you need to dye your own wig:
- Copic ink refills (Copic Various Ink)
- isopropyl alcohol (70–100%)
- small spray bottle (bonus: w/ millimeter scale)
- brush or comb with parallel bristles (to brush in the dye)
- tail comb, wide-tooth comb, hair clips (to section off the wig)
- hair dryer
- latex gloves, tissues, plastic bags / tarp (to protect your work area)
- styrofoam wig head
- bottle or wig stand
- wig (white or light color)
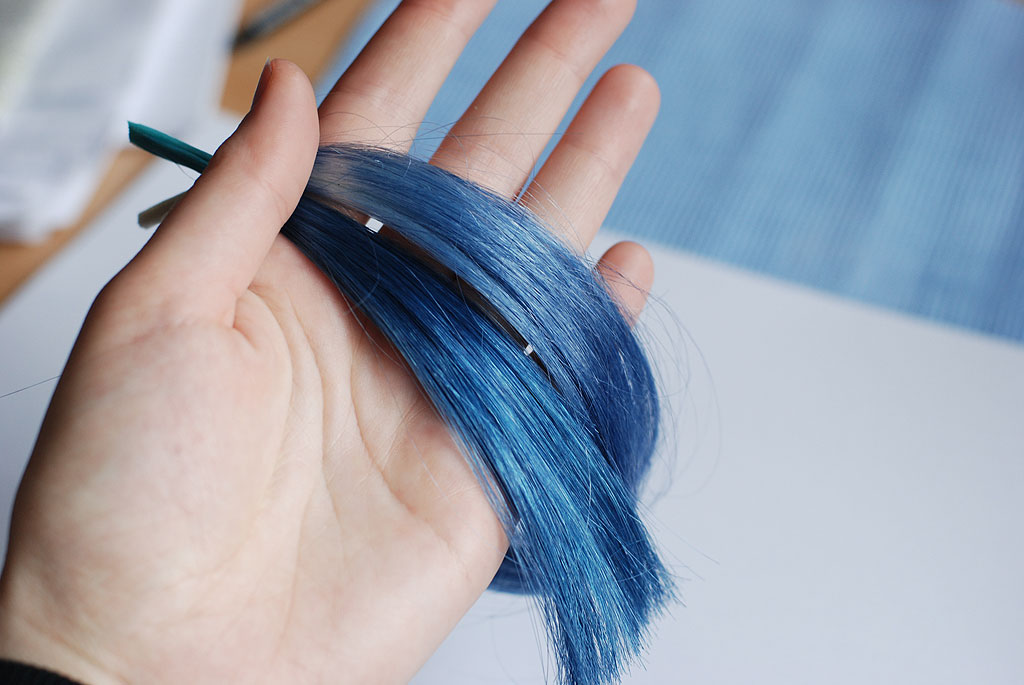
Copic ink will stain most plastic wigs, but some fibers take the dye better and are more color-fast than others. I always do a swatch test on a strand of hair or an extra weft.

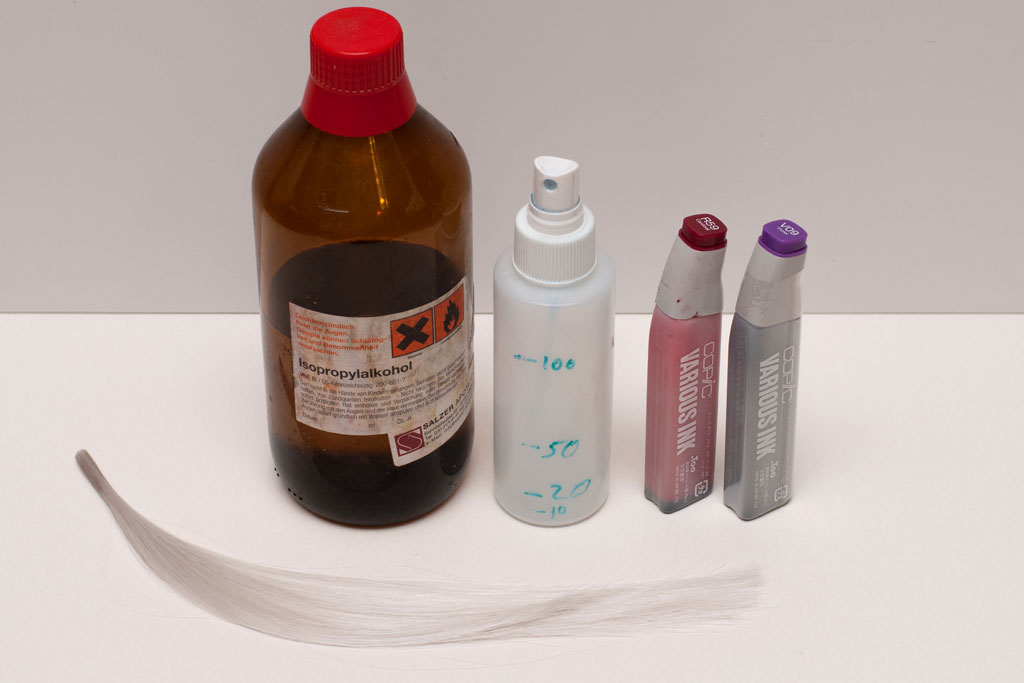
Basic ingredients: isopropyl alcohol, spray bottle with milliliter scale, Copic ink refills and fiber swatches for testing Swatch test for Byleth (Fire Emblem 3 Houses) on CosCraft’s blue grey fiber
Choose a Color
When choosing the color of your base wig and the color of your dye, it helps to understand how colors mix. Some things to keep in mind:
Wig dye is not opaque. It does not cover the original wig color completely. Compared to fabric dye or pure marker ink, it’s also harder to achieve dark and intense colors with spray-on dye. Do swatch tests to get a feel for what dye recipe works best for you.
You cannot bleach a wig, only dye it a darker shade. Pick either a white wig or a color that is one shade lighter than the color you want to achieve.
If the base wig has a tint, the colors will mix and the result will be different compared to a pure white wig. I’ve put together a color chart with wigs I’ve dyed to give you an idea what’s possible!
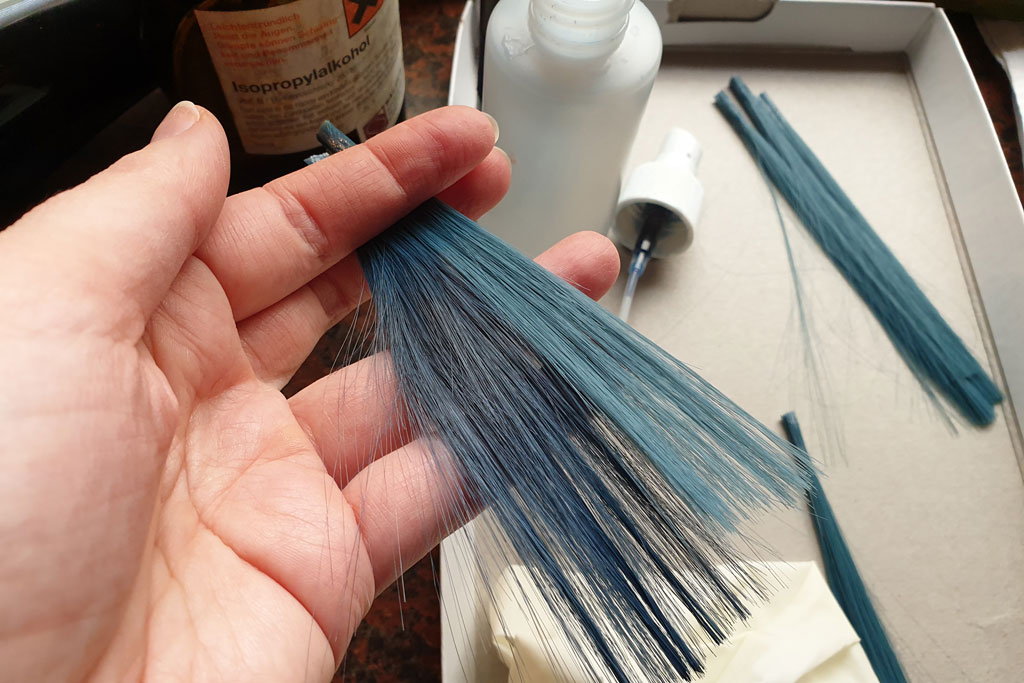
Swatch tests: dark blue Copic on sky blue vs. silvery white fiber
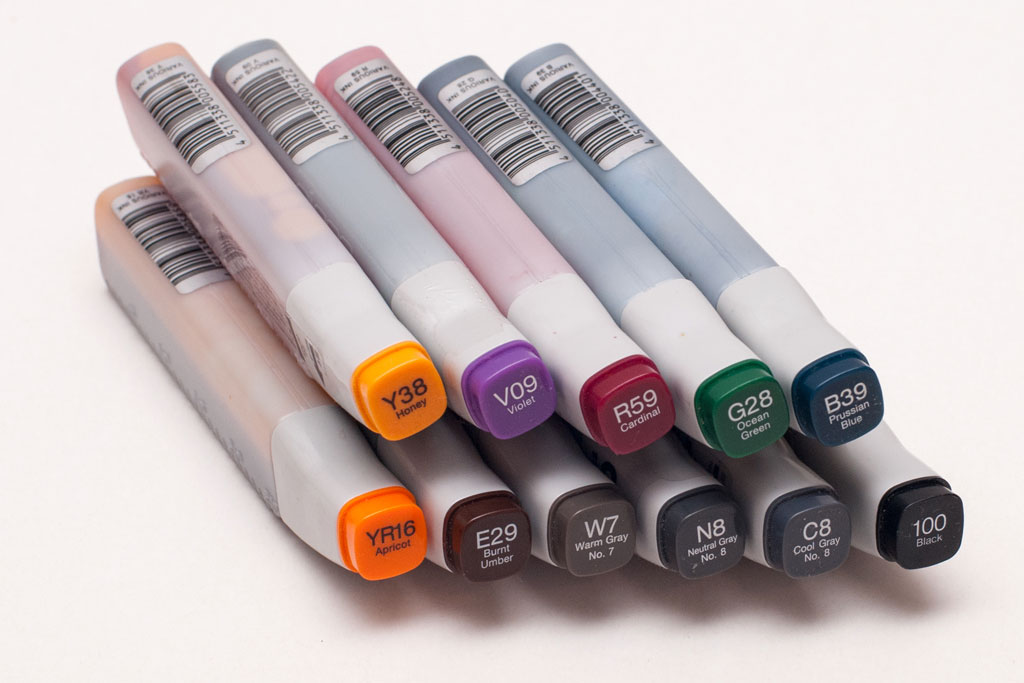
Since the ink will be diluted with alcohol, it’s a good idea to buy a darker color ink. That will also save you money because the dark inks cost just as much as the pastel ones, but they contain a lot more pigment per bottle! You don’t need to choose from all 300+ Copic colors – just buy a dark shade of each basic color and mix them as needed. You can see my favorite basic colors for mixing right here.
My favorite colors for mixing
Mix the Dye
For a thick, shoulder-length wig, you’ll need to mix about 200-300 ml of dye. Your mileage will vary depending on the amount of hair in your wig, how big the color change, and your training.
The mix ratio (Copic : alcohol) can be anything from 1:5 to 1:30.
Examples for a full wig:
- 250ml alcohol + 50ml Copic ink for a very deep color
- 250ml alcohol + 10ml Copic ink for a very pale color
50ml is equivalent to 2 refill bottles of Copic Various Ink.
Before I waste precious ink, I do a swatch test with 10ml alcohol and a few drops of Copic ink (40 drops = 1ml). Buy only a few dark base colors (Blue, Red, Grey…) and mix two or three colors for endless possibilities. Write down the recipe for each test so you can scale and replicate it later.
Note: When you do a swatch test, it’s important to set and rinse the fiber just like the real thing (follow my instructions below). Otherwise the color may turn out lighter than expected.
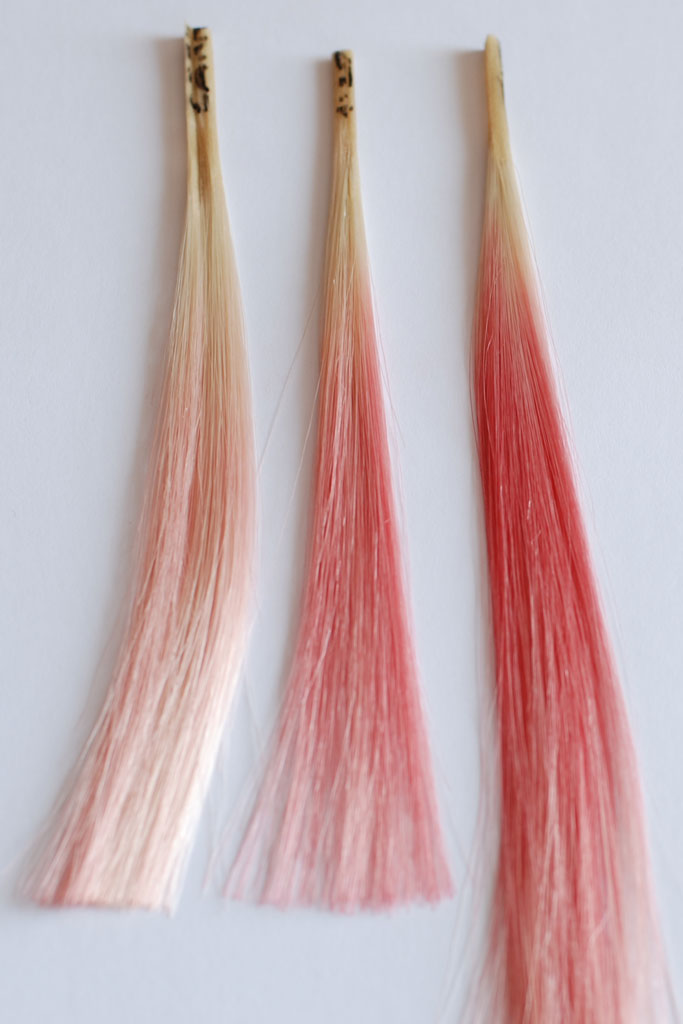
Swatch tests: Copic (Carmine R37) in 3 different concentrations on platinum blonde (613)
Get Ready
Cover your work area, preferably the whole room, and make sure it’s well-ventilated. Alcohol fumes are bad for your lungs and will give you a headache! Wear old work clothes and latex gloves at all times. Spray dye has a huge fallout and copic ink will stain skin, textiles, plastic, foam, wood… Stains on metal or ceramics can usually be removed with alcohol, but it’s better to be safe than sorry.
Put the wig on the styrofoam head and secure it with pins along the hairline. The dye will stain the foam and it will rub off again when exposed to wig dye or hairspray, so I use dedicated foam heads for each color. If you don’t dye wigs often, pull a plastic bag over a foam head to protect it. Turn the bag inside out because the print may rub off onto the wig.
My private army of foam heads that I use for dyeing
Prop the wig head on a stable wig stand so that it cannot fall over when you brush it. I use a tripod for long wigs, but a heavy bottle will do just fine for shorter wigs.
How to Dye
Section off a layer of hair that you want to dye.
Spray on the dye from a distance of 6-12″ (15-30cm). Spray lightly and keep moving the bottle for an even coloring. There should be no beads building up on the fiber, no liquid running!
Brush in the dye with your dye brush: a brush or comb with short, parallel bristles. Quick strokes help distribute the dye evenly on the fiber.
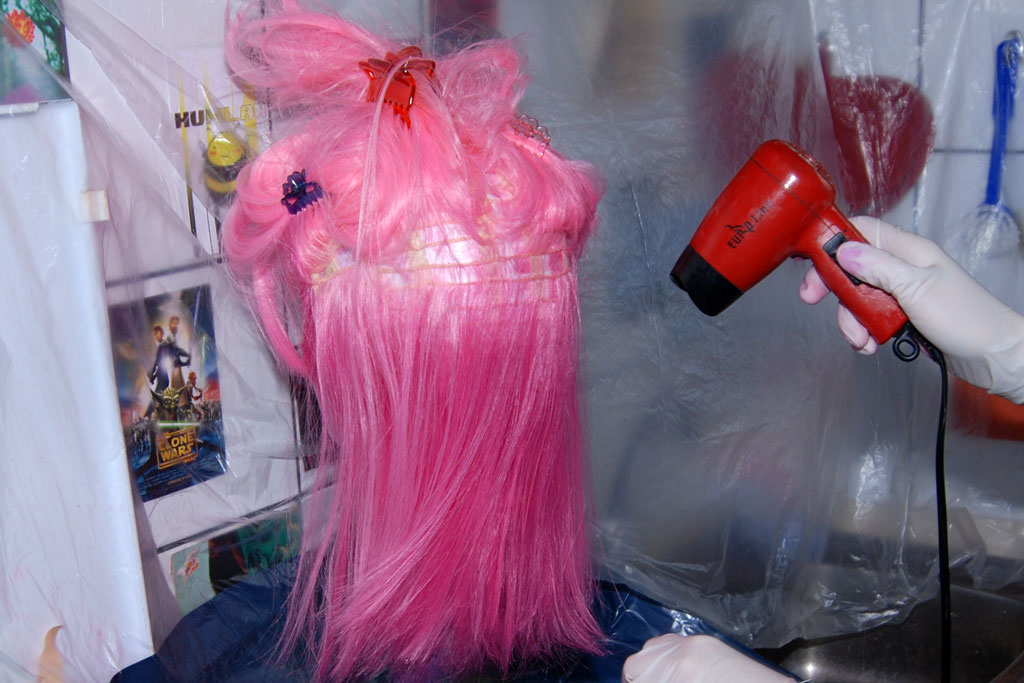
Set the dye with a hair dryer (lowest setting) until the fiber is dry. Keep moving the stream of hot air so that you don’t damage the fiber. The dye will get lighter as it dries, this is perfectly normal.
Spray on the dye from 15-30cm Brush it in Set it with heat

That’s it! The key is to work in small segments, only a thin layer of wig fiber at a time.
- Apply the dye lightly
- Brush it in quickly and thoroughly
- Set it with heat immediately
Heat-setting is important to keep the dye from running. Light spraying and small amounts of fiber guarantee that the color actually sticks. Too much dye will result in an uneven coloring after you rinse the wig, because the running alcohol takes the pigment with it and it can’t stick to the fiber properly.
Do not apply more than 1 or 2 layers of dye (spray over the same spot more than once) – it may look OK at first, but will come out spotty once you’ve rinsed the wig. If you want a darker color, go back to your swatch tests and mix a more concentrated dye!
Layer by Layer
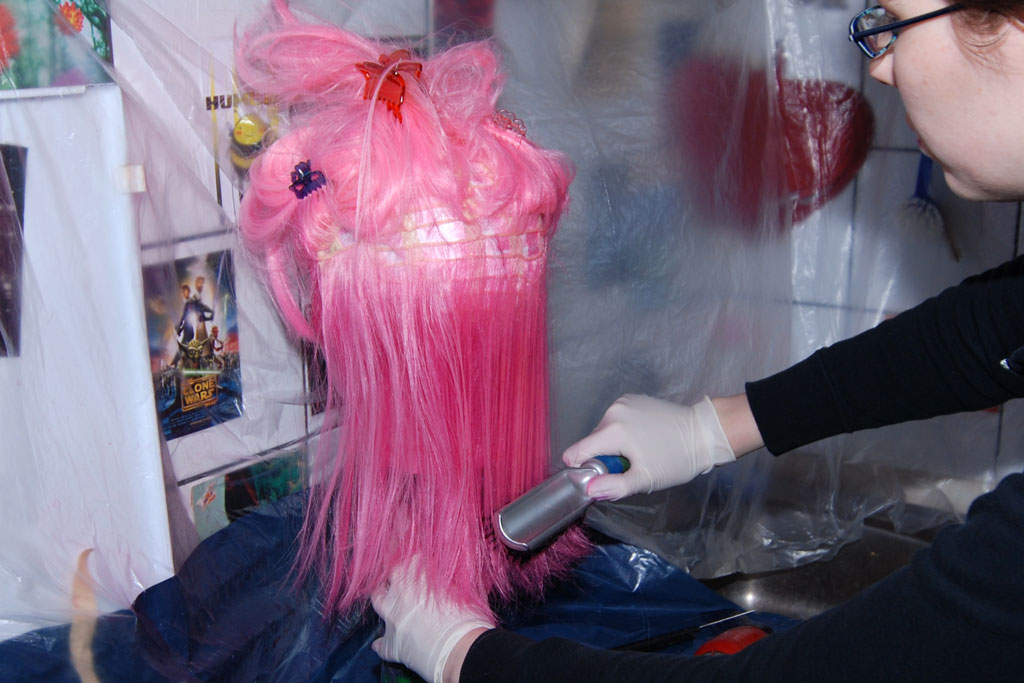
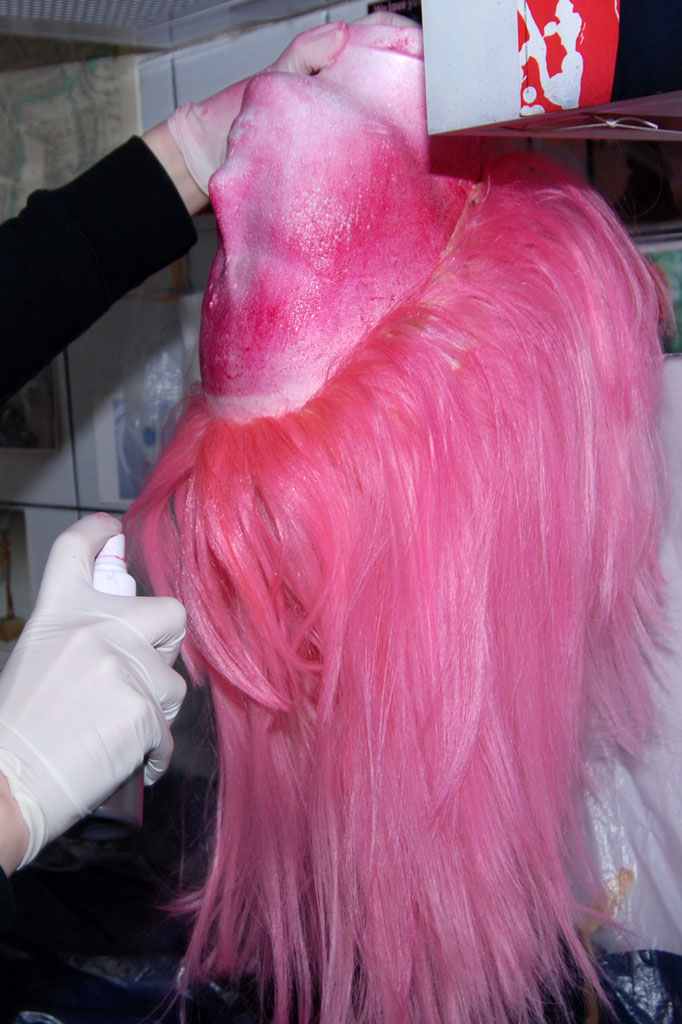
I always start by coloring the hairline first, to make sure I don’t miss this important area that will be very visible later. With the wig pinned thoroughly to the foam head, hold the head upside down. Brush the wig with your fingers or a wide-tooth comb so that it hangs down loosely.
Spray on the dye from 6-12″ (15-30cm) and brush it in. At this point, it’s not necessary to dye all of the hair from roots to ends, just concentrate on the roots at the edge of the wig that will be hard to reach once the wig is turned right side up. If you work quickly, you can color 1/2 of the hairline in one go before the dye starts running. Set it with a blow dryer.
Hold the wig head upside down and gently shake out the fiber Apply spray-on wig dye to the roots at the hairline Brush in and set the dye with heat

When you’ve colored the whole hairline, put the wig head back on the wig stand or bottle and start coloring the wig layer by layer. Start with the bottom layer at the nape of the neck, only 1 or 2 wefts (rows of hair) at a time. Use a tail comb to section off the hair, and clips to keep it out of your way.
Before you spray, brush the wig with a wide-tooth comb or the tail of a comb to make sure it’s tangle-free. Do not brush with brute force.
Tip: to reduce tangling, put up the hair in small segments, so that you don’t have to handle the whole bulk of hair every time you section off a new layer.
Use the tail of a comb as a detangling help Section off the next layer. Only dye one or two rows of wefts at a time
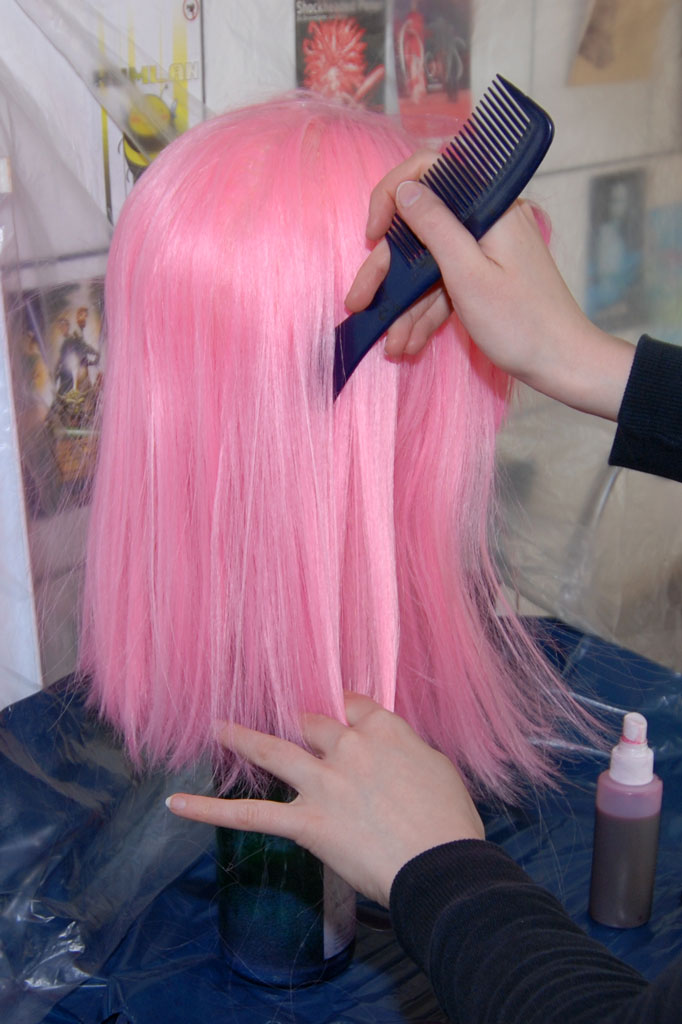

When you spray on the dye, try to catch the whole length of the wig from roots to tips, and always brush in the dye thoroughly. (Unless you’re going for a gradient or coloring the roots only – see my tips at the end of this tutorial!) The longer my wig, the smaller the sections I dye at a time, because it takes longer to color the whole length and I don’t want the dye to start running while I’m at it.
Even if it’s tedious, always set the dye with heat and do not continue before the wig is completely dry.
Section off the next layer of hair (1 or 2 rows of wefts at a time) and work your way up to the top, layer by layer.
Detangle the wig with your fingers as you section off the next layer
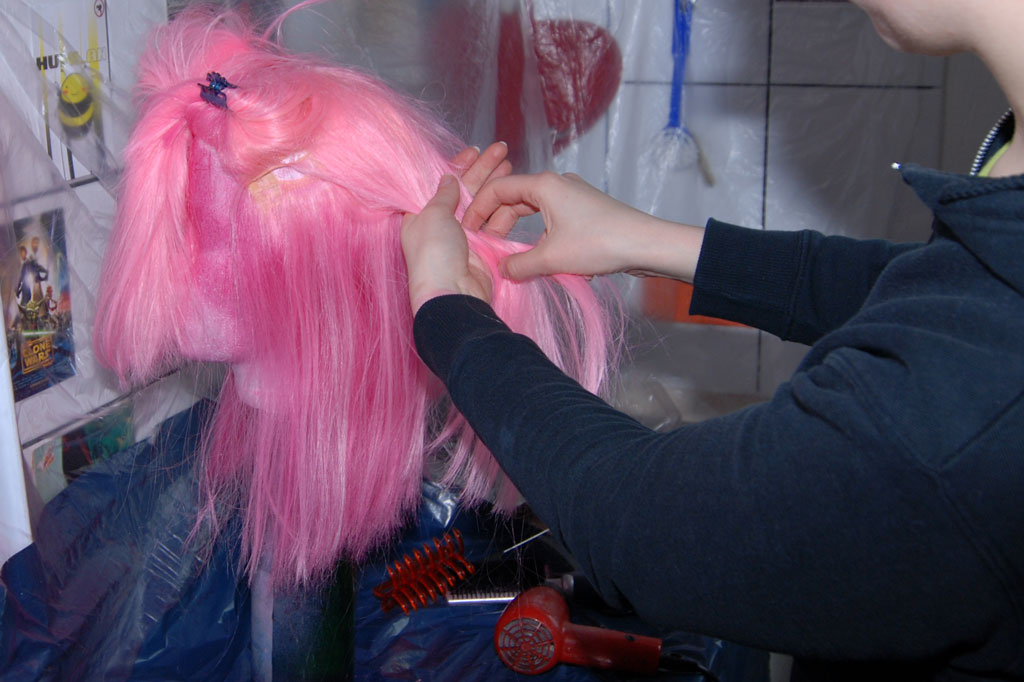
The bangs and crown of the wig are last. Make sure to dye them extra carefully because this is the most visible area of your wig.

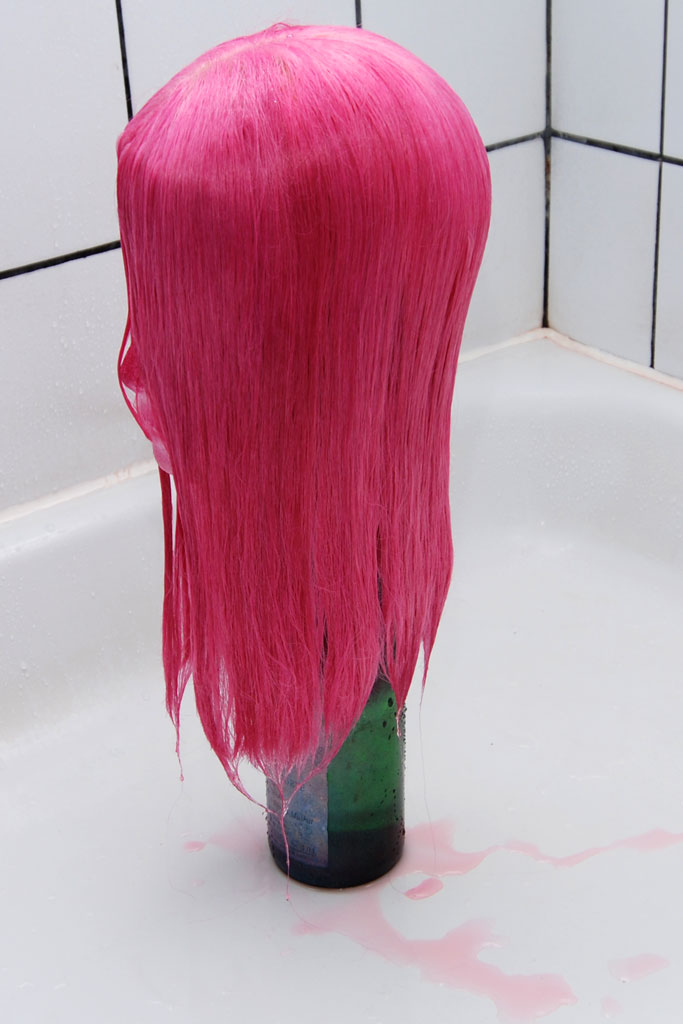
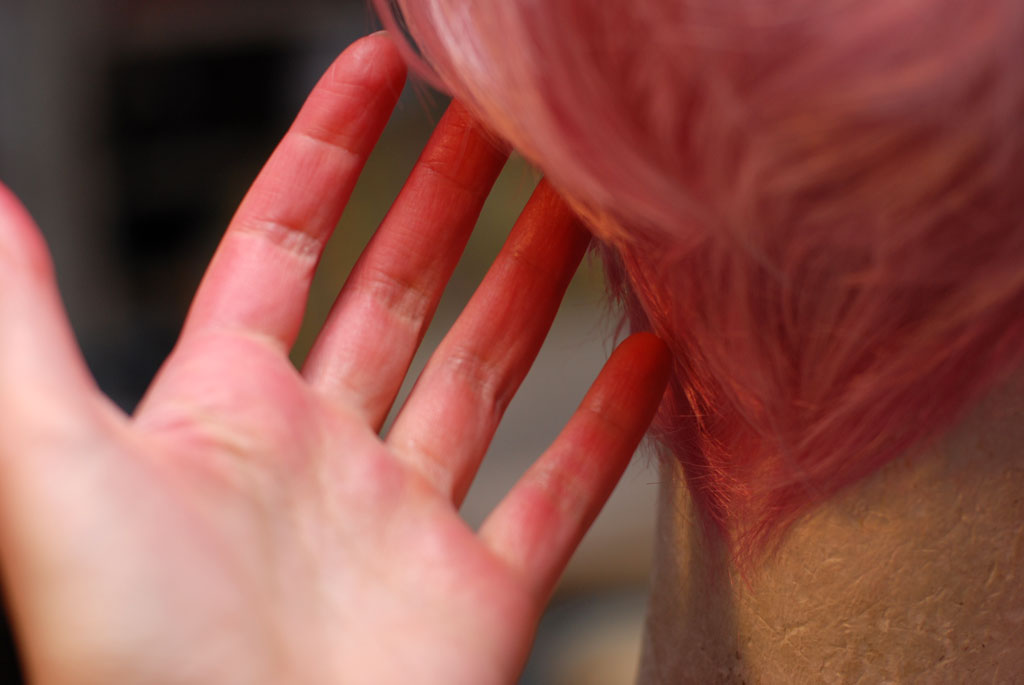
Rinse
As you’ve noticed by now, wig dyeing is a messy process! Even if you followed my advice to apply the dye in thin layers and set it properly with heat, there is still a lot of excess pigment on the fiber that will rub off when you run your hand through it. You’ll need to wash out your wig very thoroughly so that it doesn’t stain your skin and costume.
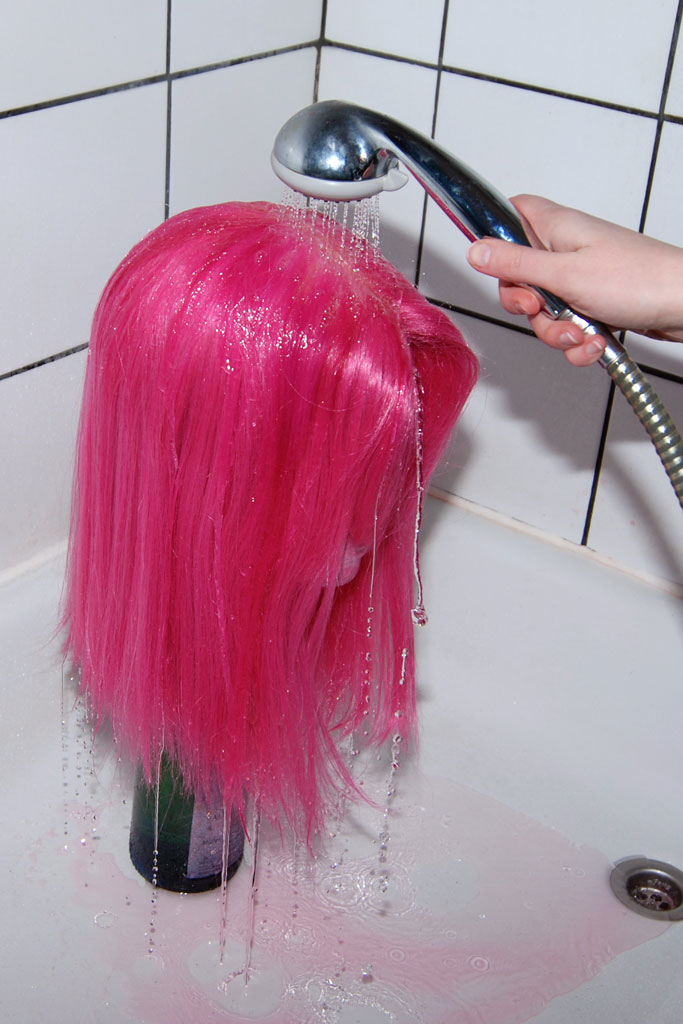
Make sure the wig is completely dry, so you know the dye is set and does not wash right out again. Put the wig head in the shower, or take it outside if you’re worried about staining your bathtub. Careful: metal and ceramics can be cleaned with alcohol, but plastic or acrylic tubs could be stained permanently!
Rinse the wig with cold water only and make sure the water reaches every part of the wig, including the hairline and bottom layers. Stop only when the water runs clear. This may take up to 10 minutes!
Let the wig sit for a few minutes. The water dripping off the wig should be clear. If it’s not, keep rinsing. You can also wipe a paper towel over the tips and see if it comes up stained. All clear? Then leave the wig to air-dry.
Rinse the wig thoroughly in the shower Check if the water dripping off is clear
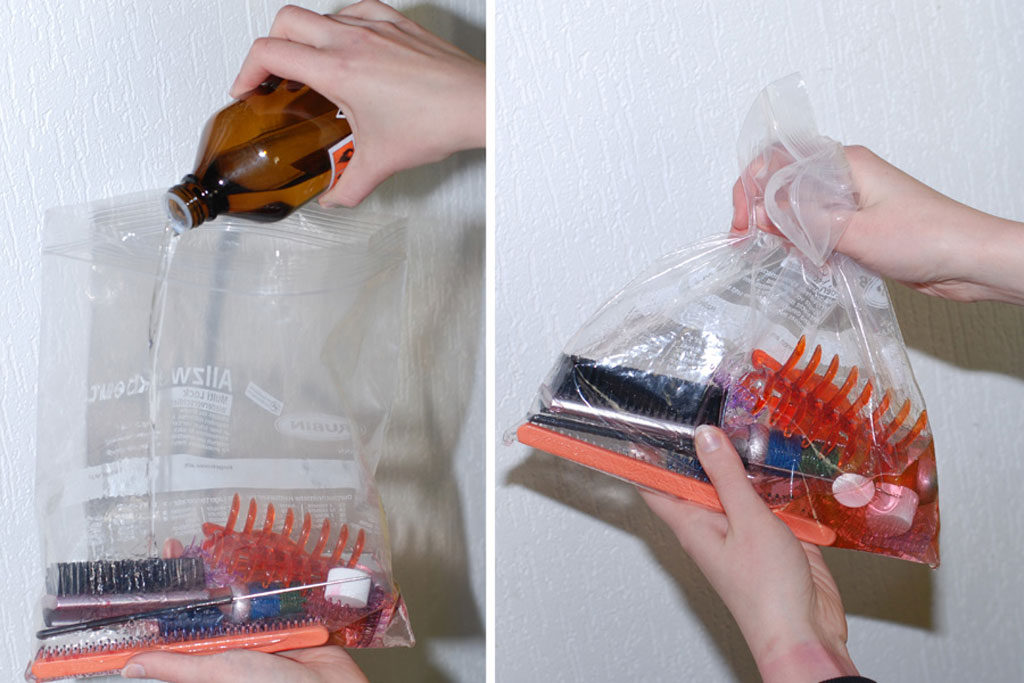
Clean Up
Remove any stains with alcohol (in the bathtub, on your hair dryer and surfaces). Put your non-electric tools in a ziploc bag with a bit of alcohol, shake well, then rinse the tools with water. Fill spray bottles with alcohol, shake them and spray out until empty. Be sure to remove any and all dye residue from your tools, or they’ll ruin the next wig!
Give your wig some love: It will be quite frizzy from all the brushing, so treat it with wig conditioner to make it easier to detangle. Use a straightening iron or a hair dryer and brush to smooth out kinks.
When you style the wig, keep in mind that hairspray contains alcohol, so it will dissolve the dye! Mist it on lightly and set it with a hair dryer immediately. Clean your hands with soap and rubbing alcohol after handling the wig.
The dye may still rub off when you wear the wig, depending on the wig fiber and how deep the color is. Dark colors are very hard to rinse properly, but this is true for most types of dye. At least Copic stains on fabric can usually be removed with alcohol and a good washing.
Careful with hairspray: it dissolves alcohol-based dye
Variations
Copic wig dye is perfect for precise application:
Defined streaks: Spray it on from a short distance, allowing the dye to bead on the fiber. Do not brush the dye in, but set it with heat immediately.
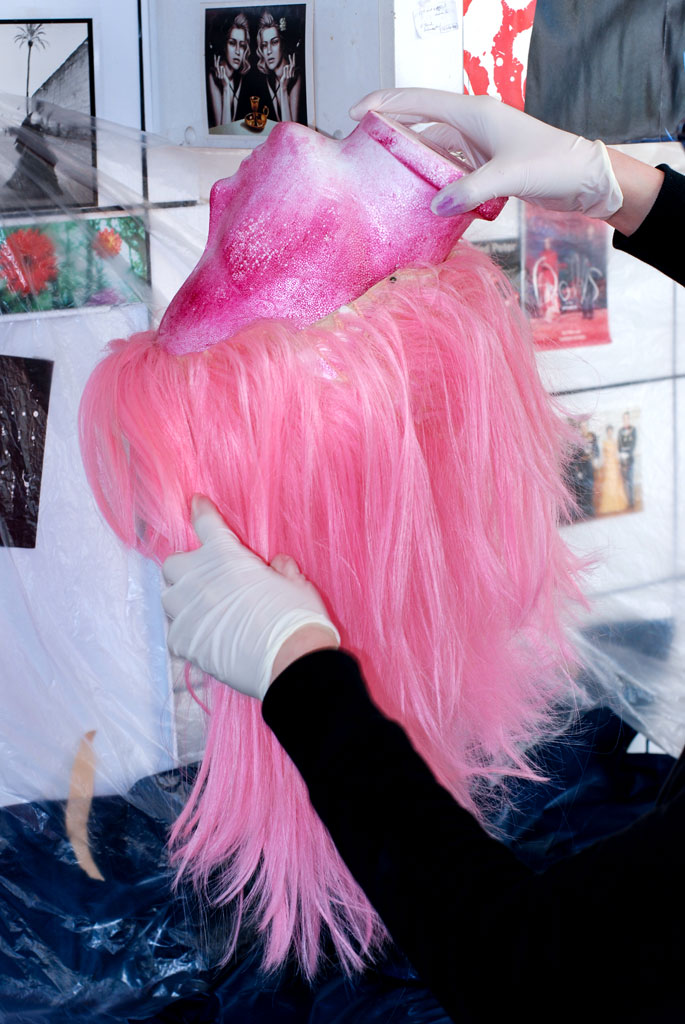
Darker roots: Apply the dye only to the first few inches at the roots. Brush it in for a smooth transition, or just set it with heat for a starker contrast.
To dye just the roots, spray on the dye from up close, then set with heat
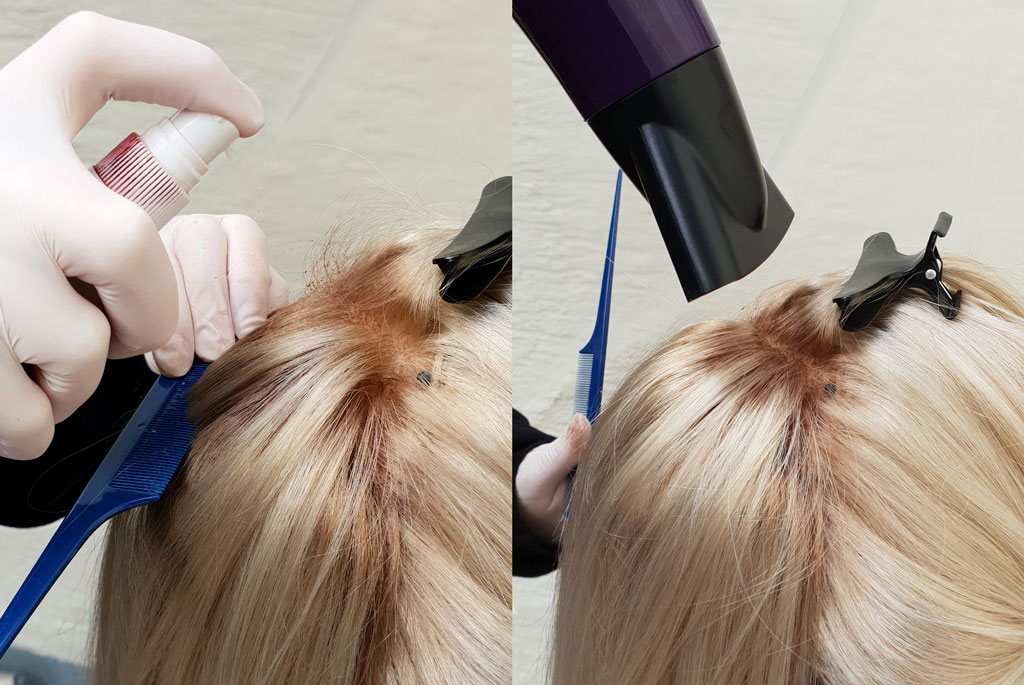
Gradient effect: Apply a light shade of dye to the length of the wig, and a darker shade to the roots. Careful not to over apply (don’t spray over the same area multiple times) to avoid runny dye and a spotty look.
Multi-color wig: Alternate two or three shades of dye for added depth! Even with just one shade of dye, you will usually get some color variations in the process, which makes the result look more natural than a plain, store-bought wig.
You can combine custom-colored wig fiber with wefts in multiple colors to achieve complex styles.
For Steph (NGNL), I spliced two wigs, then used wig dye to blend the two colors

Can’t get enough of fancy wig colors? Here’s a gallery of wigs that I’ve dyed over the years! Use it as a reference for your own coloring experiments:
3 Gedanken zu “Dyeing Wigs With Copic Ink”